Learn how to configure PDF settings in Adobe FrameMaker, and how to update general settings and import PDF settings.
In Adobe FrameMaker, you can customize PDF output settings such as page size, marks and bleeds, document security, template, and DITA options in the Publish Settings dialog.
Perform the following steps to access the Publish Settings dialog:
Choose .
The Publish panel is displayed. The Publish panel allows you to publish FrameMaker content to one or more of the available output formats.
Note: When you open the Publish panel, the drop-down list defaults to currently opened document or the book/DITA map file. Keep in mind that if you change the focus to another file (book, DITA map, or document) in your workspace, the newly selected file is selected and published.Figure 1. Publish panel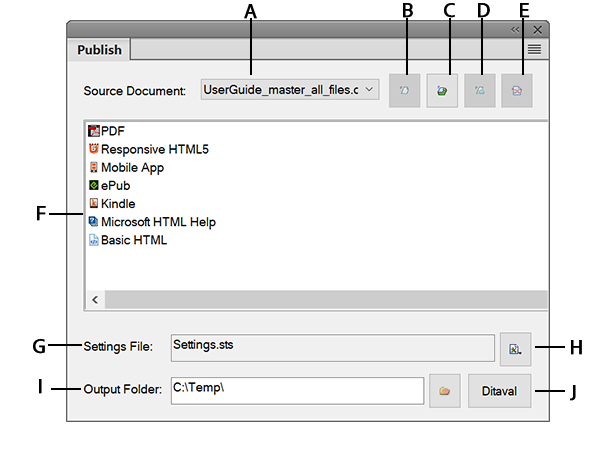
- A (Source Document)
- Select the document or book to publish.
- B (Generate Selected Output)
- The output is generated in the selected output format.
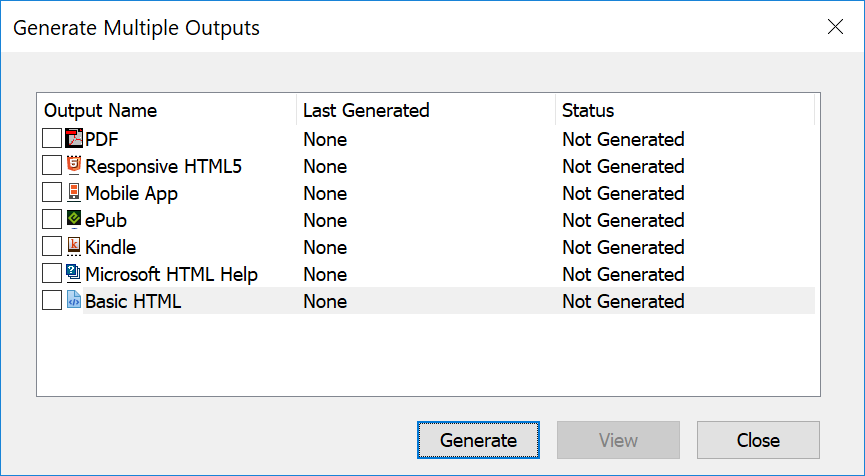
- C (Generate Multiple Outputs)
- Open the Generate Multiple Outputs dialog and select one or more formats to publish simultaneously.
- Figure 2. Generate Multiple Outputs options
- D (Publish to Server)
- Publish Responsive HTML5 output to RoboHelp Server. This button is active only when you select Responsive HTML5 as the output format and have configured RoboHelp Server connection parameters.
- E (View Output)
- If you have previously generated output, clicking the View Output icon opens the last published output for the selected format.
- F (Output format list)
- List of available output formats in FrameMaker.
- G (Settings File)
- The name of the settings file where all publish settings are saved. When you hover over the Settings File field, the tooltip displays the complete path of the settings file.
- H (Settings)
- The Settings drop-down list provide options that allow you to edit, create, and browse publish settings. For details, see Configure publish settings.
- I (Output Folder)
- Enter or choose a location to save the published output.
- J (DITAVAL)
- Available when the Source Document is a DITA map file. Click the DITAVAL button to open the DITAVAL dialog wherein you can choose a DITAVAL file to publish conditional output.
Right-click on the PDF option and choose .
The Publish Settings dialog opens up wherein you can configure publish settings for PDF or any other output format.
In the Publish Settings dialog, choose the PDF output format to configure settings for the PDF output. The settings for PDF output are available under the following tabs:
General tab, see General settings for details about the general settings.
Marks and Bleeds tab, see Marks and Bleeds for configuring marks and bleeds.
DITA Template tab, see DITA Templates for customizing DITA templates to use for publishing PDF output.
DITA Options tab, see DITA Options for customizing output while generating PDF via book with components route.