Fill and edit anchored frames
You can draw graphics in an anchored frame, drag or paste graphics from another part of the document. Or, import or paste graphics from another document or application. Use these methods to place graphics and text in unanchored graphic frames and in anchored frames.
You can position a graphic in an anchored frame and then use a text frame or text line inside the anchored frame for the figure title. However, you might find it easier to position and number the title consistently if you put the figure in a single-cell table and then set up the table title as a figure title.
An anchored frame’s contents are clipped when they extend into or beyond the frame’s border. Display the frames border by clicking it (if the border isn’t visible, choose View > Borders).
A. Frame border B. Cropped graphic C. Cropped callout
You can change the size of an anchored frame, its anchoring position, and the properties you set when you created the frame. When working with a structured document, these changes do not affect the structure of the document and are independent of the element’s format rules.
You can also manipulate anchored frames as you do other objects. For example, you can change a frame’s drawing properties (such as pen width), and you can duplicate, delete, move, or resize it.
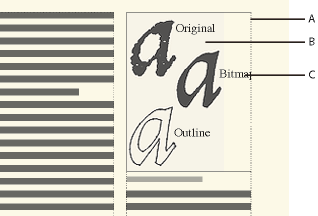
Add a title to an illustration
Filling anchored frames in structured documents
In a structured document, you can draw graphics in an anchored frame, drag, or paste graphics from another part of the document, or import or paste graphics from another document or application. Although the graphic element is part of the document’s structure, the contents you put in the frame are not.
You can even use an anchored frame to hold text, such as text in a sidebar. To do this, draw a text frame in the anchored frame. Keep in mind, though, that the text is not part of the document’s structure.
A frame’s contents are preserved when you export to XML or SGML. FrameMaker writes the contents to a separate file and adds an entity reference to it from your XML or SGML file.
important: To prepare for export to XML or SGML, put only one graphic in each frame for the best results. If your graphics are bitmaps, do not use a display bit depth of 1 bit or 24 bits; reset your display to 8 bits. Ask your application developer for other advice to be sure your frames’ contents will be fully preserved.
After filling a frame with graphics, you can edit the graphics in many ways—for example, by changing line widths, applying fill colors, and aligning, stacking, or grouping several objects.
Put graphics or text in a graphic frame
1)Do one of the following:
•To draw a graphic or add text, use one of the tools on the Tools pod.
important: Be sure to start drawing the object inside the frame. Otherwise, the object is placed on the page and not in the frame.
•To move a graphic into a frame, drag the graphic until the pointer is within the frame’s borders. The object jumps into the frame when you drag across the frame’s border.
•To paste a graphic into a frame from the Clipboard, select the frame and choose Edit > Paste.
•To import a graphic into a frame, select the frame and choose File > Import > File. You can also import a graphic in other ways, depending on the platform.
note: If a graphic looks as though it’s in the anchored frame, but it doesn’t move with the frame as you edit the surrounding text, the graphic is probably in front of the frame rather than in the frame—perhaps because you pasted it on the page rather than in the frame. Drag the graphic away from the frame and then drag it back into the frame.
Prevent an anchored frame from clipping its contents
1)Do one of the following:
•If there’s room outside the anchored frame, make the frame larger.
•If there’s room inside the anchored frame, move the object away from the edge of the frame.
•If the contents are clipped only by the width of the border, use the Tools pod to make the anchored frame’s border narrower or to change the pen pattern to None (see Apply and change drawing properties).
•If a frame and its contents are clipped by the edge of a column of text, choose Special > Anchored Frame, turn off Cropped, and then click Edit Frame.
Change a frame’s anchoring position and drawing properties
1)Select the frame and do one of the following: choose Special > Anchored Frame.
•To change the frame’s anchoring position, choose Special > Anchored Frame. Change the settings and click Edit Frame.
•To change the drawing properties, Select the frame and use the Tools pod to specify the properties you want. For example, you can change a frame’s pen pattern to make the frame’s border printable or change its fill pattern to shade the interior of the frame.
Resize an anchored frame
1)Do one of the following:
•To resize the frame quickly but approximately, select the frame and drag one of its handles. The size appears in the status bar as you drag.
•To resize the frame precisely, select the frame and specify its size with the Graphics > Object Properties, Graphics > Scale, or Special > Anchored Frame command.
•To resize an anchored frame to fit the object in the frame, press Esc M P.
•To resize a graphic within an anchored frame, select the object and drag one of its handles, or choose Graphics > Scale and enter the dimensions.
Copy, move, or delete an anchored frame
Copy or move an anchored frame by using copy and paste
1)Select the frame and choose Edit > Copy or Edit > Cut. You don’t need to select the anchor symbol.
2)Click in text where you want to insert the frame and choose Edit > Paste. The anchor symbol appears at the insertion point when text symbols are visible. When working with a structured document, look at the Element Catalog before pasting to verify that the location is valid for graphic elements.
In some cases (for example, when a frame is positioned at the top or bottom of a column), the frame does not change position even though the anchor symbol moves. If you find it difficult to reposition a frame anchored to the outside of a rotated text frame or column, unrotate the text frame, position the anchored frame, and then rerotate the text frame.
tip: If you’re working with a structured document, you can also drag a frame’s bubble in the Structure View to move the frame or Alt-drag the bubble to copy the frame.
Move an anchored frame without moving its anchor symbol
1)Do one of the following:
•For quick but approximate repositioning, drag the frame.
•For more precise repositioning, move the frame in small increments with the arrow keys.
•For greatest precision, specify the location of the frame with the Special > Anchored Frame command.
Some anchored frames cannot be moved without moving their anchor symbols. However, you can move a frame vertically when it’s anchored at the insertion point, outside the column of text, or outside the text frame. When a frame is anchored outside the column or text frame, you can’t move it above the top or below the bottom of the text frame.
note: When you move a frame into a column, the text in the column doesn’t adjust to accommodate the frame. Use the Run into Paragraph anchoring position to move the frame completely inside the column and to run the text around the frame automatically. You can also change the paragraph indents to make room for the frame.
Move a frame’s anchor symbol
1)Select the frame. You don’t need to select the anchor symbol.
2)Choose Edit > Cut, click in text where you want to insert the anchor symbol, and choose Edit > Paste. The anchor symbol appears at the insertion point when text symbols are visible.
In some cases—for example, when the frame is positioned at the top or bottom of a column of text—the frame may not change position even though the anchor symbol moves.
Delete an anchored frame
1)Select the frame and press Delete.
Add object attributes for tagged PDF
If you plan to export your document to a tagged PDF or to XML, you can include object attribute information for your anchored frames.
Alt text is different from graphics or standard text. Alt text is typically used for describing an image so that screen readers can read it aloud. Actual text is for reading aloud the actual text, as in the case of a drop cap. For example, if the author is using a drop cap for the letter A in the word “Adobe” but still wants the screen readers to read the word as “Adobe” and not as “dobe,” this can be done by filling in actual text. The attribute will be saved to alt text and actual text in tagged PDF and XML.
When you provide alternate text attribute on an anchored frame, the corresponding figure elements in PDF and graphic elements in XML get an “alt text” attribute. Actual Text attribute is processed only for tagged PDF. XML export ignores this attribute.
note: Object attributes support the Unicode text encoding standard.
1)Select the frame and choose Special > Anchored Frame.
The Anchored Frame dialog is displayed.
2)Click Object Attributes.
3)In the Text Attributes section, add your alt text and actual text, and then click Set.
note: Screen readers may ignore actual text when alt text is present.