Draw objects
When you draw an object, the pointer is a cross-hair  . After you draw, the pointer normally changes back to an arrow
  so you can select objects, or to an I-beam
  so you can select or type text. To draw another object, you usually have to click a drawing tool again.
When you draw an object directly on a page, it doesn’t move with the text, although text can run around the object. If you want the object to be “anchored” to surrounding text (that is, to move as you edit the text), you can draw the object in an anchored frame, or draw it on a page and then move it into an anchored frame.
When you draw an object, it uses the drawing properties that are selected on the Tools pod. The object is also selected, to make changing these properties easier.
Apply and change drawing properties
Use gravity and grids to align objects
Draw a straight line
1)Click the Line tool.
2)Click at the start and end of the line. You can also drag from the beginning to the end of the line. To draw a horizontal or vertical line, or a line at a 45-degree angle, Shift-click, or Shift-drag.
tip: To draw several lines that touch one another, use the Polyline tool to draw several connected lines as a single object. You can also use the Line tool to draw the lines and then use the Gravity feature to make sure that they touch one another.
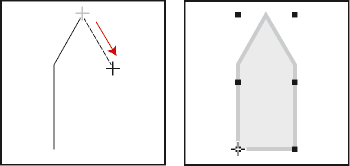
Draw a polyline or polygon
1)Click the Polyline tool or the Polygon tool.
2)Click at each vertex in turn. To draw a horizontal or vertical segment, or a segment at a 45-degree angle, Shift-click.
3)Double-click at the last vertex.
Click at each vertex and then double-click to end.
Draw an arc
1)Click the Arc tool.
2)Put the pointer where you want to start the arc and drag along the path of the arc. To draw a circular arc, Shift-drag.
Drag and then release.
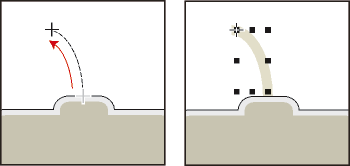
If the arc isn’t the shape you want (for example, if it’s concave rather than convex), don’t release the mouse button. Drag the cross back to the starting point and draw the arc again, dragging along the path you want the arc to trace.
Initially, the angle of the arc will be 90 degrees.
Draw a freehand curve
1)Click the Adobe FreeHand tool .
2)Place the pointer where you want to start the freehand curve, and drag along the path of the curve. The snap grid is ignored for all but the first point of a freehand curve; however, you may want the snap grid to be off when you draw the curve.
Drag and then release.
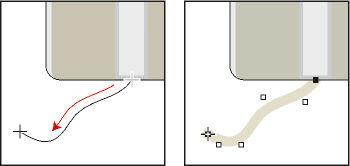
When you release the mouse button, FrameMaker approximates a curve along the path you drew and displays reshape handles and control points so you can reshape the curve.
tip: For more precise control over the shape of a freehand curve, create a curve by drawing polylines or polygons and then smoothing them.
Draw a rectangle, a rounded rectangle, or an oval
1)Click the Rectangle tool , the Oval tool , or the Rounded Rectangle tool .
2)Drag diagonally across the area in which you want the object to appear. To draw a square or circle, Shift-drag.
Drag and then release.
tip: To draw a border around a graphic, draw a rectangle with a fill pattern of None around the graphic.
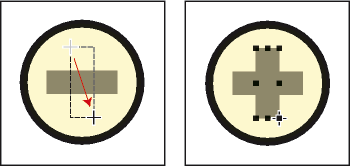
Draw a regular polygon
1)Draw a circle or square that is slightly larger than the regular polygon you want to create. If you draw a rectangle or an oval, the polygon you create won’t be regular.
2)Select the object and choose Graphics > Set # Sides.
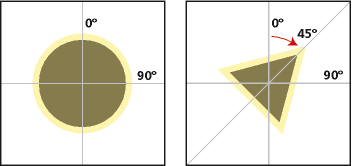
3)Specify the number of sides and the start angle of the polygon, and click Set.
Original object and regular polygon, with number of sides = 3 and start angle = 45°
Draw several objects of the same type without clicking the tool each time
1)Do one of the following:
•For all objects except text lines, Shift-click the tool. To stop using the tool, click another drawing tool or one of the selection tools  ,
,  on the Tools pod.
•For text lines, press Return at the end of a text line and continue typing.