Import graphics

Use import file command to import graphics, learn about graphics format, locate missing graphics, add graphics to structured documents and anchored frames in FrameMaker.

You can import over 20 image formats in a FrameMaker document. The following list captures some of the most commonly used image file formats that you can import in FrameMaker:

Consider the following points while importing or working with image files in FrameMaker:

Import a graphic

  1. Specify the position of the graphic by doing one of the following:

    • To place the imported graphic in a graphic frame, select an existing frame or place an insertion point in a text frame.

    • To place the imported graphic directly on a page, click in the page margin.

    • To use a drawn rectangle to define the size of the imported bitmap graphic, select an existing rectangle or draw one (do not select an anchored or unanchored frame). The graphic replaces the rectangle if the Fit in Selected Rectangle option is selected when you import; however, the aspect ratio of the graphic remains unchanged.

    • To replace an existing graphic, select it.

  2. Choose File > Import > File to open the file Import dialog.

    Or,

    Choose Insert > Image to open the Insert image dialog.

  3. In the file Import dialog, select the graphic file you want to import, or specify the HTTP path of the graphic file to import, and the import method. Once you have selected an image or provided the URL, click Import.

  4. In the Insert image dialog, select the graphic file you want to import and click Open.

  5. If the Unknown File Type dialog box appears, select a file type in the scroll list and click Convert.

  6. If the Import Graphic Scaling dialog box appears, choose a scaling option or Fit in Selected Rectangle and click Set.

Tip: For the best printed results, choose a dpi value that divides evenly (or leaves only a small remainder) into the resolution of your printer or typesetter. For the best screen representation, choose a dpi value that divides evenly into your screen resolution. (Windows screens typically have a resolution of 96 dpi.)

Import JPEG 2000 files

FrameMaker supports JPEG 2000, a version of the JPEG image-compression format.

When importing JPEG 2000 files, the filter converts the supported color modes of RGB, CMYK, Grayscale, and LAB and discards unsupported modes such as Index. The filter does not support 16-bit-per-channel images. While importing, if the Unknown File Type dialog box appears, select JPC, J2C, JPX, JPF, J2K, or JP2, and click Convert.

The file importing procedure is same as explained in the Import a graphic section.

Import SVG images

You can import Scalable Vector Graphics (SVG) into your document.

FrameMaker prints Scalable Vector Graphic (SVG) images to PostScript printers by rendering the images as vector graphics using Encapsulated PostScript (EPS). For non-PostScript printers, FrameMaker uses the FrameImage format.

In addition, when you create a PDF file from a document containing an SVG image, the image appears as vectors, which improves its look in Acrobat and allows you to zoom in on it without pixelation.

Note: Embedded SVG image animations are not supported in FrameMaker.

Import Adobe Photoshop files

FrameMaker supports importing of Adobe Photoshop (PSD) files. FrameMaker converts PSD files to native FrameImage format and converts the color space (Photoshop RGB, CMYK, LAB, Indexed, Grayscale, or Bitmap) to RGB.

New in FrameMaker (2019 release): When creating a PDF with the new PDF engine of FrameMaker (2019 release), FrameMaker keeps the PSD's color space (e.g. RGB or CMYK) in the published PDF. If the PhotoShop file has a color profile attached (e.g. sRGB IEC61966-2.1, Adobe RGB, impage P3, Euroscale Uncoated v2 etc.), the color profile is attached to the image in PDF output.

You import PSD files the same way you import other types of graphics.

Import Adobe Illustrator files

When you import an Adobe Illustrator file into FrameMaker, the file is treated as a graphic, and only one page can be imported at a time. You can import it either by copy or by reference. Both process and spot colors can be displayed and printed.

Note: Graphics that use transparency do not always print as expected to a PostScript Level 1 or non-PostScript printer. If you run FrameMaker using the -noapi option (./maker.exe -noapi), you won’t be able to import PDF files.
  1. In FrameMaker, choose File > Import > File or Insert > Image, and specify the Illustrator file you want to import.

  2. In the file Import dialog, select the graphic file you want to import, or specify the HTTP path of the graphic file to import, and the import method. Once you have selected an image or provided the URL, click Import.

  3. In the Insert image dialog, select the graphic file you want to import and click Open.

  4. If the file has more than one page, specify the page number you want by typing the page number into the box.

  5. Click Select.

Illustrator files are imported at the page size of the file. Resize the anchored frame to crop any white space from the image.

Locate missing graphics

When you open a document that contains graphic files imported by reference, FrameMaker looks for the referenced graphic files.

If FrameMaker can’t find a referenced graphic file, it displays a dialog box.

Locate a graphic FrameMaker can’t find

  1. When FrameMaker displays the Missing File dialog box, do one of the following:

    • To find and display the graphic, use the scroll list to select it and click Update Document to Use New Path. FrameMaker continues to use the new path to try to find other missing files while opening the document. That way, if you move all your graphic files to a new location, you specify the new path only once.

    • To skip the graphic file, click Skip This File. The skipped graphic appears as a gray rectangle in the document. The next time you open the document, FrameMaker tries to find the file again.

    • To skip other graphic files if they can’t be found, click Ignore All Missing Files.

  2. Click Continue.

View an imported graphic’s filename

Insert imported graphic elements into structured documents

Some graphic elements are defined for you to import a graphic along with the element. When you insert the element, FrameMaker displays an import dialog box. The graphic you import appears in an anchored frame below the line with the anchor symbol, and the frame is automatically sized large enough for the graphic.

Imported graphic in an anchored frame
Anchored frame with an importedgraphicinastructureddocument

After inserting the element, you can edit the frame by moving it, resizing it, and so on.

You can also import a graphic into an existing anchored frame—for example, if you used a graphic element that placed an empty frame in the document.

When you import a graphic element, you can make it part of your document (imported by copying) or keep it linked to its original application or document (imported by reference).

You can also import a graphic by dragging-and-dropping graphic file from Windows Explorer onto your document. The image gets added in an anchored frame.

For information on inserting an imported graphic that’s not an element (which you can do only in an unstructured flow), see Import graphics.

Insert an imported graphic element

  1. Click where you want to anchor the frame.

  2. Select an imported graphic element in the Element Catalog, and click Insert.

    You can also use File > Import > File or Insert > Image to insert an element. Select a file and click Import. If more than one imported graphic element is available, choose the one you want from the Element Tag pop-up menu in the next dialog box that appears.

  3. Select the graphic file you want to import and specify whether to import by copying or by reference.

  4. Click Import.

  5. If the Unknown File Type dialog box appears, select a file type in the scroll list and click Convert.

  6. If the Import Graphic Scaling dialog box appears, choose a scaling option or Fit in Selected Rectangle and click Set. The larger the dpi (dots-per-inch) value, the smaller the graphic is on the page.

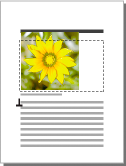
An anchored frame with the imported graphic appears in the document window, with an anchor symbol Achorsymbol at the insertion point. A bubble with the text snippet <GRAPHIC> appears in the Structure View.

If no imported graphic element is available at the location you want, you can use an invalid element. After inserting the element, talk to your developer about making the element valid at this location.

Use an invalid imported graphic element

  • Do one of the following:

    • To use an element that is valid in another part of the document, either insert the element in a valid location and then move it, or use the All Elements setting to make the element available everywhere and then insert the element where you want it.

    • To insert an invalid element with the default tag GRAPHIC, use File > Import > File or Insert > Image to import a graphic. (The element has a default tag if no defined imported graphic elements are available.)

Add an imported graphic to an existing anchored frame

  • Select the frame and use File > Import > File or Insert > Image to import the graphic.


April 29, 2020

Legal Notices | Online Privacy Policy