Page layouts

Understand how to create and use reference frames on reference pages, set up boilerplate graphics on reference pages.

You can make changes to a document’s basic page layout directly from a body page. FrameMaker automatically updates both the left and right master pages, and updates the layout of any body pages that use those master pages. If any of these body pages contain layout overrides, you are asked to confirm that you want to make the updates.

If your document uses another master page—for example, for the first page of the document—you must make any layout changes on that master page.

Change page size

Understand how to change the size of a page in FrameMaker.

  1. Make the appropriate document window or book window active. If a book window is active, select the documents you want to affect.

  2. Choose Format > Page Layout > Page Size.

  3. Do one of the following:

    • Choose a standard size from the Page Size pop-up menu. The correct dimensions appear in the Width and Height text boxes.

    • Enter dimensions in the Width and Height text boxes. Custom appears in the pop-up menu. The custom page size you specify can be small, depending on the document’s margin settings, or as large as 216 inches by 216 inches (approximately 548 centimeters by 548 centimeters).

  4. Click Set.

Note: If the document contains custom master pages, FrameMaker prevents change to a page size that cannot accommodate the text frames on those master pages.

Change pagination

Know how to set pagination in FrameMaker, change a single-sided document to double-sided documents or the reverse.

You can change a single-sided document to double-sided documents or the reverse. When you set up a double-sided document, you specify whether the first page is a left or a right page.

  1. Make the appropriate document window or book window active. If a book window is active, select the documents you want to affect.

  2. Choose Format > Page Layout > Pagination.

  3. Select one of the options in the Pagination area. If you select Double Sided, also specify whether the first page is a left or right page. If you are applying pagination in a book, you can choose Read from File to use the page side specified in the file, or you can choose Next Available Side to avoid a blank page.

    Depending on which option you selected, a blank page may be added to the previous file in the book so that the document can start on the page you specified.

  4. Click Set. If the document contains custom master pages or page layout overrides, an alert message asks how you want to proceed.

Add or delete empty pages

Add or delete empty pages in FrameMaker, specify even or odd number of pages.

You can specify that you want a document to have an even or odd number of pages. If necessary, FrameMaker adds a blank page at the end of the document to achieve the correct pagination.

Conversely, a document may contain unwanted blank pages at the end, left there because you deleted or reworked text. You can tell FrameMaker to delete these empty pages whenever you save or print the document.

FrameMaker deletes a blank page only if it uses the left or right master page, doesn’t contain the start of a flow, and has no layout overrides. FrameMaker doesn’t delete a page if it contains an empty paragraph but is otherwise blank.

If you use the document window to change the pagination of a document that is part of a book, the settings may be overridden when you update the book. You can make sure that the book pagination is correct by changing a document’s setup from the book window.

  1. Make the appropriate document window or book window active. If a book window is active, select the documents you want to affect.

  2. Choose Format > Page Layout > Pagination.

  3. From the Before Saving & Printing pop-up menu, choose an option and click Set.

If blank pages are not added or deleted as expected, make sure that all pages in the document are auto connected.

Change page margins and number of columns

Set page margins and number of columns, create a multicolumn layout with unequal column widths, set up asymmetrical left and right margins in FrameMaker.

The margin is the distance between the page edge and the text frame. For a single-sided document, you set margins for the top, bottom, left, and right sides of the text frame. For a double-sided document, you set the top, bottom, inside, and outside margins for a symmetrical look.

To set up asymmetrical left and right margins, you change the text frames directly on the master pages. For example, you could make the text frames on both the left and right pages appear on the right side of the page, leaving an area of white space on the left.

You can divide a text frame into two or more equally spaced columns of equal widths. To create a multicolumn layout with unequal column widths or gaps, use one text frame for each column of text and position the text frames one by one. Draw the text frames or set up one text frame the way you want it and then duplicate it.

  1. Place the insertion point in the main text flow or click in the page margin. If a book window is active, select the documents you want to affect.

  2. Choose Format > Page Layout > Column Layout.

    If the layout is asymmetrical (for example, with a different number of columns, or a different inside or outside margin on the left and right master pages), an alert message asks whether you want to proceed. To retain the asymmetry, change the layout directly on the master pages.

  3. To change the margins, enter the values in the Margins area. The margins and the gap (space) between columns determine the individual column width.

  4. To change the number of columns or the gap between columns, enter new values in the Columns area.

    All columns will be the same width and will be separated by a uniform gap.

  5. Click Update Entire Flow. If the new column width is too narrow to accommodate some anchored frames or tables in the document, an alert message asks whether you want to proceed. If you click OK, you can manually resize the tables and frames.

Headers, footers, and other background text

Set up headers, footers and background text. Create and modify background text frames, Resize or move a background text frame in FrameMaker.

You set up headers and footers by displaying master pages and typing text in background text frames. The contents of background text frames appear on body pages, but you can only edit them on master pages. The headers and footers might include the page number, date, chapter number and title, section number and title, author, revision number, and draft release (such as preliminary and final).

Header and footer text frames on master page
Setting up header and footer text in the master page

You create and edit header and footer text as you do any other paragraph text. You can apply paragraph and character formats, add and move tab stops, and add graphics such as a line above or below the text. In addition, you can add system variables for information such as the page number or the current date, and you can change the size and placement of the header and footer text frames. When you modify these text frames on a master page, FrameMaker automatically updates any body pages that use that master page.

You can also add other background text on master pages. For example, in the FrameMaker fax template, the informational headings are in a background text frame on the master page.

Background text frames
Setting up background text in the masterpage

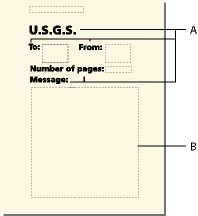
A. Informational headings in background text frames B. Template text frame

Creating and modifying background text frames

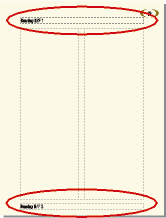
When you create a new, blank document, FrameMaker creates background text frames for headers and footers on the left and right master pages. To make it easy to add centered and right-aligned information in headers and footers, FrameMaker automatically adds center and right tab stops at the center of the text frame and at the right margin. You can draw background text frames for additional header and footer information or for other background text.

Note: You can create single lines of background text by using the Text Line tool, but you can’t apply paragraph formats to the text or insert variables in it.

Add a background text frame on a master page

  1. Draw the text frame by using the Text Frame tool.

  2. In the Add New Text Frame dialog box, click Background Text and click Add. The new text frame, like all text frames for background text on master pages, is untagged.

  3. Double-click in the text frame to place the insertion point, and then insert the header, footer, or other background text.

Resize or move a background text frame

  1. Select the text frame by Control-clicking the text frame.

  2. Do any of the following:

    • To resize the text frame, drag a handle.

    • To move the text frame, drag its border (not a handle).

Entering header or footer information

You can create simple headers and footers by typing text in the header and footer text frames on the master pages. In addition, you can specify items such as the current chapter and page numbers, the document’s total page count, and the current date. FrameMaker displays a system variable in the header or footer on the master page and replaces it with the correct value on each body page that uses that master page.

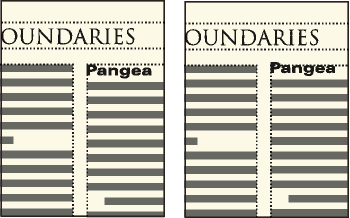
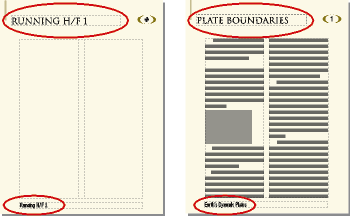
You can also create running headers and footers in which the text changes from page to page. In the following figure, the running header contains the current section heading; the footer contains the page number and some text typed directly into the background text frame.

Running headers and footers
Running header and footer in the background text frame on master pages

To create running headers and footers, you insert running header/footer variables in background text frames on master pages.

Enter text, page numbers, dates, and other information

  1. On a master page, click in the header or footer where you want to add information.

  2. Do any of the following:

    • To insert static text, type the text.

    • To insert system variables, access the Variables pod and double-click the variable name in the Variables scroll list. You can insert any system variable, such as:

      Numbering for book components

      Volume Number, Chapter Number, Section Number, or Sub Section Number

      Page numbers

      Current Page # or Page Count

      Date information

      Current Date (Long), Current Date (Short), Modification Date (Long), Modification Date (Short), Creation Date (Long), or Creation Date (Short)

      Other variables

      Chapter Title Name, Filename (Long), Filename (Short), Table Continuation, or Table Sheet

    • To insert user variables, access the Variables pod and double-click the variable name (if already defined) in the Variables scroll list.

    Tip: To add centered information in headers and footers, press Tab to move the insertion point to the centered tab stop. To add right-aligned information, press Tab again to move the insertion point to the right-aligned tab stop.

Changing page layout on specific pages

Change page layout on specific pages, create an asymmetrical layout, layout overrides, template text frame, Updating body and master page layouts. Create one-time-only page layouts in FrameMaker.

You can create an asymmetrical layout by adding or changing text frames directly on the master pages. For example, you may want the left margin to be wider than the right on both left and right pages. Or you may want a single-column layout on the left page and a two-column layout on the right.

You can even create a layout that contains columns with different widths or with different gaps by using several text frames on a page—one text frame for each column.

About layout overrides

When you make changes on a master page, FrameMaker automatically updates all body pages using that master page. When you make layout changes on a body page (for example, by changing the number of columns, the gap between columns, or the margins), you create an override to its master page’s layout. You can then do any of the following:

  • Update the master page and all corresponding body pages with your changes.

  • Create a master page based on the body page changes.

  • Do neither of the above, leaving the override as a one-time-only page layout.

Change margins and column layout on specific pages

The following steps always produce either a single-column layout or a multicolumn layout with equal-width columns.

If you want to create a multicolumn layout with unequal column widths or gaps, use one text frame for each column, and position the text frames one by one.

  1. Select the text frame whose margins you want to change by Control-clicking the frame.

  2. Choose Format > Customize Layout > Customize Text Frame.

  3. Do the following:

    • To change the margins, specify the new size and position in the Unrotated Size and Offset From areas. The Offset From Top and Offset From Left options specify the top and left margins. The bottom and right margins are then determined by the text frame’s width and height.

    • To change the number of columns or the gap between columns, change the values in the Columns area.

  4. Click Set.

Tip: Another way to change the margins is to select a text frame and then drag a resize handle. When you resize a multicolumn text frame, the column widths change to fit within the text frame, but the column gap remains the same.

Add a template text frame on a master page

For a master page to contain unequal-width columns of text, or to set up the layout for a newsletter or other document in which the articles don’t flow continuously from the first page to the last, you use multiple text frames—one for each column. For example, for a page with two unequal-width columns, you would add a second template text frame.

You can add a template text frame by drawing it or by duplicating an existing one.

  1. To draw the text frame, use the Place A Text Frame tool on the Graphics Toolbar. To draw more than one text frame, draw them in the order you want them connected.

  2. In the Add New Text Frame dialog box, click Template For Body Page Text Frame, and choose a tag from the Flow Tag pop-up menu. Choose the current flow tag, unless you’re setting up a text frame for a different flow in a multiflow document.

  3. In the Columns area, specify the number of columns in the text frame and (if it’s more than 1) the gap between adjacent columns. If you’re setting up a layout with unequal-width columns, set the number of columns to 1, because you use a separate text frame for each column.

  4. Click Add.

  5. Move the text frame as needed.

Tip: To copy an existing text frame, select the frame, choose Edit > Copy, and then choose Edit > Paste. FrameMaker copies the text frame, its contents, and its properties (including the flow tag).

Adding text frames on body pages

When you draw a text frame on a body page, you are prompted for the number of columns and the gap between them. However, FrameMaker does not assign a flow tag and does not connect the text frame to existing text frames on the page.

To use the new text frame as part of the document’s text flow, connect it to the flow.

If the new text frame is the first one in the flow, also select Autoconnect so that new pages are automatically added as needed.

Updating body and master page layouts

You can change template text frames on more than one master page and then update all corresponding body pages in one step. However, if you make column layout changes on a body page, you must update the corresponding master page before you can update the other body pages that use that master page.

Before FrameMaker updates body pages, it checks whether any body pages have column layouts that override their master page. If any pages contain layout overrides, you specify whether to keep the overrides.

Update body pages with master page changes

  1. After making layout changes on master pages, display body pages.

  2. If FrameMaker displays an alert message, specify whether to keep or remove layout overrides, and then click Continue. If you keep layout overrides, FrameMaker updates those body pages with the master page’s background text and graphics, but does not update the template text frames.

Update a master page with body page changes

  1. Choose Format > Page Layout > Update Column Layout. A message asks you to confirm the master page and body pages that are to be updated.

  2. Click Update.

  3. If FrameMaker displays an alert message, specify whether to keep or remove layout overrides on the pages being updated, and then click Continue.

Creating one-time-only page layouts

You may need to change the layout of only one body page in a document. For example, you can make a text frame longer to fit one more line of text on the page, or shrink a text frame to make room for a graphic placed directly on the body page.

When you change the column layout of a body page without updating the master page, you create a layout override.

Align text across columns

Learn to balance text across columns, feather text to the bottom of text frames, Synchronizing baselines in FrameMaker.

Balance text across columns

In a layout that uses a multicolumn text frame, you can balance the text across columns that aren’t full of text—for example, columns on partly empty pages that precede forced page breaks, and columns on the last page of a document. You can balance text across columns throughout a text flow or in an individual text frame.

Balancing off and on
Examples of text balancing on and off across columns

Balance text across columns throughout a text flow

  1. If a document window is active, place the insertion point in the main text flow or click in the page margin. If a book window is active, select the documents you want to affect.

  2. Choose Format > Page Layout > Column Layout.

  3. Select Balance Columns and click Update Entire Flow.

Balance text across columns in a single text frame

  • Click in the text frame and choose Format > Customize Layout > Customize Text Frame.

    Select Balance Columns and click Set.

Feather text to the bottom of text frames

When FrameMaker feathers text, it first adds space between paragraphs, up to a limit that you set. If more adjustment is necessary, it adds space between lines, up to another limit that you set. FrameMaker does not feather the text in a text frame in which text runs around graphics.

Before and after feathering
Before and after feathering text to the bottom of text frames

In a multicolumn text frame that contains straddles—paragraphs, tables, or anchored frames—FrameMaker adds vertical space to align the last baselines of text in adjacent columns above each straddle.

Before and after feathering with straddling
Before and after feathering text with straddling

When text is feathered, the display of pages may be slower. For this reason, you may want to feather text only after you finish editing a document.

  1. If a document window is active, place the insertion point in the main text flow. If a book window is active, select the documents you want to affect.

  2. Choose Format > Page Layout > Line Layout.

  3. Select Feather, and enter the maximum amount of space FrameMaker can add between lines (Maximum Interline Padding) and between paragraphs (Maximum Inter-Pgf Padding).

    FrameMaker will not exceed the padding limits you set. If it’s not possible to feather text in a column without exceeding the limits, FrameMaker does not feather text in that column.

  4. Click Update Flow.

Note: Feathering leaves room for the largest possible descender in the largest font size used in the line, even if no character with such a descender actually appears. If the last line in a column seems too high, check to see whether the column contains a nonprinting character (such as an anchor symbol) in a font that’s larger than that of the surrounding text.

Synchronizing baselines

When you synchronize (align) text in a flow, FrameMaker creates an invisible grid in each text frame and aligns the baseline of the first line of each specified paragraph to the grid. FrameMaker also aligns the first line after an anchored frame and tries to align the first line in each column.

Note: If feathering and synchronization are both on for a flow, feathering takes precedence over synchronization. However, the first lines in the columns are synchronized with each other.
Before and after synchronizing
Before and after synchronizing text in a flow

Because headings in large fonts often appear at the tops of columns, you can specify a first-line synchronization limit. This limit controls whether the baseline of a heading is placed on the first grid line when the heading falls at the top of a column, even when the heading’s default font is larger than the grid can accommodate. To place the baseline of a heading on the first grid line, FrameMaker lets the heading extend above the top of the column as shown in the illustration. FrameMaker does not synchronize font sizes larger than the limit you set.

Synchronize baselines across columns

  1. Check the paragraph formats of the paragraph types you want to synchronize to make sure they all have the same default font size and line spacing. Fixed line spacing should be on.

  2. Click in the flow you want to synchronize (or select the documents in the book that you want to affect) and choose Format > Page Layout > Line Layout.

  3. Select Baseline Synchronization and turn off Feather.

  4. In the Synchronization area, enter the line spacing you want to use for the text frame grid in the Synchronize Pgf’s With Line Spacing Of text box. Use the same line spacing as in the paragraphs you want to synchronize. Otherwise, FrameMaker will not synchronize the paragraphs with the text frame grid.

  5. In the First-Line Synchronization Limit text box, enter the largest font size to align at the top of a column. For example, suppose the line spacing for body paragraphs is 12 points, the column grid is 12 points, and the headings are 18 points. If you want the headings to be aligned when they appear at the top of a column, specify 18 as the first-line limit.

  6. Click Update Flow. As no descenders appear above the first line in a column, the first grid line is offset from the top of the column a distance equaling two-thirds of the specified line spacing.

Synchronize baselines in adjacent text frames

If the tops of adjacent text frames start at different positions on a page, you may need to adjust their tops to line up their grids.

Line up the grids by resizing adjacent text frames so that the distance between their tops is evenly divisible by the grid. For example, if the grid is 12 points, you can start a text frame 144 points (12 times 12 points) from the top of an adjacent text frame.


Synchronize baselines in adjacent text frames

A. Grid spacing B. Distance evenly divisible by the grid

Tip: Use the snap grid to correctly position the text frames. To do so, specify a snap grid equal to the text frame grid. Then resize the text frames until their tops snap to the grid.

April 29, 2020

Legal Notices | Online Privacy Policy