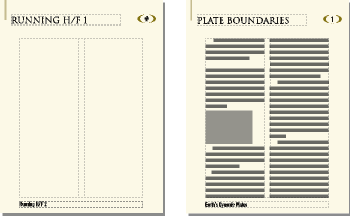
Body, master, and reference pages
FrameMaker documents contain three types of pages that help you set up your page layout:
-
Master pages specify the page layout and the background text for document pages (for example, page headers and footers).
-
Reference pages can contain frequently used graphics, formatting information, hypertext commands, mappings for HTML conversion, and boilerplate matter.
-
Body pages show the background text and graphics from the corresponding master page and contain the document content.

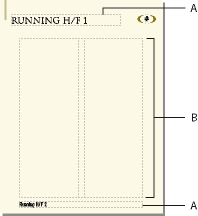
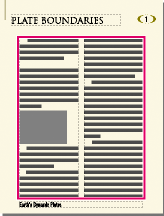
A. Master pages: first and right B. Body pages: first chapter page and right page C. Reference page
Master pages
FrameMaker uses master pages to keep track of a document’s page layout. A double-sided document contains at least two master pages, one for left pages and one for right pages. A single-sided document uses the right master page only. Documents can also contain custom master pages, which you can use for special types of pages. You can also create layouts directly on body pages for one-time-only use.
If your page layout is complex, or if you need to create design components such as page headers and footers, work with the components directly on the master pages. You can draw or import graphics—such as lines, boxes, or company logos—anywhere on a master page, as well as type text on them. Graphics and text appear on the corresponding body pages exactly as they appear on the master page, as part of the body page’s background.
Master pages can contain the following types of text frames:
-
A template text frame contains a tagged text flow—a flow with a name. When you add a body page, the template text frame is copied to the new body page. You then type the document’s text in this text frame on the body page. You can type text in a template text frame on a master page, but the text does not appear on body pages.
-
A background text frame contains an untagged text flow—a flow with no name. Its contents appear on corresponding body pages, but you can edit them only on the master pages. Background text frames are typically used for page headers and footers.
A. Untagged background text frame B. Template text frame
When you add text and illustrations to your document on body pages, FrameMaker adds body pages as necessary and automatically uses the page layout from the left or right master page.
Reference pages
You can use reference pages to store frequently used graphics that you want to position consistently throughout a document, and then use the graphics on body pages where they are needed. If you place a graphic in a reference frame—an unanchored graphic frame on a reference page—you can use the frame as a property of a paragraph format. For example, to design a heading with a line below it, draw the line in a reference frame, and then include the reference frame in the paragraph format of the heading.

Reference pages can also hold boilerplate material or clip art that you can copy and paste on body pages—for example, symbols for cautions and notes. And specialized reference pages can contain hypertext commands, formatting information for generated lists and indexes, definitions of custom math elements, and mappings for converting to XML and HTML.
A document normally contains at least one reference page. You can add your own graphics to an existing reference page, and you can create additional reference pages (up to 100).


