|

To clear a cellYou cannot delete a cell. However, you can clear the contents
of the cell. This action changes the cell type to a Text object
that is empty.
Select the cell. See To select a table, row, column, cell, or section.
Select Edit > Clear Contents.
To merge and split cellsYou
can combine two or more adjacent cells in the same row into a single
cell. For example, you can merge several cells horizontally to create
a table heading that spans several columns. You can only merge cells
that are in the same row.
You cannot merge the data from two cells into one cell. You can
only merge text. For example, if the header row is merged, the text
is merged because these two cells are Text objects. However, if
the body row is merged, and the cells are bound to items in the
data source, only the left most cell is retained.
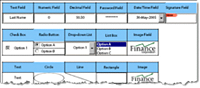
View full size graphic - A.
- Before merging cells
- B.
- After merging cells, the header row text is merged,
but the data for the body row only retains data from the left-most
cell
 It is a good idea to merge cells at the end of the process of designing a table because adding new columns or removing columns does not work the same if there is a merged cell in the table. It is a good idea to merge cells at the end of the process of designing a table because adding new columns or removing columns does not work the same if there is a merged cell in the table.To merge cells into one cellSelect the cells you
want to merge. See To select a table, row, column, cell, or section.
Select Table > Merge Cells.
If the cells contain
Text objects, Designer combines the text. If the cells contain other
objects, the objects are deleted.
To make the columns the same size by using the Distribute Columns Evenly command after you have merged cells, delete the hidden columns first by using the Table > Delete > Column command.
To split a merged cellSelect a merged cell. See To select a table, row, column, cell, or section.
Select Table > Split Cell Horizontally.
The split
cells will be converted to an empty Text object or, if the original
cells were subforms, they will be converted to empty subforms. For
example, if the merged cell was a numeric field, all the split cells
will be numeric fields.
Note: You can use these
two buttons in the Cell tab of the Object palette: Merge Cells  ,
Split Cells Horizontally  . .
To orient text vertically in cellsYou
can change the orientation in table cells so that the information
is displayed vertically instead of horizontally.
Only cells can be rotated (not rows, columns, sections, or entire
tables).
Select the cell. See To select a table, row, column, cell, or section.
In the Layout palette, select one of the rotation buttons.
Click the orientation you want. For example, the vertical
text in the previous example is rotated 90°.
In the Paragraph palette, select the align option that works
best for the cell. For example, the vertical text in the previous
example is aligned right and aligned to the top.
Note: If you rotate a field that users fill in, users will have to enter their data at the angle of rotation.
To change a cell to another object typeBy
default, all cells are set to text objects. Text objects present
read-only text that users cannot edit. You can use text objects
to do these tasks:
You can change the cell to any other type of object, such as
a numeric field or text field. In this way, you could use a table
to lay out an entire form.
A cell can also be a button that submits data, executes a web
service operation or database query, or emails data to someone.
A cell can even be a subform. A subform acts as a container for
other objects, including fields, boilerplate objects, and other
subforms. Subforms also help to position objects relative to each
other and provide structure. If a cell is a subform, the cell can
hold more than one object. For example, it can have two buttons.
When a cell becomes an object other than a Text object, it behaves
differently in a cell than if it were in the form design on its
own. For example, a Text Field object in a cell has the caption
set to None.
Here are ways to change a cell to another object type; however,
the results are different, depending on what is already in the cell
and what you change it to:
Depending on what you select from the Type list or Object Library
palette and what is in the cell, the new object replaces the existing
object. If you change a cell to a subform, objects that existed
in the cell already are wrapped in the subform. For example, if
a text field already existed in the cell and you choose Subform from
the Type list, the Text Field is wrapped in the subform. If a text
field already existed in the cell and you choose Numeric Field from
the Type list, the Numeric Field replaces the Text Field.
Drag an existing object in the form design that is outside
of the table into a cell. This method preserves the look of the
object. For example, if you drag a formatted phone number field
into a cell, the caption is retained along with the size of the
field.
If you click and drag a Subform object that is outside
of the table into a cell, it replaces the contents of the cell.
Note: If you change a cell to a text field, you can
select the Allow Multiple Lines option in the Cell tab of the Object
palette to show more than one line of text.
To change a cell to another object type by using the Type list in the Cell tab of the Object paletteSelect the cell.
See To select a table, row, column, cell, or section.
In the Object palette, click the Cell tab and select another
object type from the Type list.
To change a cell to another object type by dragging an object from the Object Library palette Drag the object from
the Object Library palette into the cell where you want it to appear. Drag the object from
the Object Library palette into the cell where you want it to appear.
To change a cell to another object type by dragging an object from the form design In the form design, drag the existing
object that is outside of the table into the cell where you want
it to appear.
|
|
|