Equations

Know about Placing and displaying equations, inline equations in structured documents, Equations in graphic frames in FrameMaker.

Placing and displaying equations

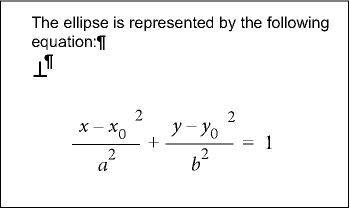
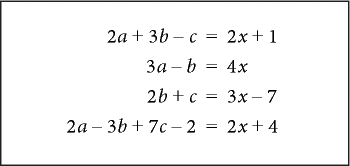
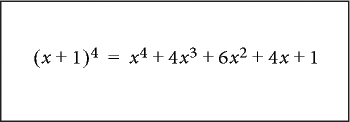
You can place an equation inline with paragraph text or display it in a paragraph of its own. In either case, FrameMaker creates an anchored frame for the equation. You can position an equation with other objects in an existing graphic frame, to annotate a graphic, for example. The graphic frames that contain equations can be either anchored or unanchored.


Placing an equation inline,display, or in a graphic with other objects

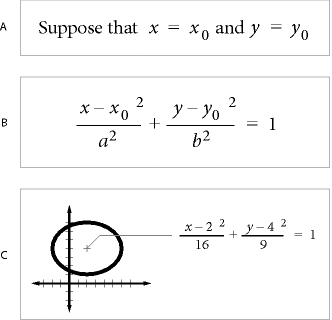
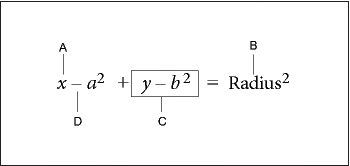
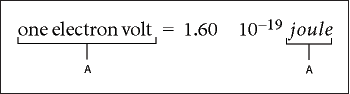
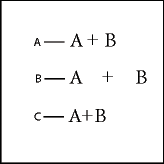
A. Inline B. Display C. In a graphic with other objects

Inline and display equations in structured documents

An equation element provides a frame with an equation object into which you can enter mathematical expressions. Like an anchored frame for graphics, an equation frame is anchored to a specific location in text.

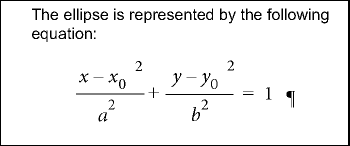
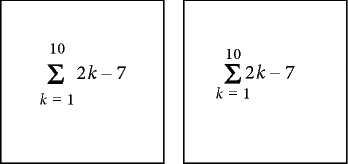
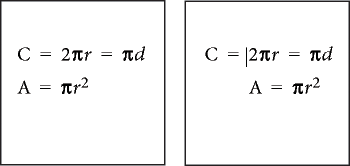
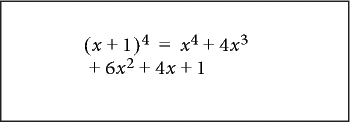
You can insert an equation element inline with paragraph text or in a separate display paragraph.


Equationinline with text and as display

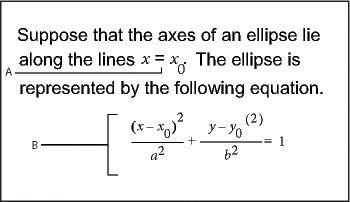
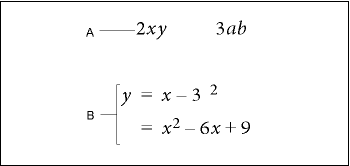
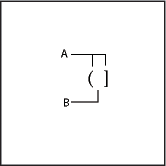
A. Inline equation B. Display equation

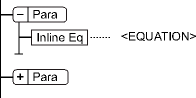
An equation element appears in the document structure where it is anchored to text, regardless of the equation position on the page. In the Structure View, a square-cornered bubble with the snippet <EQUATION> indicates an equation element. The equation itself is not part of the structure.

Equation element
Equation elementin the structured view of the document

If you export to SGML or XML, FrameMaker writes the equation to a separate graphics file (CGM format). Then FrameMaker adds an entity reference to it from your SGML or XML file.

You can change the file format for equations using a read/write rule. If you change the file format to MIF, FrameMaker keeps a track of equations and their respective file names. Saving the equation multiple times, still saves it to its one file, instead of creating multiple files as in FrameMaker 9.

For example:

New behavior

Old behavior

Equation 1 is saved in file say eq1.mif

Editing the FrameMaker content and subsequently saving the file, saves equation 1 to the same eq1.mif.

FrameMaker does NOT create new files on every save for the same equation.

Equation 1 is saved in file say eq1.mif

Editing the FrameMaker content and subsequently saving the file, creates a new file say eq2.mif for the same equation 1.

FrameMaker creates new files on every save for the same equation.

Equations in graphic frames in structured documents

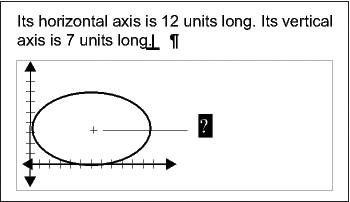
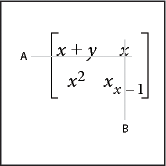
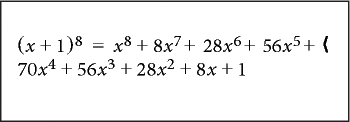
You can also place an equation in an anchored frame that’s already inserted for graphics. Do this to combine the equation with graphic objects. If the anchored frame is an element, the element is part of the document structure. However, the frame contents, including the equation, do not appear in the structure.

An equation in an anchored frame with graphics sometimes produces unwanted results if you export to SGML or XML. In general, if you plan to export to SGML or XML, place only one object in a frame.

Equations pod overview

Know the equations pod and its various settings in FrameMaker.

The Equations pod contains the commands to create and change equations. It also contains the symbols, operators, functions, and other math elements you insert in equations. To display the pod, click the Insert > Equations in the main menu.


Equations pod in FrameMaker

A. The Equations pop-up menu appears on every page. B. This part of the pod changes from page to page. C. The names of the pages appear here, with the current page highlighted.

The Equations pod contains nine pages of math elements and commands. To display a page, click its name at the top of the pod.

Symbols

Greek characters, atomic symbols, diacritical marks, and strings.

Operators

Roots, powers, signs, subscripts, superscripts, and logic symbols.

Large

Sums, products, integrals, intersections, and unions.

Delimiters

Parentheses, brackets, curly brackets, and substitution.

Relations

Equal, less than, greater than, similar to, subset of, superset of, and proportional to.

Calculus

Integrals, derivatives, partial derivatives, gradients, and limits.

Matrices

Matrices and matrix commands.

Functions

Trigonometric, hyperbolic, and logarithmic functions; commands for evaluating expressions; and commands for creating and applying rules.

Positioning

Controls to adjust the position of an expression and the spacing around it, commands to specify alignment, and commands to set and clear manual line breaks.

Create equations

Learn how to create equations and use them in your documents in FrameMaker.

To create an equation, insert an equation object in the document and then insert math elements in the equation.

Tip: When working with an equation, zoom in until it’s easy to read.

Create an inline equation

  1. Click in text where you want to insert the equation. If the text is in a rotated text frame, unrotate the frame first by selecting the rotated text frame and pressing Esc g 0 (zero).

  2. Choose Insert > Equations.

  3. On the Equations pod, choose one of the New Equation commands from the Equations pop‑up menu. Small, Medium, and Large specify the font sizes used in the new equation.

    A new equation object appears as a question mark in a frame anchored below the line with the insertion point. The first math element that you insert replaces the question mark prompt.

    New inline equation
    Newequation object appearing as a question mark

  4. Insert the math elements in the equation by typing the elements or by clicking items on the Equations pod.

    Inserted elements
    Inserting mathelements in an equation

  5. Choose Shrink-Wrap Equation from the Equations pop‑up menu. This option shrinks the frame around the equation and places the equation in the line of text at the anchor symbol.

    Shrink-wrapped inline equation
    Shrinkan equation using Shrink-Wrap Equation option

  6. If the equation seems too close to the text on either side, insert a space before or after the frame. FrameMaker treats the frame that contains an inline equation as a character and doesn’t provide extra space around it.

  7. If the equation is too tall for the line, open up more space above or below the line. Use the Line Spacing pop‑up menu on the formatting bar to turn off fixed line spacing.

Create an equation in a paragraph of its own (a display equation)

  1. Click in an empty paragraph.

  2. Apply a paragraph format from the Paragraph Catalog, or set up your own format. The paragraph format determines the alignment, vertical spacing, and any autonumber for the paragraph that contains the equation.

    Tip: If you created the document from a book or report template, use the Equation paragraph format. You can also copy this format to your document, but you’ll probably want to make some changes (for example, to the Default Font and Spacing properties).
  3. Click the Equations button Equation button at the right side of the document window.

  4. On the Equations pod, choose one of the New Equation commands from the Equations pop‑up menu. Small, Medium, and Large specify the font sizes used in the new equation.

    A new equation object appears as a question mark in a frame anchored below the empty paragraph. The first math element you insert replaces the question mark prompt.

    New equation in anchored frame
    Newequation object appearing as a question mark in a frame anchoredbelow the empty paragraph

  5. Insert the math elements in the equation by typing the elements or by clicking items on the Equations pod.

    Inserted elements
    Insert a math element in the equation

  6. Choose Shrink-Wrap Equation from the Equations pop‑up menu. This option shrinks the frame around the equation and places the equation in the empty paragraph.

    Shrink-wrapped equation in its own paragraph
    Shrink the framearound an equation

Create an equation in a graphic frame with other objects

  1. Click the Equations button Equation button at the right side of the document window.

  2. Select a graphic frame or an object in a graphic frame.

  3. On the Equations pod, choose one of the New Equation commands from the Equations pop‑up menu. Small, Medium, and Large specify the font sizes used in the new equation.

    A new equation object appears as a question mark inside the frame. The first math element you insert replaces the question mark prompt.

    New equation object
    Equation in a graphic frame with other objects

  4. Insert the math elements in the equation by typing the elements or by clicking items on the Equations pod.

  5. To place the equation exactly where you want it, first select it by control-clicking the equation.

  6. Move the equation by doing one of the following:

    • Drag it with the mouse.

    • Move it with the arrow keys.

    • Position it precisely with the Graphics > Object Properties command.

Insert math elements

Know how to insert math elements and mathematical expressions, know the scope of operations in FrameMaker.

An equation contains expressions made up of math elements—characters, text strings, operators, and other mathematical elements from the Equations pod.


Math elements in an equationwith alphanumeric character, textstring, expression, and operator

A. Alphanumeric character B. Text string C. Expression D. Operator

After you create an equation object, insert math elements in it by typing them or by clicking them on the Equations pod. The Equations pod can be closed when you insert an item from the keyboard.

Note: Math equations support the Unicode text-encoding standard.

About the scope of operations

When you insert a math element in an equation, FrameMaker adjusts the mathematical syntax. The result depends on the scope of operation—the selection or the location of the insertion point. For example, when you insert x in a fraction, the result depends on whether the numerator, the denominator, or the entire fraction is selected.

If you multiply by x

The result is

Insertionpoint at the end of 7 in the numerator or 7is selected in the numerator

Resultwhen 7 is selected or the insertion point is after 7

The numerator is selected

Result when the numeratoris selected

Insertionpoint after the equation or Wholeequation is selected

Resultwhen insertion point is after the equation or the whole equationis selected

In the first example, only the 7 is multiplied by x. In the second example, FrameMaker adds parentheses to show that the entire expression 2y + 7 is multiplied by x. In the last example, the entire fraction is multiplied by x. The size of the insertion point in the first and last examples indicates the scope.

Many mistakes in equations result from an incorrect scope of operation—having too little or too much selected when inserting an element. Be careful to select the range you want before inserting an element.

Insert a math element

  1. Select an expression or place the insertion point in an equation.

  2. Do any of the following:

    • To insert a math element by using the Equations pod, click the element.

    • To insert an alphanumeric character or a symbol that appears on the keyboard, type it. You can type parentheses, brackets, plus signs, equal signs, and so on. If you type an open parenthesis, FrameMaker inserts the closing parenthesis.

    • To insert an element by typing a backslash sequence, type a backslash ( \ ) and the string that identifies the element, and then press Return. For example, to insert the symbol for infinity Infinity symbol, type\infty  and press Return.

    • Insert a custom math element.

    If an element needs one or more operands, a question mark prompt Questionmark prompt appears for each operand; otherwise, an insertion point appears. To move from one operand to another, press Tab.

Insert a text string

A text string is a series of characters that is interpreted as a unit. Unlike characters that make up an expression, the characters in a text string don’t usually appear in italics and aren’t multiplied together.

A. Text strings
Text string inan equation

Text strings have no mathematical meaning in FrameMaker. For example, evaluation commands can evaluate the function tan but not the string “tan”.

  1. On the Symbols page of the Equations pod, click Start String. Two double quotation marks ( " " ) appear. You can also type an apostrophe ( ' ) or a double quotation mark (") to start the string.

  2. Type the text of the string. The quotation marks disappear, and the text appears as you type. To insert a straight apostrophe or straight double quotation mark as part of the string, hold down Control while pressing the key.

  3. Click End String on the Symbols page or press Return.

Insert, add, or edit a horizontal or vertical list of expressions

An equation object usually contains one equation or expression. You can set up a horizontal or vertical list in which several expressions are contained in the same object. When you select a list, all the expressions in the list are selected as one object.


Horizontal and vertical listaligned on equal signs

A. Horizontal list B. Vertical list aligned on equal signs

FrameMaker aligns the expressions in the list automatically. When you move the list, all the expressions maintain their relative positions.

  1. Select the expression you want to be the first item in the list or to add to a list.

  2. On the Operators page of the Equations pod, click the horizontal list element Horizontallist element or vertical list element Verticallist element. To add a math element, type the elements or click items on the Equations pod. A horizontal or vertical list appears. The selected expression appears as the first item in the list. A second item appears in the list as a question mark prompt.

    Before clicking

    After clicking

    An empty equationbefore clicking the horizontal list

    After clickingthe horizontal list

    Selectingan expression before clicking the vertical list

    Result afterclicking the vertical list with selected expression

    Selectingpart of an expression before clicking the vertical list

    Result afterclicking the vertical list with a part selected in the expression

In the first example, a horizontal list is inserted. In the second example, a vertical list is inserted, and the selected expression becomes the first item in the list. In the last example, a vertical list is inserted as part of a larger expression.

Insert symbols

The Symbols page on the Equations pod contains the Greek alphabet, other symbols, and diacritical marks.

The Symbols page doesn’t include Greek letters that have Roman-alphabet equivalents, such as the uppercase alpha (A). The following examples show the result of clicking Pisymbol on the Symbols page.

Before clicking

After clicking

Clickingsymbol with insertion point at the end of the expression

Symbol isadded after number 7 in the expression

Clickingsymbol after selecting the expression

Result ofclicking symbol after selecting the expression

Diacritical marks appear on the element to the left of the insertion point or on the selected expression. Click the dot or prime button once for each dot or prime diacritical mark you want to insert.

Note: To interpret and mathematically manipulate a summation, product, or partial differential element, insert the element from the Large page or Calculus page. Do not insert from the Symbols page. Elements from the Symbols page are not evaluated.

Insert operators

The Operators page on the Equations pod contains commonly used operators, roots, powers, signs, subscripts, superscripts, and logic symbols.

If an expression is selected when you insert the operator, the expression becomes the first operand. The following examples show the result of clicking the plus sign Plussign or the division operator Devidesign on the Operators page.

Before clicking

After clicking

Before clickingplus sign when nothing is selected in an expression

Result afterclicking plus sign when nothing is selected in an expression

Before clickingplus sign where a part of the expression is selected

Result afterclicking plus sign where a part of the expression is selected

Before clickingdivision operator where a part of the expression is selected

Result afterclicking division operator where a part of the expression is selected

You can represent the division operator as a slash (/), a horizontal bar Minus sign, or a division sign Devision sign.

FrameMaker can evaluate exponents mathematically, but not superscripts.


Example equation with superscriptand exponent in FrameMaker

A. Superscript B. Exponent

Insert large elements

The Large page on the Equations pod contains sums, products, integrals, intersections, and unions.

If an expression is selected when you insert a large element, the expression becomes the first operand. The following examples show the result of clicking the summation symbol Summationsymbol on the Large page.

Before clicking

After clicking

Before clickingthe summation sign when nothing is selected in an expression

Result afterclicking the summation sign when nothing is selected in an expression

Before clickingthe summation sign when the expression is selected

Result afterclicking the summation sign when the expression is selected

You can add an operand after inserting a math element from the Large page.

Insert delimiters

The Delimiters page contains delimiters such as parentheses, brackets, and curly brackets.

If an expression is selected when you insert a pair of delimiters, the expression is placed inside the delimiters. The following examples show the result of clicking the parentheses on the Delimiters page.

Before clicking

After clicking

Before clickingthe parentheses when nothing is selected in an expression

Result afterclicking the parentheses when nothing is selected in an expression

Before clickingthe parentheses when the expression is selected

Result afterclicking the parentheses when the expression is selected

You can also represent parentheses as brackets ([ ]) or curly brackets ({ }).

Insert relations

The Relations page contains relation symbols such as =, <, >, approx, equivalent, isan element of, superset, and subset.

All relation symbols—except the binary equal sign equalto—apply to the character to the left or right of the insertion point or to the selection. When you insert a relation symbol between multiplied elements, it applies to the elements on either side of the insertion point.

Binary equal signs equal to appear to the right of the current expression (as shown in the second example). When the insertion point or selection is in a subscript or superscript, the equal sign appears in the subscript or superscript.

Before clicking

After clicking

Before clickingthe binary equal sign in an expression

Result afterclicking the binary equal sign in an expression

Before clickingthe binary equal sign in an equation

Result afterclicking the binary equal sign in an equation

Before clickingthe binary equal sign at a subscript in an equation

Result afterclicking the binary equal sign at a subscript in an equation

Insert a binary equal sign at the insertion point

  1. Press Esc m =

    Before clicking

    After clicking

    Before clickingthe binary equal sign at an insertion point

    Result afterclicking the binary equal sign at an insertion point

Insert calculus elements

The Calculus page contains integrals, derivatives, partial derivatives, gradients, and the limit function.

If an expression is selected when you insert the calculus element, the expression becomes the first operand. The following examples show the result of clicking the integral symbol Integrsymbol on the Calculus page.

Before clicking

After clicking

Before clickingthe integral sign at an insertion point

Result afterclicking the integral sign at an insertion point

Before clickingthe integral sign in a selected equation

Result afterclicking the integral sign in a selected equation

You can change the position of operands and add operands.

Insert matrices

The Matrices page contains elements for matrices ranging in size from 1 by 1 to 3 by 3. After creating a matrix, you can add rows and columns.

If an expression is selected when you insert the matrix element, the expression becomes the first cell in the matrix.

Before clicking

After clicking

Before clickingthe matrix element at an insertion point

Result afterclicking the matrix element at an insertion point

Before clickingthe matrix element when an expression is selected

Result afterclicking the matrix element when an expression is selected

Insert functions

The Functions page contains trigonometric, hyperbolic, and logarithmic functions, and also the sign, limit, and general functions.

FrameMaker places functions at the insertion point or at the selection. When an expression is selected, the expression becomes the argument of the function—except for the limit and general functions Limitfunction and Limitfunction. The following examples show the result of clicking the sin function on the Functions page.

Before clicking

After clicking

Before clickingthe sin function at an insertion point

Result afterclicking the sin function at an insertion point

Before clickingthe sin function when an expression is selected

Result afterclicking the sin function when an expression is selected

Insert a custom math element

In addition to inserting math elements that are built in FrameMaker, you can insert custom math elements that have been defined for a document.

Custom math elements have no mathematical meaning in FrameMaker. For example, a custom math element for an operator is treated as an operator in an equation. However, FrameMaker cannot evaluate it.

  1. On the Equations pod, choose Insert Math Element from the Equations pop‑up menu.

  2. Select the element name and click Insert.

Shrinkwrap or unwrap an equation

Understand shrink-wrapping and unwrapping an equation in FrameMaker.

Shrinkwrapping an equation shrinks the surrounding anchored frame so that it’s large enough for the equation. The operation changes the frame anchoring position to At Insertion Point, and places the insertion point after the frame.

Before shrinkwrapping
Before shrinkingthe surrounding anchored frame using shrinkwrapping in FrameMaker

After shrinkwrapping
After shrinkingthe surrounding anchored frame using shrinkwrapping in FrameMaker

Shrinkwrap an equation when you finish working with it so that the equation takes minimal space and aligns with the baseline of the surrounding text. Unwrap an equation to enlarge the anchored frame for easy editing.

  1. Click in the equation or select its frame.

  2. On the Equations pod, choose Shrink-Wrap Equation or Unwrap Equation from the Equations pop‑up menu. The edges of a shrinkwrapped equation sometimes do not appear onscreen. They do appear in the printed document.

Edit equations

Learn how to edit an equation, remove delimiters, work with element formats and matrices in FrameMaker.

You can edit an equation as you edit text—adding, changing, rearranging, and removing math elements, and cutting, copying, and pasting them. As you edit an equation, the syntax of the equation is adjusted as necessary.

You can change a matrix—add or delete rows and columns, delete brackets, and change row height and column width. You can also choose among several representations for some math elements such as parentheses. You can add operands to others such as integrals and summations.

If your equation is shrinkwrapped, unwrap the equation before editing it. This makes the anchored frame full-sized again, giving you more room to work.

Note: To edit a rotated equation, first restore the equation or text frame to its unrotated position by pressing Esc g 0 (zero).

Extend a selection using the keyboard

  • Press the spacebar. The selection expands to include the next higher expression. The following example shows the result of pressing the spacebar repeatedly.

    Original selection

    Original selection for extenda selection using the keyboard

    Pressed once

    Spacebar used once to extenda selection

    Pressed twice

    Spacebar used twice to extenda selection

Change the selection

  • Do one of the following:

    • To change the selection to the next subexpression on the right, press the Right Arrow key.

    • To change the selection to the next subexpression on the left, press the Left Arrow key.

    • To change the selection to the next question mark prompt, press Tab.

Replace or delete a math element or equation

  1. Select the element you want to delete and press Delete. A question mark prompt replaces the element.

  2. Do one of the following:

    • To replace the element, click the Equations pod or type to insert the replacement.

    • To delete the element, press Delete again. FrameMaker removes any elements that are no longer necessary—for example, a plus sign or parentheses.

    • Control-click the equation to select the equation, and press Delete.

Remove delimiters

After entering or editing an equation, you sometimes end up with extra delimiters—parentheses, curly brackets, and brackets. You can remove extra delimiters. If you later use evaluation commands, FrameMaker evaluates the equation as if the delimiters are still present.

  • To remove all delimiters, select the expression. On the Delimiters page of the Equations pod, click Remove Parentheses.

    Before clicking

    After clicking

    Before clickingRemove Parentheses to remove all delimiters from a selected expression

    After clickingRemove Parentheses to remove all delimiters

  • To remove one delimiter, place the insertion point to the right of the delimiter and press Delete. If the delimiter has a mate, such as the left parenthesis between a and b in the example, the mate is also removed.

    Before

    After

    Before pressingdelete key to remove a delimiter at an insertion point

    After pressingdelete key to remove a delimiter at an insertion point

Toggle an element format

You can represent some math elements in more than one way. For example, delimiters can appear as Delimiterexample 1, Delimiterexample 2, or Delimiterexample 3. Division can appear as Divisionexample 1, Divisionexample 2, or Divisionexample 3.

  1. Select the entire element.

  2. On the Operators, Large, Delimiters, or Calculus page of the Equations pod, click Toggle Format. The command is the same on all four pages and operates on any element with multiple formats. Click more than once to get the format you want in some cases.

Add an operand to a math element

Radical symbols, gradient symbols, and logarithms can have one or two operands. Integrals and other symbols on the Large and Calculus pages can have one, two, or three operands.

Operands
Operands in anequation

You can add operands to these elements without starting over.

  1. Click or select anywhere in the expression with the element.

  2. Click Add Operand on the Large or Calculus page. A question mark prompt appears where you specify the new operand.

Change matrices

You can change the number of rows or columns in a matrix and add or remove brackets around the matrix. You can allow the column width to vary from column to column, depending on the contents, or specify that all columns are equal width. Similarly, you can allow the row height to vary from row to row.

You can also transpose a matrix and perform matrix algebra.

  • To add a row or column to a matrix, place the insertion point in the matrix. On the Matrices page of the Equations pod, choose Add Row or Add Column from the Matrix Commands pop‑up menu.

    Before Add Column

    After Add Column

    Before clicking Add Columnto add a column in a matrix

    After clicking Add Columnto add a column in a matrix

    Add Row adds a row at the bottom.

    Add Column adds a column at the far right.

  • To delete a row or column from a matrix, select the row or column and press Delete.

  • To add or remove brackets around a matrix, select the entire matrix. On the Matrices page of the Equations pod, click Add/Remove Brackets.

  • To change the row height or column width in a matrix, select the matrix. On the Matrices page of the Equations pod, choose All Equal or Proportional from the Matrix Row Height or Matrix Column Width pop‑up menu.

Equal row heights (left) and Proportional row heights (right)
Example of Equal row heightsand Proportional row heights

If you choose Proportional, each row is tall enough to hold the tallest cell in the row. Each column is wide enough to hold the widest cell in the column.

If you choose All Equal, each row is tall enough to hold the tallest cell in the entire matrix. Each column is wide enough to hold the widest cell in the entire matrix.

Create and define math elements

Know math element types, change built-in math elements, define custom math elements in FrameMaker.

If you need a math element that doesn’t appear on the Equations pod, you can create a custom element—for example, a new operator such as OperatorOperator. However, FrameMaker cannot evaluate custom math elements mathematically.

To display a built-in element on the pod differently in your document, you can redefine the element. For example, you can redefine the asin(inverse sine) function so it appears as sin1. You can redefine the appearance of a built-in element, but you can’t change its type.

You can also import math element definitions from another document.

Custom math element definitions are stored on one or more reference pages whose name begins with FrameMath. Each definition is a text line in an unanchored graphic frame whose name is the element name.


Custom math element definitionas text line in an unanchored graphic frame.

A. Graphic frame B. Text line

Math element types

A math element type indicates how the element behaves in relation to other elements around it. For example, a plus sign (+) has the type infix, which means that it has two operands, one to the left and one to the right.

You can define custom math elements of the following types.

Type

Example

Number of operands

Atom

Custom mathelement— atom

None

Delimiter

Custom mathelement—delimiter

One

Function

Custom mathelement—function

One, to the right of the element

Infix

Custom mathelement—Infix

Two, to the left and the right of the element

Large

Custom mathelement—Large

Up to three, above, below, and to the right of the element

Limit

Custom mathelement—Limit

Up to two, below and to the right of the element

Prefix

Custom mathelement—Prefix

One, to the left of the element

Postfix

Custom mathelement—Postfix

One, to the right of the element

Vertical list

Custom mathelement—Verticallist

Two, one above the other (The text line that defines a custom vertical list is used as a separator between list items.)

You cannot define custom math elements of the following types.

Type

Example

Derivative

Math element— Derivative

Diacritical mark

Math element—Diacriticalmark

Horizontal list

Math element—Horizontallist

Matrix

Math element—Matrix

Root

Math element—Root

Script

Math element—Script

Substitution

Math element—Substitution

Vertical division bar

Math element—Verticaldivisionbar

Define a custom math element or change a built-in math element definition

  1. Choose View > Reference Pages and display a FrameMath reference page.

    If the document doesn’t contain a FrameMath reference page, display a reference page and then choose Insert > Add Reference Page. Name the new page FrameMath1. Capitalize the letters F and M as shown.

  2. Use the Graphic Frame tool to draw an unanchored graphic frame on the page.

  3. In the Frame Name dialog box, enter a name for the math element. If you are redefining a built-in element, enter that element name.

  4. Use the Text Line tool to add a text line in the graphic frame.

  5. Create the math element in the text line using the following guidelines:

    • You can type any characters in the text line, and you can change the character format. You can also move the characters by using micropositioning shortcuts.

    • For all math elements except delimiters, the text line represents just the mathematical symbol, not the operands. When you later insert the element in an equation, FrameMaker places the operands in the appropriate places, based on the type of math element. For example, a large element, such as a summation or an integral sign, has up to three operands—one above, one below, and one to the right of the symbol.

    • A custom delimiter can contain only one operand, even though some built-in delimiters contain two or three. To indicate the location of the operand, insert a space in the text line. If you do not insert a space in the text line, FrameMaker places the operand between two copies of the delimiter.

      A. Characters in delimiter.  B. Space indicates the operand.
      Acustom delimiter

    • FrameMaker uses the first text line in the frame for the custom math element. Make sure that only one text line exists in the frame.

  6. Select the graphic frame.

  7. On the Equations pod, choose Add Definition To Catalog from the Equations pop‑up menu.

  8. If you’re defining a custom math element, choose an element type from the pop‑up menu, and click Add.

Find the name of a math element

  1. Place the insertion point in an equation.

  2. On the Equations pod, choose Insert Math Element from the Equations pop‑up menu.

  3. Turn off Show Custom Only, and then scroll through the element names to find the one you want.

  4. Click Cancel.

Change or delete a custom math element definition

  1. Display the FrameMath reference page that contains the math element by doing one of the following:

    • If the custom math element appears in an equation, select the element, and choose Update Definition from the Equations pop‑up menu on the Equations pod. Then click Go To Frame.

    • If you haven’t inserted the custom math element into an equation, choose View > Reference Pages. Then display the FrameMath reference page you want.

  2. Do one of the following:

    • Edit the text line that defines the math element. When you display a body page again, FrameMaker uses the modified definition, and shrinkwraps the equations again.

    • Delete the graphic frame. If the element appears in an equation, FrameMaker displays the element name, surrounded by question marks, instead of the element.

Position math elements in an equation

FrameMaker positions math elements according to their mathematical meaning in an equation. Sometimes you want to microposition elements—reposition them so they’re closer to or farther from other elements in the equation.

Before and after micropositioning
Positionmath elements in an equation using micropositioning

You can also control the amount of white space on each side of an element.


Controlling the amount ofwhite space on each side of an element

A. Default spacing B. Space added to the left and right C. Space removed from the left and right

  • On the Positioning page of the Equations pod, do one of the following:

    • To position a selected expression, click a Micropositioning arrow. Click as many times as necessary. (Each click moves an expression one pixel on the screen.) Zoom in for greater precision.

      Micropositioning arrows
      Positioning a selected expression using a Micropositioningarrow

    • To remove micropositioning, click the button at the center of the Microposition area Micropositionarea.

    • To inspect the position offsets and adjust them numerically, click Position Settings. The exact offsets appear in the Microposition Offset area of the Math Element Position Settings dialog box. To adjust the position, enter values in the Microposition Offset area and click Set.

    • To adjust white space, click a plus sign (+) to add white space or a minus sign (–) to remove it. Click as many times as necessary. Each click adds or subtracts one pixel of space. Zoom in for greater precision.

    Note: To change the spacing around a math element of type infix, prefix, postfix, or delimiter, adjust the space around the adjacent math elements instead. For example, to add space on either side of the plus sign in the expression a+b, selecta. Add space to the right. Then selectb. Add space to the left.
    • To adjust spacing values, click Position Settings. The exact spacing appears in the Spacing area of the Math Element Position Settings dialog box. To adjust the spacing values, enter values in the Spacing area, and click Set. To restore the default spacing values, click the button at the center of the Spacing area Spacing area.

Adjust the spacing values for a math element wherever it appears

You can update some math element definitions—infix, prefix, postfix, large, scripts, and the division bar—with new spacing. When you do, FrameMaker adjusts the spacing around the element wherever it appears in the document and rewraps the equations.

You can also change the spread—the space between characters—uniformly in all small, medium, and large equations.

  1. After you adjust the spacing around the element in an equation, select the element.

  2. On the Equations pod, choose Update Definition from the Equations pop‑up menu.

  3. Do one of the following:

    • To update the spacing for the element throughout the document, click Update.

    • To reset the spacing to the default, click Get Default.

Set line breaks and align equations

Know how to define line breaks and align equations along a point in a frame or in a list in FrameMaker.

You can control equation breaks across lines and alignment of the lines in a multiline equation, or of the items in a list or matrix. You can also align several equations with one another, even if they appear in different anchored frames.

Aligned along left side of equal signs
Controllingequation breaks across lines and alignment of the lines in a multilineequation

You can manipulate equation objects as you do other objects. You can automatically and manually align items in a vertical list and lines in a multiline equation. Manual alignment points override automatic alignment.

Aligned on left side and at manual alignment point
Automatically and manually align items in avertical list and lines in a multiline equation

You can align the items in a horizontal list along their tops, bottoms, or baselines.

Baseline-aligned
Align the itemsin a horizontal list along their baselines

You can also align the cells in each row of a matrix along their tops, bottoms, or baselines. You can align the cells in each column at the right, left, or center, or along equal signs.

Aligned along:
Align the cellsin each row of a matrix along their center and baselines

A. Baselines B. Centers

Change equation line breaking

When an equation breaks across lines, the entire equation remains in a single anchored frame. You can set where an equation breaks across lines automatically. When you change the line-break width, the equation is reformatted to the new width.

Original equation
An entire equationin a single anchored frame

Equation set to break at specific location"
Equationset to break at 1.25"

You can also force a line break at a specific location in the equation. However, don’t use manual line breaks to create separate equations. Instead, insert a vertical list of expressions.

You can change line breaking in these ways:

  • To change the automatic line break width, click in the equation or select any part of it. Choose Graphics > Object Properties. Edit the value in the Automatic Line Break After box, and click Set. The value is preset to the width of the equation frame.

  • To insert a manual line break, click where you want the equation to break into two lines. On the Positioning page of the Equations pod, choose Set Manual from the Line Breaking pop‑up menu. A line-break symbol Line-breaksymbol appears at the insertion point when text symbols are visible.
    Manual line break
    Manuallybreaking a line

  • To remove a manual line break, select the part of the equation that contains the line-break symbol. On the Positioning page of the Equations pod, choose Clear Manual from the Line Breaking pop-up menu.

Align display equations

The format of the paragraph that contains the equation controls the alignment (left, center, or right) of a display equation.

Paragraph alignment set to Center
Paragraphalignment set to Center

  1. Click in the paragraph that contains the equation (not in the equation itself).

  2. Choose the alignment from the Alignment pop‑up menu in the formatting bar or in the Paragraph Designer.

Set automatic alignment for a vertical list or multiline equation

  1. Click in the equation or list.

  2. On the Positioning page of the Equations pod, choose an item from the Left/Right pop‑up menu. When you choose Left Of = or Right Of =, the lines are aligned along one side of an equal sign. A line with no equal sign is aligned along its left side.

Set a manual alignment point for a multiline equation or for an item in a vertical list

  1. Do one of the following:

    • Click in the first line of a multiline equation where you want subsequent lines to align.

    • Click in a vertical list item where you want the item to align with the rest of the list.

  2. On the Positioning page of the Equations pod, choose Set Manual from the Left/Right pop‑up menu. A manual alignment symbol Manual alignmentsymbol appears at the insertion point when text symbols are visible. Subsequent lines of a multiline equation are left aligned with the manual alignment point. A vertical list item aligns with other items in the list at the manual alignment point.

Clear a manual alignment point

  1. Select the part of the equation that contains the manual alignment point.

  2. On the Positioning page of Equations pod, choose Clear Manual from the Left/Right pop‑up menu. You can also clear a manual alignment point by setting another.

Align items in a horizontal list

  1. Click in the list.

  2. On the Positioning page of the Equations pod, choose an item from the Up/Down pop‑up menu.

Align cells in a matrix

  1. Click in the matrix.

  2. On the Positioning page of the Equations pod, choose an item from the Up/Down pop‑up menu or from the Left/Right pop‑up menu. The Left/Right and Up/Down commands affect the whole matrix. To align individual cells, use micropositioning.

Check alignment settings for a horizontal or vertical list, or for a matrix

  1. Do one of the following to select the entire list or matrix:

    • Drag through the list or matrix.

    • Place the insertion point in the matrix and press the spacebar repeatedly.

  2. On the Positioning Page of the Equations pod, click Position Settings.

Left-, center-, or right-align equations in a frame

You can align several equation objects with one another in a graphic frame, just as you align other objects. You can also align several equation objects along a manual alignment point, even when they’re in separate graphic frames.

Equations aligned at manual alignment points
Aligntwo equation objects with one another in a graphic frame at manualalignment points

FrameMaker maintains the alignment of the equation objects as you edit the equations. For example, if two equations are left aligned, the left alignment is maintained as the equations expand or shrink.

  1. Select the equations to align by Control-clicking the first equation; Control+Shift-click the other equations.

    Make sure that the last equation you select is the one you want to align with.

  2. Choose Graphics > Arrange > Align.

    Alignment options
  3. Select the alignment you want, and click OK.

Align equations along a point

  1. Set the manual alignment point in one of the equations to align.

    If you don’t set a manual alignment point, FrameMaker aligns an equation on the left.

  2. Click in the equation and choose Graphics > Object Properties.

  3. Choose Manual from the Alignment pop-up menu and specify the location of the alignment point within the frame in the Alignment Point Offset area. The left offset is the distance from the left edge of the frame to the manual alignment point.

    Specifying the top offset precisely is unnecessary. You can move the equation up or down later, just as you do any other object.

  4. Click Set.

  5. Repeat steps 1 through 4 for each equation you want to align. Use the same distance from the left edge for each equation, but change the top offset to position the equation vertically in the frame. If the equations you’re aligning are in different anchored frames, make sure that the left edges align with one another.

Change font settings in equations

Learn how to change font and format settings for equations in FrameMaker.

A document contains font settings that apply to all equations in it. These settings determine the font sizes and spacing for small, medium, and large equations. They also determine the character format used for Greek characters and for symbols, functions, numbers, strings, and variables.

You can change the preset size of an entire equation. You can also change the character format of individual math elements—for example, to use color or a special font.

You can also change the font sizes and character formats used for all equations in a document.

Change the character format in individual equations

You can’t change the spread, stretch, superscript, subscript, underline, overline, strikethrough, change bar, or pair kerning properties for any element. You also can’t change the font family for individual Greek characters and symbols and for some operators.

  • To change the preset size or color of an equation, click in the equation, choose Graphics > Object Properties, and do one of the following:

    • To change the equation size, choose a size from the Size pop-up menu, and click Set. If the equation is shrinkwrapped, FrameMaker rewraps it.

    • To change the equation color, choose a color from the Color pop-up menu, and click Set.

  • To change character format, select the element or expression, and change as you do for text.

  • To create a superscript or subscript, insert the appropriate operator.

  • To change the spread of characters, microposition them by using the positioning page of the Equations pod.

  • To place a line over or under an expression, use the diacritical marks on the Symbols page of the Equations pod.

Change equation fonts throughout a document

You can change the font size and spacing for all small, medium, and large equations in a document. When you make global font changes, FrameMaker reformats and rewraps all shrinkwrapped equations in the document.

Greek characters and symbols in equations normally appear in the Symbol font. You can use fonts such as Mathematical Pi and Universal Greek if these fonts are installed on your system.

Functions, numbers, and strings normally appear in Times New Roman or Times. Variables normally appear in italic. You can change the character format of each of these kinds of elements. For example, you can display all elements in Helvetica, with functions in italic and variables in bold.

Note: Don’t delete formats from the Character Catalog if you’re using them to specify the character format of math elements. If you delete these character formats, all equations in the document are reformatted using the default font.

Use Equation Sizes from the Equations pop‑up menu on the Equations pod for the following change:

  • To change equation fonts throughout the document, do one of the following:

    • Specify the font sizes and spread, and click Set. Spread is expressed as a percentage of the font size. Positive spread values cause wider spacing around elements; negative values cause narrower spacing.

    • Click Get Defaults.

  • To change the font for Greek characters and symbols, choose one of the available fonts from the Math Symbols pop‑up menu, and click Set.

  • To change the character format for functions, numbers, strings, and variables, first create the character format you want. Then choose the character format from the Functions, Numbers, Strings, or Variables pop‑up menu, and click Set. FrameMaker displays the format you created in the pop-up menus.

Evaluating equations

Know how to evaluate equations, equation transformation, equation matrix, addition, multiplication, division, rules pop-up and overrides in FrameMaker.

After you create an expression or equation, you can transform it by changing its mathematical representation. For example, you can multiply polynomials, factor terms, simplify expressions, and combine fractions.

Original selection

Transform anexpression or equation by changing its mathematical representation—originalselection

Expanded

Transforman expression or equation by changing its mathematical representation—expanded

Multiplied out

Transforman expression or equation by changing its mathematical representation—multipliedout

Multiplied out again

Transforman expression or equation by changing its mathematical representation—multipliedout again

You can also evaluate equations by substituting values and performing computations.

Original selection

Evaluate equationsby Substituting values and performing computations—original selection

Expanded

Evaluateequations bySubstituting values and performing computations—expanded

Value substituted

Evaluate equationsby Substituting values and performing computations—value substituted

Result computed

Evaluate equationsby Substituting values and performing computations—result computed

Transform or evaluate an expression

  1. Select the expression, or part of it.

  2. Choose a command on the Matrices or Functions page of the Equations pod. For example, select an expression and then choose Multiply Out from the Multiplication pop-up menu on the Functions page.

  3. To transform or evaluate an expression, use the commands on the Matrix Commands pop-up menu of the Matrices page and the commands on the six pop-up menus of the Functions page.

Matrix Commands pop-up menu

Matrix Transpose

Transposes the rows and columns of a selected matrix.

Selected matrix

After transposing

Selected matrix 

After transposingthe matrix

Matrix Algebra

Performs matrix multiplication and addition, and evaluates dot and cross products in a selected matrix.

Selected matrix (or matrices)

After matrix algebra

Selected matrix1

After performingmatrix algebra on matrix 1

Selected matrix2

After performingmatrix algebra on matrix 2

Selected matrix3

After performingmatrix algebra on matrix 3

Selected matrix4

After performingmatrix algebra on matrix 4

After performing matrix algebra, you can use the Simplify command to combine like terms.

Addition pop-up menu

Add Fractions

Adds selected fractions, expressing the result as a single fraction. This command also combines like terms.

Selected fraction

After adding

Selected fraction1

After addingfraction 1

Selected fraction2

After addingfraction 2

Selectedfraction 3

After addingfraction 3

If the selected expression contains the sum of more than two fractions, Add Fractions adds only the first two. Use this command repeatedly to combine all the fractions.

Selected expression

Selected expressioncontaining sum of more than two fractions

Added once

Adding theexpression containing sum of more than two fractions once

Added twice

Addingthe expression containing sum of more than two fractions twice

Order Sum

Arranges polynomials in decreasing powers of a selected variable.

Before ordering

After ordering

Before orderingpolynomials in decreasing powers of a selected variable

After orderingpolynomials in decreasing powers of a selected variable

Order Sum Reverse

Arranges polynomials in increasing powers of a selected variable. In the following example, you select an x—any x—before choosing Order Sum Reverse.

Before ordering

After ordering

Before orderingpolynomials in increasing powers of a selected variable

After orderingpolynomials in increasing powers of a selected variable

Multiplication pop-up menu

Use the Multiplication pop‑up menu on the Functions page to factor terms, multiply out expressions, and distribute multiplication and division over addition.

Factor

Factors a selected term out of a product.

Before factoring

After factoring

Before factoringa selected term out of a product

After factoringa selected term out of a product

Before factoringa selected term out of a product

After factoringa selected term out of a product

Factor Some

Factors a selected term from only those terms that contain it.

Before factoring

After factoring

Before factoringa selected term from only those terms that contain it

After factoringa selected term from only those terms that contain it

Multiply Out

Simplifies the selected expression, distributes multiplication over addition, and expands a selected term raised to a positive integral power.

Selected expression

After multiplying

Expression1 selected to be multiplied out

Expression1 after it is multiplied out

Expression2 selected to be multiplied out

Expression2 after it is multiplied out

The Simplify command also simplifies the selected expression.

Multiply Out Once

Multiplies the first pair of factors on the left side of a selected expression.

Selected expression

After multiplying

Selectingan expression to multiply the first pair of factors on the leftside

The expressionafter the multiplication

If you use this command several times, the results appear in a different form.

Distribute

Performs a variety of operations depending on the expression you select, as shown in the following examples:

  • Distributes division over addition.

    Selected expression

    After distributing

    Selectingan expression to distribute division over addition

    The expressionafter the distribution

    Use the Add Fractions command to perform the reverse operation.

  • Distributes multiplication over addition.

    Selected expression

    After distributing

    Selecting anexpression to distribute multiplication over addition

    The expressionafter the distribution

    Use the Factor command to perform the reverse operation.

  • Transforms products and quotients involving radicals and exponents into a single expression raised to a power.

    Selected expression

    After distributing

    Transformingproducts and quotients involving radicals and exponents into a singleexpression raised to apower—example 1

    Example1 after distributing

    Transformingproducts and quotients involving radicals and exponents into a singleexpression raised to apower—example 2

    Example2 after distributing

    Transformingproductsand quotients involving radicals and exponents into a singleexpression raised to apower—example 3

    Example 3 afterdistributing

    Use the Simplify command to perform the reverse operation.

Distribute Over Equality

Performs the same operation on both sides of an equal sign.

Selected expression

After distributing

Selected expressionto distribute over equality—example 1

Example 1after distributing

Selectedexpression to distribute over equality—example 2

Example 2after distributing

Selectedexpression to distribute over equality—example 3

Example3 after distributing

Division pop-up menu

Long Division

Performs long division in a fraction that contains a polynomial numerator and denominator.

In the following example, you select an x—any x—before choosing Long Division. You select an x in the fraction of the first result and choose Long Division again to obtain the second result.

Before dividing

Before performinglong division in a fraction that contains a polynomial numeratorand denominator

Divided once

After performinglong division once in a fraction that contains a polynomial numeratorand denominator

Divided twice

After performinglong division twice in a fraction that contains a polynomial numeratorand denominator

Remove Division

Converts division to multiplication in a selected expression by changing positive exponents in a denominator to negative and negative exponents in a denominator to positive.

Selected expression

After removing division

Using RemoveDevision to convert division to multiplication in selected expression1

After convertingdivision to multiplication in selected expression 1

Using RemoveDevision to convert division to multiplication in selected expression2

After convertingdivision to multiplication in selected expression 2

To convert negative exponents to division operators, use the Remove Negative Powers command.

Remove Division 1 Level

Converts division to multiplication, as Remove Division does, but applies only to the first level of operators.

Selected expression

After removing division

Using RemoveDivision1 Level to convert division to multiplication in selectedexpression 1

After convertingdivision to multiplication in selected expression 1

Using RemoveDivision 1 Level to convert division to multiplication in selectedexpression 2

After convertingdivision to multiplication in selected expression 2

To convert the first level of negative exponents into division operators, use the Remove Negative Powers 1 Level command.

Remove Negative Powers

Converts negative exponents to positive in a selected expression by replacing multiplication with division and division with multiplication.

Selected expression

After removing negative powers

Using RemoveNegative Powers to convert negative exponents to positive in selectedexpression 1

After removingnegative powers from selected expression 1

Using RemoveNegative Powers to convert negative exponents to positive in selectedexpression 2

After removingnegative powers from selected expression 2

Remove Negative Powers 1 Level

Converts negative exponents to positive, as Remove Negative Powers does, but applies only to the first level. If the selected expression has no negative exponents at the first level, this command has no effect.

Selected expression

After removing negative powers

Using RemoveNegative Powers 1 Level to convert negative exponents to positivein selected expression 1

After removingnegative powers from selected expression 1

Using RemoveNegative Powers 1 Level to convert negative exponents to positivein selected expression 2

After removingnegative powers from selected expression 2 (no effect)

Evaluation pop-up menu

Number Crunch

Changes integers to floating-point numbers in a selected expression and then evaluates the expression.

Selected expression

After number crunch

Using NumberCrunch to change integers to floating-point numbers in selectedexpression1 and then evaluating the expression

After usingNumber Crunch on selected expression 1

Uusing NumberCrunch to change integers to floating-point numbers in selectedexpression2 and then evaluating the expression

After usingNumber Crunch on selected expression 2

Uusing NumberCrunch to change integers to floating-point numbers in selectedexpression3 and then evaluating the expression

After usingNumber Crunch on selected expression 3

Using NumberCrunch to change integers to floating-point numbers in selectedexpression4 and then evaluating the expression

After usingNumber Crunch on selected expression 4

Use the Show All Digits command to show up to 15 decimal places in a floating-point number.

Number Crunch displays NaN (Not a Number) for operations that result in undefined values. It displays Infinity for operations that result in a value too large to calculate. Small numbers can sometimes be evaluated to zero.

Selected expression

After number crunch

using NumberCrunch displays NaN (Notal Number) for operations that result inundefined values for expression 1

After usingNumber Crunch on expression 1

Using NumberCrunch displays NaN (Notal Number) for operations that result inundefined values for expression 2

After usingNumber Crunch on expression 2

Show All Digits

Shows the full internal accuracy of a floating-point number.

Selected number

After showing all digits

Selected numberto show all digits

After showingall digits

Evaluate

Evaluates the selected expression. The operations performed depend on the type of expression selected, as shown in the following examples:

  • Rewrites an expression raised to a power less than 20 as a product.

    Selected expression

    After evaluating

    Selectedexpression to raise to a powerless than 20 as a product

    After evaluatingthe expression with the raised power

  • Computes the factorial of an integer. If the result is too large to calculate, the result appears as Infinity.

    Selected expression

    After evaluating

    Selected expressionto compute the factorial of an integer

    After evaluatingthe expression with the factorial of an integer

  • Computes the determinant of a 1-by-1 or 2-by-2 matrix.

    Selected expression

    After evaluating

    Selectedexpression to compute the determinant of a matrix

    After evaluatingthe expression with the determinant of a matrix

  • Extracts a term from a sum or product.

    Selected expression

    After evaluating

    Selectedexpression to extract a term from a sum or product

    After evaluatingthe expression with a term from a sum or product

  • Evaluates a substitution just as the Evaluate Substitution command does.

  • Rewrites an Evaluate Between operator as a difference.

    Selected expression

    After evaluating

    Selected expressionto rewrite an Evaluate Between operator as a difference

    Resultafter evaluating the expression

  • Rewrites the logarithm of a product as a sum of logarithms and rewrites a logarithm of a power as a product.

    Selected expression

    After evaluating

    Selectedexpression to rewritethelogarithm of a product

    Result afterevaluating the expresison

    Selectedexpression to rewrite the logarithm of a product

    Result afterevaluating the expresison

  • Rewrites a logarithm to a base in terms of natural logarithms.

    Selected expression

    After evaluating

    Selected expressionto rewrite alogarithm to a base in terms of natural logarithms

    Result afterevaluating the expresison

  • Rewrites a choice function in terms of factorials.

    Selected expression

    After evaluating

    Selectedexpression to rewrite a choice function in terms of factorials

    Result afterevaluating the expresison

Evaluate Substitution

Performs a specified substitution and then simplifies the expression. When an Evaluate Between operator is selected, this command rewrites the expression as a difference.

Selected expression

After evaluating

Selected expressionto perform a specified substitution and then simplifying the expression

Resultafter evaluating the expresison

Selected expressionto perform a specified substitution and then simplifying the expression

Result afterevaluating the expresison

Evaluate Integrals

Rewrites a selected integral with a polynomial integrand. This command converts a definite integral into an indefinite integral evaluated between the upper and lower bounds. Use Evaluate Integrals several times to integrate a polynomial fully.

Selected expression

Selected expressionto rewrite a selected integral with a polynomial integrand

Evaluated once

Result afterevaluating the expression once

Evaluated twice

Result afterevaluating the expression twice

Evaluate Derivatives

Evaluates a selected derivative, applying the chain rule to complex expressions when necessary. This command evaluates a partial derivative only when all dependencies are explicitly written.

This command treats elements in a total derivative as if they depended on the variable of differentiation. Use the Evaluate command to expand an nth derivative before using Evaluate Derivatives to evaluate it.

Before

After

Before usingEvaluate Derivatives on an expression

After usingEvaluate Derivatives on an expression

Before usingEvaluate Derivatives on an expression

After usingEvaluate Derivatives on an expression

Evaluate Derivatives 1 Level

Evaluates only the first level of a selected derivative.

Before

After

Before usingEvaluate Derivatives on the first level of a selected derivative

After usingEvaluate Derivatives on the first level of a selected derivative

Rules pop-up menu

Use the Rules pop-up menu on the Functions page to store and apply rules that transform expressions.

For example, use Enter Rule to store a rule such as a = a + 3. Then use Apply Rule to substitute a + 3 for a in another expression.

Enter Rule

Stores a rule for substituting one expression for another. Select the expression you want to store as a rule before you choose Enter Rule. You can store only one rule at a time.

Designate Dummy

Designates a selected term to be a dummy variable. Use a dummy variable in a rule to substitute the expression on the right side of the rule for any variable, not just the variable explicitly named on the left. A dummy variable appears in boldface. For example, if you designate x in the rule x = a 2– as a dummy variable, you can substitute a 2– or x for any variable in an expression.

Select the term you want to be a dummy variable before you choose Designate Dummy. Then use the Apply Rule command to replace a selected expression with the expression assigned to the dummy variable.

Apply Rule

Substitutes one term or set of terms for another in a selected expression, using the rule stored with the Enter Rule command.

Rule entered

Rule enteredin the Enter Rule command

Selected expression

Selected expressionfor the Enter Rule command

After rule is applied

Result afterthe rule is applied

Before you apply a rule that contains a dummy variable, select the term you want the variable to replace. In the following example, x is the dummy variable in the rule.

Rule entered

Rule enteredin the Enter Rule command with a dummy variable

Before rule is applied

Selectedexpression for the Enter Rule command with a dummy variable

After rule is applied

Result afterthe rule is applied with a dummy variable

Other Rewrites pop-up menu

Simplify

Simplifies the selected expression. To evaluate fractions that involve infinity or division by zero, use the Number Crunch command instead of Simplify.

The operations performed depend on the type of expression selected, as shown in the following examples:

  • Performs integer arithmetic.

    Selected expression

    After simplifying

    Selected expressionto perform integer arithmetic with Simplify command

    Result aftersimplifying the expression

    Selected expressionto perform integer arithmetic with Simplify command

    Result aftersimplifying the expression 

    Selected expressionto perform integer arithmetic with Simplify command

    Result aftersimplifying the expression

    When the result is too large to calculate, it appears as Infinity.

  • Groups terms in a sum or product.

    Selected expression

    After simplifying

    Selected expressionto group terms in a sum or product with Simplify command

    Result aftersimplifying the expression

    Selected expressionto group terms in a sum or product with Simplify command

    Result aftersimplifying the expression

    Selectedexpression to group terms in a sum or product with Simplify command

    Result aftersimplifying the expression

  • Divides out common factors in a fraction.

    Selected expression

    After simplifying

    Selected expressionto divide out common factors in a fraction with Simplify command

    Result aftersimplifying the expression

    Selected expressionto divide out common factors in a fraction with Simplify command

    Result aftersimplifying the expression

    Use the Remove Negative Powers command to remove negative powers from the result.

  • Interprets the complex number i, represented by the Greek letter iota iota symbol.

    Selected expression

    After simplifying

    Selected expressionto interpret the complex number i with Simplify command

    Result aftersimplifying the expression

  • Distributes exponentiation across multiplication and division.

    Selected expression

    After simplifying

    Selected expressionto distribute exponentiation across multiplication with Simplifycommand

    Result aftersimplifying the expression

    Selectedexpression to distribute exponentiation across division with Simplifycommand

    Result aftersimplifying the expression

    Simplifying simplifyingroot of x square x produces resultof simplifying root of x square rather than mod x.

Simplify Some

Simplifies the selected expression, as the Simplify command does, but does not multiply fractions.

Selected expression

After simplifying

Using SimplifySome command with selected expression to simplify the selected expressionwithout multipling fractions

Result aftersimplifying the expression

Isolate Term

Isolates a selected expression on one side of the equal sign. This command does not combine terms or solve for the selected expression.

Selected expression

After isolating term

Using Isolateterm command to isolate a selected expression on one side of theequal sign

Result afterisolating the expression

Using Isolateterm command to isolate a selected expression on one side of theequal sign

Result afterisolating the expression

Using Isolateterm command to isolate a selected expression on one side of theequal sign

Result afterisolating the expression

Expand First Term

Expands the first term of a selected summation or product.

Selected expression

After expanding

Using ExpandFirst Term command to expand the first term of a selected summation

Result afterexpanding the expression

Using ExpandFirst Term command to expand the first term of a selected product

Result afterexpanding the expression

Expand All Terms

Expands all terms of a selected summation or product.

Selected expression

After expanding

Using ExpandAll Term command to expand terms of a selected summation

Result afterexpanding the expression

Using ExpandAll Term command to expand terms of a selected product

Result afterexpanding the expression


April 29, 2020

Legal Notices | Online Privacy Policy