Author structured content

Learn how you can author content in structured FrameMaker.

You can create structured document as structured XML documents or as .fm documents.

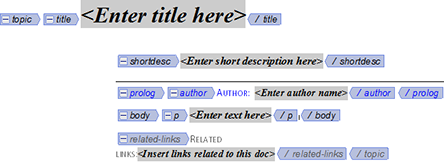
Structured authoring is based on elements. An element in a document contains text, image, or other elements. A structured document is made up of a hierarchy of elements.

Element hierarchy
Hierarchy ofelements in a structured document

The elements in a structured document depend on the structured application on which the document is based. A structured application defines the structural and formatting rules that are then used by the structured documents that use the application. For details, see Getting started with structured applications.

When you create a structured document in FrameMaker, you need to specify the structured application to use.

Create XML documents

You can create a blank XML document that is not based on a structured application.

You can also create an XML document that is based on an existing DTD (Document Type Definition).

You can create structured XML documents that are based on a Structured Application.

Create a blank XML

You can create a blank XML document from scratch. This document only contains a single root element (<ROOT>).

  1. Open the New XML dialog (File > New > XML).

  2. In the Other XML tab, select Empty XML and click OK.

  3. Open the Elements catalog to view the list of elements in the catalog (View > Pods > Element Catalog).

    Note: The Elements catalog contains a <TEXT> and a <ROOT> element.

In the WYSIWYG view, you can only add <ROOT> elements or text to the root elements.

In the XML view, you are able to add elements to the XML structure. For example, you can add a <SECTION> and a <P> element within a <ROOT> element:

p element added in XML view
Adding a p element in the XML view

In the WYSIWYG view, the Elements catalog now displays the <SECTION> and the <P> element. You can now add this element in the XML document. This document is not based on any structured application, so FrameMaker does not enforce any structural rules on the document. FrameMaker, however, ensures that the structure of the XML is maintained.

Create an XML based on a DTD

You can create a XML document based on an existing DTD (Document Type Definition).

  1. Save the following snippet into a text file.

    <!ELEMENT BOOK (CHAPTER+)> 
    <!ELEMENT CHAPTER (HEADLINE,BODY)> 
    <!ELEMENT HEADLINE (#PCDATA)>
    <!ELEMENT BODY (#PCDATA)> 
    <!ATTLIST CHAPTER AUTHOR CDATA #REQUIRED> 
  2. Save the text file with the .dtd extension.

  3. Open the New XML dialog (File > New > XML).

  4. In the Other XML tab, select DTD based XML and click OK.

  5. In the New XML dialog:

    Root Element

    Specify the name for the root element of the XML document. This is the topmost element in the hierarchy.

    Public ID

    A public ID in an XML document makes it portable to other computers.

    System ID

    Path to the DTD. This can be a path on your file system or a URL.

    Note: If you view the document in the XML view, the public ID and the System ID are stored in the DOCTTYPE declaration at the top of the file.
  6. Click OK.

    The <BODY>, <CHAPTER>, and <HEADLINE> elements defined in the DTD are available in the Elements catalog.

  7. Insert the <CHAPTER> element into the document.

    The Attributes for New Element dialog prompts you to specify the value of the AUTHOR attribute.

Create an XML based on a structured application

A structured application defines structural rules (using EDD or DTD), content formatting (using templates), read/write rules for the documents that are based on the application. FrameMaker provides a set of out-of-the-box structured applications that you can use to create documents. These applications are based on the following open standards:

DITA

Darwin Information Typing Architecture (DITA) provides an off-the-shelf DTD and set of rules designed specifically for writing online documentation, such as software help files. It defines a tag structure suited to authoring, producing, and delivering technical documentation. The types of tags in DITA include <topic>, <title>, <shortdesc>, <prolog>, <body>, and <concept>.

xDocBook

DocBook is also an open standard, designed for technical articles and documentation. DocBook provides a DTD for writing technical books and articles, with a structure that such forms imply. DocBook tags include <article>, <section>, <title>, <articleinfo>, and <pubdate>.

XHTML

Extensible Hypertext Markup Language (XHTML) is an extension of HTML that is based on XML and is designed to work with XML-based applications. It can be viewed, edited, and validated with standard XML tools. Using XHTML is an easy way to migrate from HTML to XML while retaining forward and backward compatibility of your content.

S1000D

For performance considerations, FrameMaker does not run the associated S1000D scripts at startup. Before creating document based on S1000D applications, you need to:

  1. Edit > Preferences to open the Preferences dialog.

  2. Go to the General > Launch tab and remove the following entries from the Don’t Load Startup Scripts field:

    S1000dUtilities and S1000Dmenu

  3. Click OK and restart FrameMaker.

Note: For more information about S1000D, see Adobe FrameMaker (2017 release) Application Pack for S1000D.

In addition, you can create your own structured application. You can then create documents based on this application.

  1. Choose File > New > XML to open the New XML dialog.

  2. Select a structured application from the Structured Applications tab or select a DITA structured application in the DITA tab.

    Note: The DITA structured applications are also available in the Structured Applications tab.
  3. Click OK.

The elements in the Elements catalog and the attributes defined for each element are based on the structured application on which the document is based.

Since structured documents enforce structural rules, the elements in the Elements catalog are based on the current context.

Save an XML document

When you save an XML document, if you prompted with the following dialog, you need to select the associated structured application.

Choose structured application
Selecting the associated structured applicationwhile saving an XML document

If you choose an incompatible structured application, the errors are logged to the message console.

When you open a structured document, the FrameMaker error console displays structural and other issues in a document, if any. This console also provides the following information about document issues:

  • Exact location of the issues within the document

  • Name of invalid elements, if any

Open an XML document

When you open an XML document, if you are prompted with the following dialog, you need to select the associated structured application.

Choose Structured Application
Selecting the associated Structured Applicationwhile opening an XML document

If you choose an incompatible structured application, the errors are logged to the error console. In addition, if the XML document hierarchy does not follow the structural rules defined in application, the document is displayed with errors in the Structure View.

Working with elements

Understand and work with various elements in structured authoring in FrameMaker, know elements catalog and learn to manage elements.

The elements in a structured document depend on the structured application on which the document is based. When you create a structured document, the Elements catalog for the document is populated with the elements defined in the application.

Elements catalog

You use the Elements catalog to view and work with the elements defined in the associated structured application.

To open the Elements catalog for the current document, choose View > Pods > Element Catalog.

Elements pod
Elements podin FrameMaker

To maintain the structure of the document, the Elements catalog displays only valid elements. This implies that the catalog displays only elements

  • defined in the associated structured application

  • valid at the current location

    For example, say a structured application defines a <table> element that contains <row> elements. The <row> element is displayed in the Elements catalog only if the insertion point is placed at the appropriate location in the <table> element.

    Elements catalog displaying valid row element
    Elements catalog displaying valid row element

Use the Elements catalog to:

Insert

Insert an element into the document hierarchy. See Insert an element.

Wrap

You can change the format of content within an existing element. For example, you can set one or more words in the paragraph to bold. Since structured documents are element-based, the structured application needs to enclose the word or words within an appropriate element. See Wrap an element

Change

You can choose to change the enclosing element in the hierarchy. For example, you can change a paragraph (<p>) to a note (<note>). See Change an element.

Options

You can customize the display of elements in the Elements catalog based on the options in the Set Available Elements dialog. See Configure the Elements catalog.

Insert an element

  1. Place the insertion point at a location in the document hierarchy.

  2. Select the required element in the Elements catalog.

  3. Click Insert to insert the element in the document hierarchy.

  4. If the Attributes for New Element dialog is displayed, specify the required attributes and click Insert Element.

    You can also click Insert Element and specify any attributes later. For details on attributes of elements in a document, see Working with attributes.

Note: Double-click an element in the dialog as a shortcut to insert.

If the element is text-based (paragraph or note), you can start typing into the document. FrameMaker ensures that the text is inserted within the element boundaries.

If the element is image-based, the file selection dialog box is displayed.

If the element is table-based, the Insert Table dialog box is displayed.

Note: The file selection or Insert Table dialog boxes display only if the functionality to display the dialog boxes is implemented in the structured application on which the current document is based.

To change how FrameMaker functions when you insert an element into the hierarchy, use the options in the New Element Options dialog (Element > New Element Options):

Always Prompt for Attribute Values

Display the Attributes for New Element dialog every time you insert an element into the document.

Prompt for Required Attribute Values

Display the dialog only if the associated structured application specifies mandatory attribute values for an element. If you do not specify the values, the structure of the document is broken. However, you can specify the values later.

Do Not Prompt for Attribute Values

Does not display the dialog when a new element is inserted in the hierarchy.

Allow Automatic Insertion of Children

If an element contains child elements, insert the child elements when the parent element is inserted.

The child elements inserted along with the parent depends on the rules defined in the associated structured application. For example, in a DITA topic, if you insert an ordered list (<ol>) element, one list item (<li>) element is also inserted. If you disable this option, an empty ordered list element is inserted.

Process AutoInsertion Rule Recursively

If an element contains descendant elements (child elements that also contain children), insert all the descendant elements when the parent element is inserted.

The descendent elements inserted along with the parent depends on the rules defined in the associated structured application. For example, in a DITA topic, if you insert an ordered list (ol) element, one list item (li) element is also inserted. Inside the list item element, a paragraph element is inserted. If you disable this option, an ordered list element is inserted along with the list item element.

Keyboard shortcut to insert an element

  1. Press Ctrl + 1 to display the Smart Catalog of valid elements.

  2. From the Smart Catalog select the required element and press Enter.

Wrap an element

  1. Select the content and click on the element (to wrap) in the Elements catalog.

  2. Click Wrap to enclose the selected content within the element boundaries.

Note: If you are sure that the selected element in the dialog is a format-based element, such as bold or italic, the double-click shortcut will work. However, if the element is not format-based, FrameMaker will try to insert the element (for example a table) at the selected location. You can verify the validity of the document structured in the Structure View.

Keyboard shortcut to wrap an element

  1. Select the element in the document to apply a format.

  2. Press Ctrl + 2 to display the Smart Catalog of valid elements.

  3. From the Smart Catalog select the required element and press Enter.

Change an element

  1. Select the element in the Structure View pod that you want to change.

  2. Select the element in the Elements catalog to which you want to change and click Change.

Note: FrameMaker will make the best effort to change the element.

Keyboard shortcut to change an element

  1. Select the element in the document to change.

  2. Press Ctrl + 3 to display the Smart Catalog of valid elements.

  3. From the Smart Catalog select the required element and press Enter.

Configure the Elements catalog

Click Options to open the dialog to perform the following tasks:

Valid Elements for Working Start to Finish

Displays only elements that are valid at the current insertion point in the hierarchy. The order of the elements in the pod is the same as they are defined in the structured application.

Choose this option if you plan to go through a document from start to finish and fill in the elements in their correct order and hierarchy.

Valid Elements for Working in Any Order

Displays only elements that are valid at the current insertion point in the hierarchy.

Choose this setting if you plan to build a valid document but not necessarily by working from start to finish. This is helpful if you do not have all the information you need.

Elements Allowed Anywhere in Parent

Displays all elements that are valid for the current parent.

Choose this option if you want more flexibility for filling in elements. You can insert elements that are invalid and correct the errors later.

All Elements

Displays all elements available in the Elements catalog defined in the structured application. However, the valid elements at any insertion point are preceded with a check mark.

Choose this option if you:

  • are not building a valid document

  • want flexibility and will correct errors later

  • are wrapping elements around contents

  • want to see what is available elsewhere in the document

Check mark against valid elements
Check mark against valid elements in the Elementspod

Customized List

Click Edit to open the Customized List of Available Element dialog. You can then choose the elements to show or hide. Use the Move Up and Move Down buttons to specify the order in which the elements display in the pod.

Choose this option to:

  • work with a pre-defined subset of the elements

  • display elements in a specific order

  • work with an element list that is static and not context specific

Important: This is a fixed list so the list does not also include elements valid at the current insertion point unless you have selected the elements when creating the list.
Show Element Description Tags

Displays the description of an element, in brackets, to the right of the element.

List After Other Valid Elements

Depending on the options selected above, the pod may contain elements that are invalid at the specified location. Choose this option to display valid elements first, followed by invalid elements.

Manage elements

When working with elements in a document, you use the Elements catalog to insert, wrap, and change the elements. However, you can also, merge multiple elements in a document, you can split a single element into multiple elements, and unwrap elements in a document.

Merge elements

You can merge multiple similar and contiguous elements in a document. For example, you can merge two or more p tags to include the contents into one p tag. You can merge multiple lists (ordered or unordered) to include the elements of the different lists into one list.

  1. To select multiple similar elements in the Structure View pod, click the first element then keeping the Shift key pressed, click the other elements that you want to merge.

    Note: The elements that you want to merge must be contiguous (placed next to each other in the document hierarchy).
  2. Choose Element > Merge.

    Alternatively, you can right-click the selection and choose Merge from the pop-up menu.

The multiple elements are merged into a single element of the same type.

Split an element

You can split a single element into two elements. For example, if a list contains multiple list items, you can split the list into two lists. The list items in the two new lists depends on the item you selected to split the list. Also, if a paragraph of text contains a piece of text that is wrapped in an element, you can split the paragraph at the wrapped element.

  1. Select the element at which point you want to split the parent.

    For example, select the list item at the point where you want to split a list.

    Or select the wrapping element at the point where you want to split a paragraph.

  2. Choose Element > Split.

    Alternatively, you can right-click the selection and choose Split from the pop-up menu.

The parent element is split at the selected child element.

Note: You cannot split the contents of a table. Also you need to ensure that the splitting of an element does not break the structure of the document.

Unwrap element text

If you can wrapped text inside an element (Wrap an element), you can choose to remove the text from with the wrapping element.

  1. Select the element that wraps text in a document.

  2. Choose Element > Unwrap.

    Alternatively, you can right-click the selection and choose Unwrap from the pop-up menu.

The wrapping element is removed from the text.

Banner text

Banner text in a document acts as a visual cue to working with the element in a document. For example, the following document based on the DITA topic structured application, displays banner text:

Banner text indicates what you should enter in various elements
Banner text actingas a visual cue to work with the element in a document

When you place the cursor on the banner text, the entire text is selected, you can then start typing and the banner text is replaced.

Show or hide banner text

You can choose to display or hide the banner text in a document. By default, the banner text is displayed.

To show or hide the banner text, from the View menu, choose Element Banner Text.

Remove banner text on delete

If you select the banner text in an element and press the Delete key, the banner text is removed. However, if you do not type any text in place of the banner text, as soon as you move to another element, the deleted banner text is displayed in the element.

You can choose to override this default behavior and ensure that the banner text, if deleted, does not reappear. The banner text will not reappear even if you close and reopen the document.

To ensure that the banner text remains deleted, you need to set the RedisplayBannerTextForemptyElements flag in the maker.ini file to OFF.

Banner text settings

Besides the RedisplayBannerTextForemptyElements flag described above, you can also configure banner text using the following settings in the maker.ini file:

Property

Description

BannerTextFontAngle

Angle of the banner text

BannerTextFontVariation

Any variation of the font width

BannerTextTextColor Banner text font color

BannerTextBKcolor

Banner text background color

Element boundaries

When you are working on a structured document in the WYSIWYG view, you can use the element boundaries as visual cues. An element boundary marks the beginning and end of an element in the WYSIWYG view. You can then use these boundaries as a visual cue to place the insertion point or select the text within a boundary. If you want to insert another element before or after an element in the document, you can place the insertion point before or after the opening or closing boundary of the element and Insert an element.

To place element boundaries as square brackets around the content, choose View > Element Boundaries.

Document with element boundaries in WYSIWYG view
Document with element boundariesin WYSIWYG view

To display the tag names of the element in the element boundaries, choose View > Element Boundaries (as Tags).

Document with element boundaries with tags in WYSIWYG view
Document withelement boundaries with tags in WYSIWYG view

Create output with banner text and element boundaries

Banner text and element boundaries are part of the WYSIWYG view of a FrameMaker document but are not included as part of the document content. For example, if you are working in an XML document, the banner text and element boundaries are not available in the XML View.

Save as PDF

Since banner text and element boundaries are part of the WYSIWYG view, they are included in the PDF output, if you use the Save As PDF functionality of FrameMaker.

Multi-Channel Publishing

Since banner text and element boundaries are not part of the document content, they are not included in any of the Multi-Channel publishing output formats.

Working with attributes

Learn how to work with various attributes in structured authoring in FrameMaker.

The elements in a structured document define the content in the document. You can also use element attributes to include additional information (metadata) to element. An attribute is a name-value pair associated with a specific element. For example, say the content elements in a structured application have an audience attribute. You might use this attribute to single-source content. You can set the attribute of elements to, say admin and enduser. Your publishing solution can then use these attributes to publish documents based on the attribute values of the elements. In this case, one document for administrators and another document for end users. A similar approach can be used for print and online output.

Note: The elements that display in the elements catalog are defined in the structured application on which the document is based. Similarly, attributes for each element are also defined in the associated structured application.

Set attribute values for elements

To set attribute values for elements

  1. Select an element in the document hierarchy.

  2. Open the Attributes dialog (Element > Edit Attributes).

  3. Click on an attribute in the dialog.

    At the bottom of the dialog, information about the attribute is displayed:

    Name

    The name of the attribute as it appears on the dialog.

    Type

    If the attribute value is optional or required. Also, the type of the value:

    String

    Enter a value for the attribute

    Choice

    Select a value from the available drop-down list.

    Default value

    Displays the default value, if any. Or specifies that no default value is required.

  4. For String type attributes, you can enter a text value.

    For Choice type attributes, you need to select a value from the value drop-down list.

View the attributes of an element

You can view the attribute values set for an element in the Attributes dialog (Element > Edit Attributes).

Alternatively, you can view the attribute values set for an element in the Structure View. To view the attribute values:

  1. Click the arrow sign to the right of the element in the Structure View.

    If one or more attribute value is set for the element, the list displays only those attributes. However, the arrow sign remains.

    Click the arrow sign again to display the complete list of attributes.

  2. If no attribute value is set for the element, the complete list of attributes is displayed.

Set attributes display options on element insertion

You can specify how the attributes display in the Structure View when an element is inserted in the document hierarchy. To specify the display options open the Attribute Display Options dialog (View > Attribute Display Options).

Required and Specified Attributes

The required and specified attributes of the element display when the element is inserted into the document.

All Attributes

All attributes of the element display when the element is inserted into the document.

No Attributes

No attributes of the element display when the element is inserted into the document.

Note: If you change the options in the Attribute Display Options dialog, the settings are applied to the currently opened document. For example, if you change the option from No Attributes to All Attributes, all the elements in the documents in the Structure View are expanded to display all the attributes.

Copy the attribute values from one element to another

You can copy all the attribute values set on one element to other elements in a document.

  1. In Structure View, right-click on the element from which you want to copy attribute values and choose Copy Attribute Values from the pop-up menu.

  2. Right-click on the element to which you want to copy the attribute values and choose Paste from the pop-up menu.

    To copy the attribute values to multiple elements, use the Shift + click to select multiple contiguous elements in the document and choose Edit > Paste.

Create equations using the Equations pod

Learn how you can create equations using the equations pod in FrameMaker.

You create an equation by inserting an equation element and then entering the mathematical expressions for the equation. To insert an element, you can use the Elements catalog. You can also use a New Equation command from the Equations pop-up menu in the Equations pod.

Note: The term “math element” refers to part of an expression, such as an operator. It is not a structural element.

You can use any equation element for both inline and display equations. Some documents also have a paragraph element defined that provides formatting properties for the display equations.

The format rules for an equation element suggest a set of font sizes for the equation: Small, Medium, or Large. You can change to a different set of font sizes. This change is not considered a format rule override. If you remove format rule overrides in the document, the equation does not return to its original font size.

Create an inline equation using an element

  1. Click in text where you want to insert the equation. If the text is in a rotated text frame, unrotate the frame first by pressing Esc g 0 (zero).

  2. Select an equation element in the Elements catalog and click Insert.

    The first math item that you enter replaces the question mark prompt of the new equation object.

    New equation object
    Creatingan inline equation using an element

  3. Enter the equation by typing numerals and other items or by clicking items on the Equations pod.

  4. Choose Shrink-Wrap Equation from the Equations pop-up menu in the pod.

    Shrink-wrapped frame around an inline equation
    Shrink-wrapping a frame aroundan inline equation

  5. If the equation seems too close to the text on either side, insert a space before or after the frame. FrameMaker treats a frame that contains an inline equation as a character and doesn’t provide extra space around it.

    If an inline equation is too tall for its line, perhaps turn off fixed line spacing for that paragraph.

Create a display equation using an element

  1. If your document has a paragraph element defined for formatting display equations, click where you want the equation paragraph. Select the paragraph element in the Elements catalog, and click Insert.

    This element sometimes defines space above and below the equation, alignment in the text column, and an autonumbered caption.

  2. Click in an empty paragraph element where you want to insert the equation.

  3. Select an equation element in the Elements catalog, and click Insert.

    New equation object
    Inserting new equation object

  4. Enter the equation.

  5. Choose Shrink-Wrap Equation from the Equations pop-up menu.

    Shrink-wrapped frame around a display equation
    Shrink-wrappingthe frame around a display equation

  6. If no equation element is available at the location that you want, perhaps you can use an invalid element. Do one of the following:

    • To use an element that is valid in another part of the document, insert the element in a valid location and then move it. You can also use the All Elements setting to make the element available everywhere and then insert the element where you want it.

    • To insert an invalid equation element with the default tag EQUATION, choose a New Equation command from the Equations pop-up menu in the Equations pod. The element has a default tag if no defined equation elements are available.

    After inserting the element, talk to your developer about making the element valid at this location.

Create an equation in an anchored frame element

To create an equation in an anchored frame element:

  1. Select an anchored frame or a graphic object in the frame.

  2. Choose a New Equation command from the Equations pop-up menu in the pod.

    The first math item you enter replaces the question mark prompt of the new equation object. The equation does not appear in the document structure.

    New equation object in a frame with graphic objects
    New equationobject in a frame with graphic objects

  3. Enter the equation.

Create equations using MathML

Understand how you can create equations using MathML style editor and structure editor in FrameMaker.

In addition to using the FrameMaker Equation pod to add equations to your documents, you can also use the MathFlow editor from Design Science to design complex mathematical equations. You can then add these equations to your FrameMaker documents. You also have the option to later modify these equations in the same MathFlow editor and publish documents containing MathML equations.

MathML equations are available for use in FrameMaker structured and unstructured documents.

Note: You can also insert MathML equations in DITA 1.3 topics (topic, task, concept, reference, and troubleshooting.) A new element named, “mathml” is created when you insert a MathML equation.

If you generate PDF output for a document containing MathML equations, a reader can search for the contents of these equations.

FrameMaker ships with a trail version of the following MathFlow editors:

For a feature comparison of the editors, see MathFlow Editors. Also, for the procedure to upgrade to the full version of the MathFlow editor, see Configure the installation settings.

See the video, MathML in unstructured documents.

Create and insert a MathML equation into a document

  1. On the Insert menu, choose MathML Equation.

  2. Create an equation in the MathFlow Editor window.

    For details on how to create equations in the MathFlow see the MathFlow help. You can launch the MathFlow help from within the MathFlow Editor window.

  3. To add the equation to the document, click OK.

The equation is inserted into the document.

Note: If you get the font initialization failed error message, see the KB article MathML font initial­ization error for resolution.

When the MathML equation is created, an image (.png) file is inserted in the document.

Note: FrameMaker does not support the .eps file format for MathML images.

Edit a MathML equation in a document

  1. Double-click the equation in the document or right-click on the equation and choose Edit with MathFlow.

  2. Edit the equation in the MathFlow Editor window.

  3. To update the equation in the document, click OK.

FrameMaker also supports the copy-paste and undo-redo operation on equations on MathML equations in a document.

Important: For structured (DITA 1.3) and unstructured document, you can insert MathML equations at any appropriate location of the document. However, in the case of your own structured documents, you will need to first define an element in the Elements catalog that supports this type of object. FrameMaker ships with a sample structured app (for DITA 1.2) that includes a MathML element. For details how to use this element, see Sample DITA MathML structured app.

Configure the MathFlow settings in FrameMaker

To configure MathML settings in FrameMaker, open the Preferences dialog and go to the MathML tab.

Configure the installation settings

FrameMaker ships with a 30 day trial version of Style and Structure editor of MathFlow from Design Science. You can obtain the full version of the Style or Structure editor from Design Science and integrate that with FrameMaker.

  1. After you have installed the full version of the Style or Structure editor, go to the MathFlow section of the MathML tab.

  2. The trial version that ships with FrameMaker is installed in the Adobe FrameMaker installation path. If you have installed MathFlow in an alternative path, specify that path.

  3. In the License File Path text box, specify the path to the license file and click OK.

You need to restart FrameMaker to ensure these changes take effect.

Note: The MathFlow 30 day trial period starts from the first time to invoke the editor. Not from the day you install the version of FrameMaker that includes the editor.

Format a MathML equation

You can update the formatting of a selected MathML equation in a document or you can change the preferences for all MathML equations. By default, the font size of the equations is set to 14 px. DPI for the images that FrameMaker inserts into a document for each equation defaults to 300 dpi. Also, you can choose to place an equation inline with the enclosing paragraph and you can apply the formatting of the enclosing paragraph to the equation.

To update the formatting of the current selected MathML equation:

  1. Select the MathML equation and choose Graphic > Object Properties.

    Or choose Graphic > Object Style Designer.

    These options are also available in the right-click menu.

  2. Update the formatting for the currently selected MathML equation in the MathML Equation Properties dialog.

    MathML Equation Properties dialog
    Formatting aMathML equation in MathML Equation Properties dialog

    DPI and Font
    Change the DPI and Font size settings.
    Inline
    Place the image inline with the enclosing paragraph.
    Apply Paragraph Style

    Apply the following formats of the enclosing paragraph to the equation:

    • Font

    • Font family

    • Background color

    • Foreground color

You can also apply these settings globally to all MathML equations created subsequently.

  1. Open the Preferences dialog (Edit > Preferences).

  2. In the MathFlow settings section of the MathML tab, change the equation settings.

These settings take effect immediately. So you do not need to restart FrameMaker.

Configure the MathFlow editor

The trial version of the MathFlow editor includes the Style and Structure editors. During this period, you can choose between either of these editors.

  1. To change the MathFlow editor, go to the Editor Type section of the MathML tab.

  2. Choose the required MathFlow editor and click OK.

You need to restart FrameMaker to ensure these changes take effect.

Note: When installing the full version of MathFlow, you need to choose between the Style and Structure editors. The MathFlow trial integration with FrameMaker includes both the editors. So you are recommended to use both these editors when trying out this feature.

Sample DITA MathML structured app

FrameMaker includes a sample DITA 1.2 MathML application named DITA_1.2_MathML_Sample. This <mathml> element has complete support for the MathML equations that are rendered by the MathFlow Style and Structure editors. To add MathML to a document, you can create a file based on this application and then use the MathML element in it.

See the video, MathML in structured documents.

Insert a MathML type element

  1. Choose File > New > XML.

  2. In the New XML dialog, go to the Structured Applications tab and choose DITA_1.2_MathML_Sample and click OK.

    A new document is created.

  3. Go to any part of the document where you want to insert a MathML equation.

    The MathML element, mathml, is available in the Elements catalog of the sample structured app.

    Note: A mathml element is available at any point in the document where a foreign element is available.
  4. Double-click the <mathml> element to insert it at the point in the document.

  5. Go to the XML view of the current document.

    The XML of the structured document contains a MathML node at the location where you inserted the MathML element.

    Note: Each element within the mathml node has an mml prefix. This prefix is used to avoid name conflicts with other elements used in the XML either from the Elements catalog of the structured app or from elements defined in the MathML structure.

You also have the option to edit the equation within the mathml node in the XML view. The changes can then be seen in the WSIYWIG view.

Note: If you try to publish a DITA_1.2_MathML_Sample document without inserting any MathML equation, then no output is generated for such document.

Change text direction

Learn how you can change direction of text in structured documents in FrameMaker.

The direction (LTR or RTL) of a structured document is defined in the associated structured application. If the structured application supports document direction, you can change the direction of the text in supported elements in the document.

To change the direction of the text of an element:

  1. Select the element in the Structure View.

  2. Open the Attributes editor and change the dir attribute.

FrameMaker provides out-of-the-box direction support for DITA topics (topic, task, concept, and reference). However, you can create your own structured application with direction support.

FrameMaker now includes a new direction property. That you can use in your structured application.

For example, you can create a read-write rule such as the following to specify that the FrameMaker direction property maps to the structured document dir attribute:

attribute "dir"
{
   is fm attribute;
   is fm property direction;
}
Note: If you change the direction attribute of an element in a non-DITA XML file, the direction of the contents does not immediately change. You will need to close and open the XML file to reflect the changes.

For more details on adding direction support to your own structured applications, see the FDK Programmer’s Guide.

Smart paste

Understand what smart paste is and how it helps to paste content from HTML, Word, Excel or Outlook as DITA content in FrameMaker.

FrameMaker allows you to paste HTML, Microsoft® Word, Microsoft® Excel, and Microsoft® Outlook content as DITA content. You can also create and configure XSLs for other FrameMaker structured applications. Using XSL, FrameMaker identifies the content while it is in the clipboard and structures it with the most appropriate hierarchy or sequence of elements. Then you can use the smart paste command to paste it to FrameMaker as DITA content.

Note: When you paste text of a specific direction (LTR or RTL) into a FrameMaker document, you need to ensure the text direction of the destination location (document, table, or paragraph) is set to the same direction.

The content you paste is structured according to an XSL specified in the relevant structured application. In FrameMaker, the XSLs are specified for the following DITA documents:

The XSL filename and path are specified using the Stylesheet element (Stylesheets > XSLTPreferences > SmartPaste > Stylesheet).

The smart paste XSLs for DITA are at:

$STRUCTDIR\xml\DITA_1.2\app\technicalContent\xslt\
The XSL added in the DITA_1.2_topic application for smart paste
Pasting HTML,MS® Word, MS® Excel, and MS® Outlook content as DITA content usingSmartPaste

Smart paste content in a DITA file

To smart paste content in a DITA file:

  1. Copy HTML, Microsoft® Word, Microsoft® Excel, or Microsoft® Outlook content.

  2. Place your cursor in one of the following types of DITA topics: topic, task, concept, or reference.

  3. Select Smart Paste from the context menu. (keyboard shortcut for Smart Paste: Esc+s+p+t)

    The pasted content is structured in appropriate elements that the structure allows.

Add smart paste XSL for a custom XML application

You can also create an XSL for smart pasting content for your custom Structured Application.

  1. Create an XSL appropriate for your EDD.

  2. Open the structapps.fm file.

  3. Under <Stylesheets>\<XSLTPreferences>, add the <SmartPaste> element and the following elements under it:

    1. <Stylesheet>: Path to the relevant XSL file.

    2. <StylesheetParameters>: This element has two child elements: <ParameterName> and <ParameterExpression>. See a DITA application in structapps.fm for details.

  4. Save the file.

  5. Select Structure > Application Definition > Read Application Definitions.

    Now you can use smart paste for an XML file based on your custom application.

Conditional text in XML

Know what is conditional text in XML in FrameMaker.

Structured FrameMaker allows you to export and import all conditional text (visible and hidden), along with information about the condition tags, such as their show/hide status, color, and style.

To preserve conditional text when saving and opening XML files, the XML file that FrameMaker generates contains the following:

In addition to normal text, support for conditional text in XML allows an entire table or table rows to be conditional. The same applies to footnotes, markers, and anchored graphics. Also, conditional text can be inside a text inset (XML or text).

OLE object support

Understand what is OLE object support in FrameMaker.

Structured FrameMaker supports round-tripping OLE objects, such as Visio objects and PowerPoint presentations. FrameMaker uses an XML Processing Instruction to handle the OLE object roundtripping.

You can control the OLE support using the DirectOLESupportInXml flag in the maker.ini file. To enable this feature, set the flag as On. The default value of this flag is Off; when this flag is Off, the OLE is saved as a .mif file.

Also, notice the following entries in the maker.ini file:
54="pptx"  OLE2 OLE2  OLE2     FMGFXImport "pptx" frame.exe ^.pptx 
55="VSD"  OLE2 OLE2  OLE2      FMGFXImport "VSD" frame.exe ^.vsd
These entries assign an automatic filetype filter to a file when it is imported. If necessary, you can add more filters (with respective OLEs).

To insert an OLE object:

  1. Select File > Import > Object. The Insert Object dialog appears.

  2. Navigate to the OLE object and select Create from File or Link.

  3. Click OK.

Note: You can also paste an OLE object using the Paste Special command and selecting Paste Link.

Whitespace handling

Know what is Whitespace handling in FrameMaker and the white space normalization standard.

When you open an XML file in FrameMaker’s WYSIWYG or Author view, the white spaces get normalized.

White space in XML is any character from the following set: space, tab and blank line/new line (except hard return). White space serves the following purposes:

  1. Visually format the document in its source form, such as for code, to denote semantic significance for the XML document.

  2. While using a text editor to edit XML, add spaces and line breaks into the element content model for better readability of the XML. This white space is not part of the information conveyed by the document and has no semantic significance for the XML application.

    Note: Default pretty printing is disabled in XML view for new and modified documents.

W3C has defined how white space in XML documents should White-space XML applications.

White-space normalization standard

FrameMaker uses the following rules for white space normalization according to the standard:

  1. XML ignores the first sequence of white space immediately after the opening tag and the last sequence of white space immediately before the closing tag.

  2. XML translates non-space characters (tab and new-line) into a space character and consolidates all multiple space characters into a single space.

  3. XML ignores the sequence of white space occurring between two elements if the parent element is defined to have element content.

  4. You can set the xml:space attribute of an element to preserve to retain the white spaces. For example, if we normalize the following (as appearing in the XML code view):

    Hickory[SPACE][SPACE][SPACE]dikory dock. 
    The mouse[TAB][SPACE]ran up the clock.

    It appears as (in WYSIWYG view):

    Hickory[SPACE]dikory dock. 
    The mouse[SPACE]ran up the clock.
  5. White space introduced through expansion of character references (for example Space =&#32; Tab= &#9; Newline=&#10;) is preserved on XML open. It is not considered white space per the above rules.

    For example, if FrameMaker normalizes the following (as appearing in the XML code view):

    Hickory&#32;&#32;&#32;dikory dock. 
    The mouse&#9;&#32;ran up the clock.

    After normalization, tt appears as the following (in WYSIWYG view):

    Hickory[SPACE][SPACE][SPACE]dikory dock. 
    The mouse[TAB][SPACE]ran up the clock.

Disable dropping whitespaces on import

To disable dropping whitespaces, set the property RemoveExtraWhiteSpacesOnXMLImport in maker.ini to FALSE.

Note: Use caution while editing an ini file.

Preserve whitespaces for specific elements

If the xml:space attribute is set to preserve (xml:space=”preserve”), then FrameMaker preserves all whitespaces. You can use this setting to preserve whitespaces for certain elements alone. This setting lets FrameMaker drop whitespaces for all other elements in the WYSIWYG and Author views.

Cross-references in XML

Know about creating Cross-references in XML in FrameMaker.

Structured FrameMaker allows you to generate and retain external cross-references when saving and opening XML files.

For example, if your FrameMaker file contains a cross-reference to another file, when you save your file in XML, FrameMaker generates tags representing the cross-reference along with information about the referenced file. When opening the same XML file, FrameMaker converts the cross-reference tags and the information they contain into a FrameMaker cross-reference.

FrameMaker supports a new attribute, srcfile, to retain external cross-reference information when generating XML documents.

When you export a file containing an external cross-reference to XML, the srcfile attribute of the cross-reference contains the name of the referenced file and the ID of the referenced element in the file.

Note: FrameMaker converts file paths in the generated XML to URIs.

Round trip table properties

Understand the Round trip table properties in Adobe FrameMaker.

Read-write rules handle the roundtripping of table formatting properties. New R/W rule mapping for the table cell properties is as follows:

Property

Non-CALS R/W Rule

CALS R/W Rule

Attribute Value

FP_CellAngle

cell angle

rotate

Integer

FP_CellOverrideFill

fill override

NA

Integer corresponding to FDK values

FP_CellUseOverrideFill

use fill override

NA

0 = False

Nonzero value = True

FP_CellOverrideShading

shading override

NA

Tag of FO_Color

FP_CellUseOverrideShading

shading override

NA

0 = False

Nonzero value = True

FP_CellOverrideBottomRuling

bottom ruling override

NA

Tag of FO_RulingFmt

FP_CellUseOverrideBRuling

bottom ruling override

NA

0 = False

Nonzero value = True

FP_CellOverrideLeftRuling

left ruling override

NA

Tag of FO_RulingFmt

FP_CellUseOverrideLRuling

left ruling override

NA

0 = False

Nonzero value = True

FP_CellOverrideRightRuling

right ruling override

NA

Tag of FO_RulingFmt

FP_CellUseOverrideRRuling

right ruling override

NA

0 = False

Nonzero value = True

FP_CellOverrideTopRuling

top ruling override

NA

Tag of FO_RulingFmt

FP_CellUseOverrideTRuling

top ruling override

NA

0 = False

Nonzero value = True

The read-write rule mapping for the table row properties is as follows:

Property

Non-CALS R/W Rule

CALS R/W Rule

Attribute Value

FP_RowKeepWithNext

keep with next

NA

0 = False

Nonzero value = True

FP_RowKeepWithPrev

keep with next

NA

0 = False

Nonzero value = True

FP_RowStart

row placement

NA

Integer corresponding to FDK values

In the following example, the prop5 attribute controls the bottom ruling of the table.

element "tablecell" 
{ 
is fm table cell element; 
attribute "prop1" is fm property right ruling override; 
attribute "prop2" is fm property use right ruling override; 
attribute "prop3" is fm property top ruling override; 
attribute "prop4" is fm property use top ruling override; 
attribute "prop5" is fm property bottom ruling override;  
attribute "prop6" is fm property use bottom ruling override; 
attribute "prop7" is fm property left ruling override; 
attribute "prop8" is fm property use left ruling override; 
attribute "prop9" is fm property cell angle; 
}

In the following example, the att1, att2, att3, and att4 attributes control the shading properties of the table cell:

element "tablecell2" 
{ 
is fm table cell element; 
attribute "att1" is fm property shading override; 
attribute "att2" is fm property use shading override; 
attribute "att3" is fm property bottom ruling override; 
attribute "att4" is fm property use bottom ruling override;  
attribute "att5" is fm property fill override; 
attribute "att6" is fm property use fill override; 
}

Round trip equations and anchored frames

Know the Round trip equations and anchored frames in FrameMaker.

You can roundtrip equations and anchored frames between Structured FrameMaker and XML. When you save a Structured FrameMaker document to XML, FrameMaker creates MIF files for the equations and anchored frames in the document. FrameMaker saves every anchored frame and equation in a different MIF file.

Note: To test this feature, you can use the ReportPlain XML application in the samplesStructapps.fm file at: <Fm_install_location>\Structure. This XML application has Equation and Frame elements.

You can change the type of files that are created for storing equations and anchored frames by specifying the following flag in the maker.ini file.

To specify the default vector format for xml, edit maker.ini (user area) file and add flag DefaultvectorformatforXMLexport flag. For example, the following sets default vector format for xml to CGM.

DefaultvectorformatforXMLexport=CGM

April 29, 2020

Legal Notices | Online Privacy Policy