Import graphics
You can import Adobe® Photoshop®, JPEG 2000, SVG, and Adobe® Illustrator® files into FrameMaker. Use File > Import > File to import graphics.
You can import a graphic into an anchored or unanchored graphic frame, into a rectangle that serves as a bounding box, or directly onto a page. If you want the graphic to move with text as you edit the document—for example, a graphic in longer documents or documents intended for HTML conversion—import the graphic into an anchored frame. If you want the graphic to stay where you place it—for example, if the graphic is the logo of a letterhead—import it onto the page and position it where you want it.
When you import a graphic, you can specify an import filter on the basis of the graphic’s format. When you import a bitmap image, you also specify its scale in dots per inch (dpi). The larger the dpi value, the smaller the graphic is on the page.
When you copy an image, or copy an image by reference, into a document, you can specify an HTTP path from which to import the graphic. The HTTP path is preserved in the XML roundtrip.
Using paths when importing by reference
Import a graphic
1)Specify the position of the graphic by doing one of the following:
•To place the imported graphic in a graphic frame, select an existing frame or place an insertion point in a text frame.
•To place the imported graphic directly on a page, click in the page margin.
•To use a drawn rectangle to define the size of the imported bitmap graphic, select an existing rectangle or draw one (do not select an anchored or unanchored frame). The graphic replaces the rectangle if the Fit in Selected Rectangle option is selected when you import; however, the aspect ratio of the graphic remains unchanged.
•To replace an existing graphic, select it.
2)Choose File > Import > File.
3)Select the graphic file you want to import, or specify the HTTP path of the graphic file to import, and the import method.
4)Click Import.
5)If the Unknown File Type dialog box appears when you click Import, select a file type in the scroll list and click Convert.
6)If you're importing a bitmap graphic, choose a scaling option or Fit in Selected Rectangle and click Set.
tip: For the best printed results, choose a dpi value that divides evenly (or leaves only a small remainder) into the resolution of your printer or typesetter. For the best screen representation, choose a dpi value that divides evenly into your screen resolution. (Windows screens typically have a resolution of 96 dpi.)
Import JPEG 2000 files
FrameMaker supports JPEG 2000, a version of the JPEG image-compression format.
When importing JPEG 2000 files, the filter converts the supported color modes of RGB, CMYK, Grayscale, and LAB and discards unsupported modes such as Index. The filter does not support 16-bit-per-channel images.
1)Choose File > Import > File.
2)Specify the file you want to import, and select Import By Reference or Copy Into Document.
3)Click Import. If the Unknown File Type dialog box appears, select JPC, J2C, JPX, JPF, J2K, or JP2, and click Convert.
Import SVG images
When importing a Scalable Vector Graphic (SVG), the SVG Import dialog box allows the user to select the rasterization quality of the image. By increasing the rasterization quality, printed and PDF versions are crisper; however, increasing the rasterization also increases the file size of the image, and it takes longer to import it.
FrameMaker prints Scalable Vector Graphic (SVG) images to PostScript printers by rendering the images as vector graphics using Encapsulated PostScript (EPS). For non-PostScript printers, FrameMaker uses the FrameImage format.
In addition, when you create a PDF file from a document containing an SVG image, the image appears as vectors, which improves its look in Acrobat and allows you to zoom in on it without pixelation.
note: Embedded SVG image animations are not functional in FrameMaker.
1)Choose File > Import > File.
2)Click Import.
3)Specify the file you want to import, and select Import By Reference or Copy Into Document.
4)Click Import.
5)In the Import SVG dialog box, specify the raster quality.
6)Specify image dimensions if they are different from the default size (you can’t scale proportionally in this dialog box).
7)Click Set.
note: Depending on the rasterization quality and available memory, it might take several minutes for the SVG image to import.
Import Adobe Photoshop files
FrameMaker supports importing of Adobe Photoshop (PSD) files. FrameMaker converts PSD files to native FrameImage format and converts the color space (Photoshop RGB, CMYK, LAB, Indexed, Grayscale, or Bitmap) to RGB.
You import PSD files the same way you import other types of graphics.
Import Adobe Illustrator files
When you import an Adobe Illustrator file into FrameMaker, the file is treated as a graphic, and only one page can be imported at a time. You can import it either by copy or by reference. Both process and spot colors can be displayed and printed.
note: Graphics that use transparency do not always print as expected to a PostScript Level 1 or non-PostScript printer. If you run FrameMaker using the -noapi option (./maker.exe -noapi), you won’t be able to import PDF files.
1)In FrameMaker, choose File > Import > File, and specify the Illustrator file you want to import.
2)Select either Import By Reference or Copy Into Document.
3)Click Import.
4)If the file has more than one page, specify the page number you want by typing the page number into the box.
5)Click Select.
Illustrator files are imported at the page size of the file. Resize the anchored frame to crop any white space from the image.
Locate missing graphics
When you open a document that contains graphic files imported by reference, FrameMaker looks for the referenced graphic files. If it can’t find a graphic file, it displays a dialog box.
Locate a graphic FrameMaker can’t find
1)When FrameMaker displays the Missing File dialog box, do one of the following:
•To find and display the graphic, use the scroll list to select it and click Update Document to Use New Path. FrameMaker continues to use the new path to try to find other missing files while opening the document. That way, if you move all your graphic files to a new location, you specify the new path only once.
•To skip the graphic file, click Skip This File. The skipped graphic appears as a gray rectangle in the document. The next time you open the document, FrameMaker tries to find the file again.
•To skip other graphic files if they can’t be found, click Ignore All Missing Files.
2)Click Continue.
View an imported graphic’s filename
1)Select the graphic that has been imported by reference and choose Graphics > Object Properties. The graphic’s name and path appear in the panel.
Insert imported graphic elements into structured documents
Some graphic elements are defined for you to import a graphic along with the element. When you insert the element, FrameMaker displays an import dialog box. The graphic you import appears in an anchored frame below the line with the anchor symbol, and the frame is automatically sized large enough for the graphic.
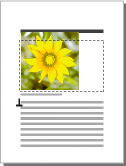
Imported graphic in an anchored frame
After inserting the element, you can edit the frame by moving it, resizing it, and so on.
You can also import a graphic into an existing anchored frame—for example, if you used a graphic element that placed an empty frame in the document.
When you import a graphic element, you can make it part of your document (imported by copying) or keep it linked to its original application or document (imported by reference).
For information on inserting an imported graphic that’s not an element (which you can do only in an unstructured flow), see Import graphics.
Insert an imported graphic element
1)Click where you want to anchor the frame.
2)Select an imported graphic element in the Element Catalog, and click Insert.
You can also use File > Import > File to insert an element. Select a file and click Import. If more than one imported graphic element is available, choose the one you want from the Element Tag pop-up menu in the next dialog box that appears.
3)Select the graphic file you want to import and specify whether to import by copying or by reference.
4)Click Import.
5)If the Unknown File Type dialog box appears, select a file type in the scroll list and click Convert.
6)If the graphic you’re importing is a bitmap, choose a scaling option from the pop-up menu and click Set. The larger the dpi (dots-per-inch) value, the smaller the graphic is on the page.
An anchored frame with the imported graphic appears in the document window, with an anchor symbol  at the insertion point. A bubble with the text snippet <GRAPHIC> appears in the Structure View.
If no imported graphic element is available at the location you want, you can use an invalid element. After inserting the element, talk to your developer about making the element valid at this location.
Change the scope of elements available in a structured document
Use an invalid imported graphic element
1)Do one of the following:
•To use an element that is valid in another part of the document, either insert the element in a valid location and then move it, or use the All Elements setting to make the element available everywhere and then insert the element where you want it.
•To insert an invalid element with the default tag GRAPHIC, use File > Import > File to import a graphic. (The element has a default tag if no defined imported graphic elements are available.)
Add an imported graphic to an existing anchored frame
1)Select the frame and use File > Import > File to import the graphic.