|

You
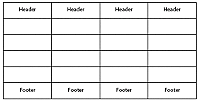
can create a simple table with a range of columns and rows with
or without header or footer rows. For example, here is a four-column,
four-row table with a header and footer row.
In the Object Library palette, click the Standard category
and select the Table object  . .
Click where you want the table to appear.
Note: If you selected Don’t Show This Again in the Insert Table dialog box, when you select the Table object in the Object Library palette, Designer automatically inserts a table with the same number of columns and rows that you inserted the last time you used the Insert Table dialog box.
In the Insert Table dialog box, enter the number of columns
and rows.
You can enter a maximum of 20 columns and 50 rows.
You can add more columns and rows after the table is created by
using the Insert commands in the Table menu.
(Optional) To add a header row, select Include Header Row
In Table.
(Optional) To add a footer row, select Include Footer Row
In Table.
Click OK.
|
|
|