|

A list is a group of related content that can be used in
a letter template as a single unit. Any kind of content can be added
to a list. Lists can also be nested. List modules can be specified
as: ORDERED: The order cannot be changed in the
Create Correspondence runtime.
OPEN: Users can change the order, or add modules to
the list
When creating a list, you can specify a type,
such as: Plain: No additional style formatting is applied
to the list.
Bulleted: A list formatted with a simple bullet.
Numbered: A numeric list with the choice of Standard
(1,2,...), Upper Roman (I, II, ...) and Lower Roman (i, ii,...)
numerals.
Lettered: An alphabetical list with the choice of
lowercase (a,b,...) and uppercase (A,B,...) letters.
Custom: You can create any Numbered/Lettered type
and prefix and suffix values of your choice.
Create a listOpen the Manage Assets user interface. If you have
installed the solution template and sample users, you can go to
the sample portal at http://<server>:<port>/lc/cm/manageassets.html
Log in using your appropriate credentials (such as user name as
tgoldman and password as your password).
Click New > List or select a list asset
and click Edit.
Specify the following information for the list:
Name: Type a unique name for the list asset. No two
assets (text, image, condition, or list) can have the same name.
Description: Type a description of the asset.
Category: Select a category for the list. The System
Administrator defines the categories.
Subcategory: Select a subcategory for the list. The
System Administrator defines the subcategories.
Data Dictionary: Select the data dictionary to which
to connect. Only assets that use the same data dictionary as the
letter, or assets that have no data dictionary assigned, can be
selected. Assigning a data dictionary to a list makes it easier
for the person creating a letter template to find the appropriate
list.
Comment: Enter an optional comment. If you are editing
an existing asset, you can use this box to indicate the reason for
the edit.
Click OK.
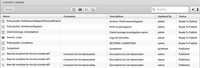
You can create new assets or select existing ones. The Content
Library pane on the right lists all of the existing resources available.
You can filter the resources you need by selecting the appropriate
filter (text, image, list, or condition). If no filter is selected,
then all resources are displayed. You can also search using the
basic and advance search features.
To add an asset to the list, select it in the Resource pane
and click Insert.
The asset is added to the List Items pane.
To change the order of the assets within the list, select
an asset in the List Assembly pane and use the arrows to move the
asset. When the user opens a letter template in the Create Correspondence
user interface, the content is assembled in the order you defined
here.
The user can select assets from the Content Library by clicking
the Library Access button.
To lock the order of the assets in the list so that the Claims
Adjustor cannot change the order, click Lock Order. If you
do not select this option, the Claims Adjustor can change the order
of the list items.
You can select the following options to specify how each
asset in the list behaves at runtime: Editable:
When this option is selected, the content can be edited in Create Correspondence
user interface.
Mandatory: When this option is selected, the content
is required in Create Correspondence user interface.
Preselected: When this option is selected, the content
is preselected in Create Correspondence user interface.
Skip bullets and numbering: When this option is selected,
the content skips bullets and numbering in Create Correspondence
user interface.
Indentation: You can change the indentation level
of each module/content selected as part of the List. Indentation
is specified in terms of Levels (starting with zero), such that
each level of indent corresponds to a padding of 36pts.
Compound: When selected, the compound numbering is
applied as a combination of the outer(parent) List's style and it's
own style. The compound numbering on this nested List is based on
the order in which this nested List appears in the outer List.
Ignore list style: If the Compound Numbering option
is deselected, then the option to Ignore List Style is enabled.
This selection ignores the nested List's own style and the numbering
continues from the outer List. Therefore the modules of the nested
list are treated as part of the outer list itself, disregarding
any styles specified on the nested List. If the Ignore List Style option
is deselected for a nested List, the modules that are part of that nested
List have their own numbering style.
To allow
the Claims Adjustor to search for and add more content into the
list, select the Library Access button. If you do not select
this option, the Claims Adjustor is limited to the content you have
defined for the list.
Click Done.
Styling with bullets and indentation in List ModulesThe List Module in the Correspondence Management Solution
provides the capability to define and group one or more Text/Image/Condition/List
modules. The set of modules that are selected as part of a List
appear in the final PDF document in the order in which they are
selected in the List. The types of lists you can create are:
Plain: no style.
Bulleted: using the bullet character.
Numbered: using a choice of standard numerals, as
well as both uppercase and lowercase roman numerals.
Lettered: using a choice of both uppercase and lowercase
letters.
Custom: any Numbered/Lettered type and prefix and
suffix values.
You can specify indentation on each module/content selected as
part of the List (and Target). Indentation is specified in terms
of Levels (defaults and starts with zero), and each level of indent
corresponds to a padding of 36pts.
You can specify an indentation on a nested List module that is
selected as part of a target/list. All modules within that List
are indented to the given level of indentation. If an indent is
specified both on the nested list and individual modules (within
that nested list), then the overall indentation applied on a module
would be the indentation on the list, plus the indentation on the
module.
When including a List within another numbered List, the numbering
across the modules of that nested list can be specified as compound
numbering such as the format 1.1., 1.2.,.. or 1.a., 1.b.,... and
so on. If the nested condition does not return a list, then the
compound numbering selection is ignored. The selection of 'Skip Style',
'Compound Numbering' and 'Ignore Style' is dependent on each other.
The 'Skip Style' can only be selected when 'Compound Numbering'
and 'Ignore Style' are deselected. The 'Compound Numbering' can
only be selected when 'Skip Style' and 'Ignore style' are deselected
and 'Ignore Style' can only be selected when 'Skip Style' and 'Compound
Numbering' are deselected. You can ignore the nested list's style
and the numbering continues from the outer list as if the modules
of the nested list were part of the outer list. If the Ignore List
Style option is also deselected for a nested List, the modules that
are part of that nested List would simply have their own numbering
style. The compound numbering on the nested list is based on the
order where the nested List appears in the outer list. For example,
if the nested list appears next to a Text Module which is the second Text
module in the outer list's selected content, then the numbering
applied on its module's would be of the form 2.a., 2.b.,... Similar
rules apply for other styling combination. When including a (nested)
'Plain/Bulleted' List with compound numbering selected, the compound
numbering style is applied as per the outer list's style. For example,
if the outer List has a style of 1, 2, 3.., the numbering on the
nested List would be 1.1., 1.2... If the outer List has a style
of A, B, C.. the numbering on the nested List would be A.A.., A.B....,
and so on.
|
|
|