Know what a mini TOC is in Adobe FrameMaker. Learn how to create, update or delete a mini TOC in FrameMaker.
Introduction
FrameMaker allows you to add a miniature table of contents (mini TOC) at a document level. This feature is currently supported for unstructured documents only. A mini TOC improves the readability and eases the navigation in a long document. The mini TOC feature eliminates the old manual technique of adding cross-references of each heading in your document to mimic a mini TOC. With this feature you can automatically create, sort, and insert a mini TOC at a specified location in your document.
You can change the formatting and style of a mini TOC in the same way as you would do for a regular TOC. For more information about formatting the mini TOC, see Update mini TOC. Once a mini TOC is included in a document, you can publish it in all supported output formats.
If you are working in a right-to-left (RTL) document, then the direction of the mini TOC is based on the direction of the document (). This implies that even if all the content in a document is based in a left-to-right (LTR) language, but the direction of the document is RTL, the direction of the mini TOC will also be RTL.
Create mini TOC
Open the document in which you want to insert a mini TOC.
Click where you want to insert the mini TOC.
Choose .
Move paragraph styles to the Include scroll list. To move an item between scroll lists, select the item and click an arrow, or double-click the item. To move all items from one scroll list to the other, Shift-click an arrow.
To have each entry in the generated list be linked to its source, select Create Hypertext Links. These links let you jump to the source of an entry by clicking the entry.
Click Set.
A new mini TOC is created and placed in your document. Once you save the document, FrameMaker creates new paragraph styles with suffix MTOC for all paragraph styles that were used to make up the mini TOC. Also, a new reference page (MTOC) is added in the document.
Update mini TOC
If you update a heading or change the formatting of the mini TOC from the reference page, the change is not reflected until you save or print the document, or manually update the mini TOC.
Make changes to the headings in your document.
Right-click on the mini TOC and select Update Mini TOC from the context menu.
Note: You can also choose .Click OK on the alert message.
If you want to update mini TOCs in all documents within a book, you can do so with a single click.
Open the book window and select the book file.
Choose .
Figure 1. Update Book dialog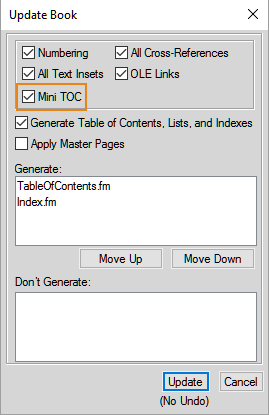
Select the Mini TOC option.
Click Update.
With this single book update operation, mini TOCs present in all document within the book are updated.
You can also update the look and feel of the mini TOC by changing the paragraph styles used to generate the mini TOC. You can simply open the paragraph style (with MTOC suffix) in the paragraph designer, make the required changes, and update the paragraph style definition. You can also use the reference page (MTOC) to make the required changes.
If you do not want the page numbers in the mini TOC, then you can use any one of the following two approaches:
Remove page numbers from all output formats
Open the reference page and remove all occurrences of
<$pagenum>variable from the MTOC page. Once you have removed the variable, save the document and update the mini TOC. The page numbers would not be shown in the source document as well as in any published output.Remove page numbers from output formats supported by Publish panel
Create a new character style and apply it on all occurrences of
<$pagenum>variable in the MTOC page. Open the Publish Settings (in ), open the Style Mapping tab, and select the character style from the list. Enable the Exclude From Output option for the character style that you have applied on the<$pagenum>variable. The page numbers would be visible in the source document, but they will not be published in any output format supported by the Publish panel.
For more information about the various output formats supported by Publish panel, see Multichannel publishing.
Delete mini TOC
To delete a mini TOC, right-click on the mini TOC and select Delete Mini TOC from the context menu.
Alternatively, choose to delete the mini TOC.