|

After creating a curriculum, you can make
many changes such as assigning prerequisites, assigning test-outs,
and editing completion requirements. Adobe recommends using either
test-outs or prerequisites, but not both, to create learning paths.
Using both is possible, but it can be time-consuming and complicated
to test all of the possible workflows learners may encounter.
Assign prerequisites to an item
Assigning
prerequisites enforces learner access to items in a specific sequence.
A folder cannot be set as a prerequisite. Also, external training
items should not be set as Required because Adobe Connect cannot
automatically track external items.
Note:
Avoid creating redundant
prerequisites; they are confusing for learners and may cause performance
issues on your Adobe Connect server.
-
If you’re not on the Curriculum Information page
for the curriculum that you want to modify, click the Training tab
and browse to the curriculum. Select the curriculum name to open
the Curriculum Information page.
-
In the list of curriculum items, click the name of the
item or folder that requires a prerequisite. This procedure refers
to this item as the
selected item
.
-
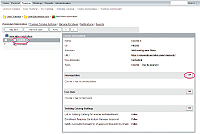
In the Prerequisites area, click Edit.
View full size graphic

In the Course Information Prerequisites area, click Edit to
create a specific learning path.
-
The Select Prerequisite area lists the items in the curriculum.
Use the Options pop‑up menu next to an item to specify the type
of prerequisite:
-
Suggested
-
Indicates that the prerequisite is optional. Users receive
a message requesting that they take the prerequisite before taking
the selected item.
-
Required
-
Indicates that the prerequisite must be completed successfully,
not just completed, before taking the selected item. Do not assign
Required status to external content. Adobe Connect cannot verify
completion of external content, such as a website URL.
-
Hidden
-
Indicates that the selected item appears on the enrollment
page only after the user completes the prerequisite.
-
When you finish selecting prerequisites, click Save.
Assign test-outs for an item
You can design the
curriculum so that enrollees are not required to take an item if
they pass a related test-out item. Folders cannot be configured
as test-out items or linked as selected items. Always use a specific
course or meeting, not a folder, as a test-out or selected item
for any other learning object.
Here are tips for creating
test-outs:
-
Carefully choose between the Optional, Blocked,
and Hidden options. Your learners could have a very different path
and learning experience depending on which option you select for
a test-out.
-
You cannot assign a test-out for the first item in a curriculum.
-
Do not use chained test-outs. An example of a chained test-out
is setting item 1 as a test-out for item 2 and then setting item
2 as a test-out for item 3.
-
If you’re not on the Curriculum Information page
for the curriculum that you want to modify, click the Training tab
and browse to the curriculum. Select the curriculum name to open
the Curriculum Information page.
-
In the list of items, click the name of the item that
requires a test-out item. This procedure refers to this item as
the
selected item
.
-
In the Test-Outs area, click Edit.
-
The Select Test-Outs area lists items in the curriculum.
Use the pop‑up menu by an item to designate it as a test-out for
the selected item, using the following criteria:
-
Blocked
-
Indicates that if the enrollee passes the test-out item,
the selected item is unavailable to the enrollee. If the enrollee
fails the test-out item, the selected item becomes available.
-
Optional
-
Indicates that if the enrollee passes the test-out item,
the selected item is no longer required to complete the curriculum.
-
Hidden
-
Indicates that if the enrollee passes the test-out item,
the selected item is hidden from the enrollee. If the enrollee fails
the test-out item, the test-out item is visible and available for
the enrollee to take.
-
When you finish specifying test-out items, click Save.
Edit completion requirements
You can designate an item as
required
,
which specifies that an enrollee must successfully complete the
item to complete the curriculum. By default, all items are required,
but you can set individual items as optional or required without impacting
other items.
-
If you’re not on the Curriculum Information page
for the curriculum that you want to modify, click the Training tab
and browse to the curriculum. Select the curriculum name to open
the Curriculum Information page.
-
In the Completion Requirements area, click Edit.
-
For each item that you want to specify as required, select
Required from the pop‑up menu.
-
When you finish specifying required items, click Save.
|
|
|