|

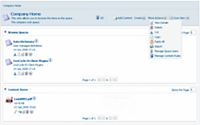
The default LiveCycle Contentspace (Deprecated) user interface
is displayed with a set of actions that you select from menus. You
may want to change the icons to suit your organization. The icons
are GIF files that are 16x16 pixels in dimension. The 16x16 pixel
sized images are used as part of the custom menu and list of icons
that you see for a piece of content as shown in the following illustration.
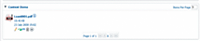
These icons are used to represent actions that you perform on
a space or piece of content in Contentspace. You can customize the
image that is used for an action. This customization is useful if
you want to use images that your users are familiar with. For example,
to view a document for file, you may want to use a glasses icon as
shown in the following illustration instead of the provided icon
for Contentspace:
Customizing icons for actions
To customize any of the action icons in LiveCycle Contentspace,
you must first determine the action that you want to customize.
An easy way to determine the action associated with the icon you
want to change is to log on to Contentspace, right-click the icon
for the action you want to customize, and then find the XML code
that is used to customize it.
The following procedure customizes the View Details icon for
a space.
To find and replace images:
-
Determine the action
that you are customizing by performing the following steps:
-
Log in to Contentspace.
-
Locate the icon for the action you want to change.
-
Right-click the image for the icon, and in the Properties
dialog box, note the name of the icon for the next step.
-
Go to the root level in your development environment, and
copy your new 16x16 image to the images/icons folder.
-
From the root level in your development environment, go to
WEB-INF/classes/alfresco.
-
Open web-client-config-actions.xml file in an editor and
search for the name of the image you want to change from step <HyperText>1.
Note:
You may have an image for an action used in more
than one place. Based on the name of the action, you can determine
what the action is used for.
Some of Content Services (deprecated) actions
are also available in the following files. If the action you want
to change the icon for is in one of these files, change the name of
the icon in the file that you found them in and proceed to the last
step in this step. You can use the next step as guide for changing
your XML code.
-
WEB-INF/classes/alfresco/module/datacapture/webclient/web-client-config-datacapture.xml
-
WEB-INF/classes/alfresco/module/events/webclient/web-client-config-eventaction.xml
-
WEB-INF/classes/alfresco/module/genericservice/webclient/web-client-config-genericservice-action.xml
-
WEB-INF/classes/alfresco/module/nativeref/webclient/web-client-config-nativeref.xml
-
WEB-INF/classes/alfresco/module/rightsmanagement-action/webclient/web-client-config-rm-action.xml
-
WEB-INF/classes/alfresco/module/transformation/webclient/web-client-config-trf-action.xml
-
Perform the following steps only if the action you are modifying
is in the WEB-INF/classes/alfresco/web-client-config-actions.xml
file:
-
Select and copy the XML block from the opening
<action>
tag
to the closing
</action>
tag for the action.
-
From root level in your development environment, go to /WEB-INF/classes/alfresco/extension
folder and open web-client-config-custom.xml in an editor.
-
Before the closing
</alfresco-config>
tag
at the end of the file, type the following code below:
            <config>
                <actions>

                </actions>
            </config>
-
Between the opening
<actions>
and
closing
</actions>
tag that you added in
the previous step, paste the code for the XML code that you copied from
the web-client-config-actions.xml.
        <config>
            <actions>
                <action id="details_space">
                    <label-id>view_details</label-id>
                    <image>/images/icons/View_details.gif</image>
                    <action-listener>#{BrowseBean.setupSpaceAction}
                    </action-listener>
                    <action>dialog:showSpaceDetails</action>
                    <params>
                        <param name="id">#{actionContext.id}</param>
                    </params>
                </action>
            </actions>
        </config>
-
Between the
<image>
and
</image>
tags
you added in the previous step, change the name to the name of the
image you added earlier in this procedure.
        <config>
            <actions>
                <action id="details_space">
                    <label-id>view_details</label-id>
                    <image>/images/icons/customview16.gif</image>
                    <action-listener>#{BrowseBean.setupSpaceAction}
                    </action-listener>
                    <action>dialog:showSpaceDetails</action>
                    <params>
                        <param name="id">#{actionContext.id}</param>
                    </params>
                </action>
            </actions>
        </config>
-
Save the file.
|
|
|