|

After
you create a table using subforms, you can insert a table into a
table cell. For example, you can show two independent tables side
by side (in separate cells) or nest tabular material.
Before you insert a table in to a cell, you must wrap the cell
in a subform.
-
Start the nested table:
-
Select the cell
(in the table that was created using subforms) where the nested
subform will go.
-
Select Insert > Wrap In Subform.
-
Type a name for the subform in the Name box in the Binding
tab of the Object palette. For example, type
Wrapper
.
-
Create the nested table.
-
Right-click the cell
again and select Wrap In Subform, or drag the Subform object from
the Object Library palette to the cell.
-
Type a name for the subform in the Name box in the Binding
tab of the Object palette. For example, type
NestedTable
.
-
In the Accessibility palette, select Table from the Subform
Role list.
-
Right-click the cell (TextField1 in the example) and select
Delete.
-
Create a header row for the nested table:
-
Drag
another Subform object into the NestedTable subform.
-
Set the width and height of the header row.
-
Type a name for the subform in the Name box in the Binding
tab of the Object palette. For example, type
NestedRow1
.
-
In the Accessibility palette, select Table Header from the
Subform Role list.
Note:
A subform that is inserted into a parent subform that is set to Flowed may not appear in the correct position in the Hierarchy palette.
-
Add text for the column headers:
-
In the Object
Library palette, click the Standard category and drag two Text objects
into NestedRow1.
-
Select one of the text objects and type a name for the text
object. For example, type
Description
.
-
Select the second text object and type a name for the text
object. For example, type
Cost
.
-
Select the two Text objects in NestedRow1 and select Layout
> Group.
-
Create a body row for the nested table:
-
Drag
another Subform object into the NestedTable subform.
-
Set the width and height of the body row.
-
Type a name for the subform in the Name box in the Binding
tab of the Object palette. For example, type
NestedRow2
.
-
In the Accessibility palette, select Body Row from the Subform
Role list.
-
In the Object Library palette, click the Standard category
and drag three field objects into NestedRow2 (such as Text Fields).
-
Set the parts of the table to Flowed:
-
Select
the NestedTable subform and, click the Subform tab of the Object palette,
and select Flowed from the Type list.
-
Select the subform that contains the NestedTable subform
called (untitled Subform) (page 1), click the Subform tab of the
Object palette, and select Flowed from the Type list.
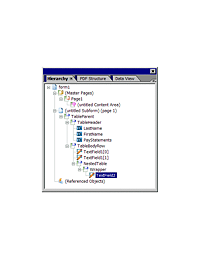
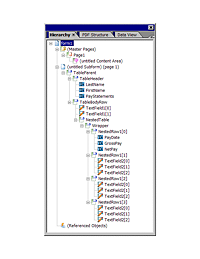
The
Hierarchy palette could look like this illustration.
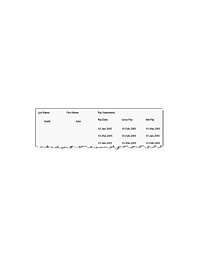
The
form could look like this in the Preview PDF tab.
|
|
|