|

Drop-down lists and list boxes
provide users with a way to select a single choice from a list.
The choices are represented by text. You define the list of default options.
Drop-down list
|
List box
|
|---|
Only one choice is visible until the user
opens the list.
|
Any number of options can be visible at
once. When the display area of the list box is too small to display
all of the items in the list, a vertical scroll bar is displayed.
|
Accepts custom user entries.
|
Does not accept custom user entries.
|
Unlike check boxes and radio buttons, drop-down lists and list
boxes support variable sizes of data and variable sets of choices.
Clicking the drop-down arrow button displays the full set of choices,
and clicking a choice in the list selects a single item. When the
layout of the form prohibits the use of check boxes or radio buttons,
consider using a list box to present options.
After you add a drop-down list or list box to the form design,
you can edit the caption text and manipulate the object’s properties
in the Field, Value, and Binding tabs of the Object palette. You
can define these properties:
 You can dynamically populate a drop-down list
or list box with values from a data source. To specify the list of options for a drop-down list or list boxYou can add a list
of options to a drop-down list or list box by using either of these two
ways:
By copying the data from Microsoft Excel or a text editor
Individually by using the Add Item button
The data
that you are copying must be in tab-delimited format. You can copy and
paste text or a text and value pair. If you choose to paste text,
you place the text in a single column. If you want to paste a text
and value pair, place the text in one column and the value in a
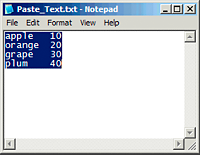
second column. Here are examples of text and value pairs in Excel
and Notepad. Always place the list items in the first column.
You can dynamically populate a drop-down list with
values from a data source.
To add items from Excel or text editorSelect the drop-down list or list box.
Do one of the following actions:
In Excel,
copy the spreadsheet cells that contain the text (or text and value pair)
you want in the drop-down list or list box.
In a text editor, copy the text (or text and value pair)
you want in the drop-down list or list box.
In the Object palette, click the Field tab, and then click
Paste  . .
You can do any of the following actions:
To
reorder an item in the list, select the item and click Move Up  or
Move Down or
Move Down  . .
To delete an item in the list, select the item and click
Delete Item  . .
To sort the list in ascending order, select Sort Ascending  . .
To sort the list in descending order, select Sort Descending  . .
For a drop-down list only, to enable users to specify an
item that does not appear in the list, select the Allow Custom Text
Entry option.
To add items individuallyIn the Object palette, click the Field tab, and
do one of the following actions:
Type the text corresponding to the first option and press
Enter.
Type the text corresponding to the next option and press
Enter.
Repeat step 3 for each option that you want to add to the
list.
You can do any of the following actions:
To
reorder an item in the list, select the item and click Move Up or
Move Down .
To delete an item in the list, select the item and click
Delete Item .
To sort the list in ascending order, select Sort Ascending .
To sort the list in descending order, select Sort Descending .
For a drop-down list only, to enable users to specify an
item that does not appear in the list, select the Allow Custom Text
Entry option.
To define the behavior of a drop-down list or list boxIn the Object palette,
in the Value tab. From the Type list, select one of these options:
To allow users to choose to enter data or not, select User
Entered - Optional.
To prompt users to enter data and make the field recommended,
select User Entered - Recommended and type a custom message in the
Empty Message box.
To prompt users to enter data and make the field required,
select User Entered - Required and type a custom message in the
Empty Message box.
To make the field read only and display a data value that
is calculated and displayed through an attached script, select Calculated
- Read Only. Users will not be able to edit the calculated value.
To make the field editable and display a data value that
is calculated and displayed through an attached script, select Calculated
- User Can Override. Users can edit the value if the calculation
script has been written to accept the input. If a user does edit
the calculated value, the custom message you specify in the Override
Message box appears.
To make the field read only and display a data value that
is merged or calculated and displayed at run time, select Read Only.
Users will not be able to edit the value.
If the value is recommended or required, type a prompt into
the Empty Message box.
If the value will be calculated, attach the calculation script
to the object using the Script Editor.
(Optional) If a calculated value can be overridden, type
a message into the Override Message box.
To display a default selection in the drop-down list or list boxYou can set a default
selection for the drop-down list or list box. You must first specify
the list of options for a list.
In the Object palette, click the Value tab.
Select the default option from the Default list.
Note: The Default list is not available when the Type
option is set to Calculated - Read Only or Calculated - User Can
Override.
The options in the Default list correspond to
the list items in the Field tab of the Object palette.
To define custom data-binding properties for a drop-down list or list boxBinding
options enable you to build a form that captures data for enterprise infrastructures
or use an external data source to populate a form at run time. Set data-binding
properties in the Binding tab of the Object palette.
Select the drop-down list or list box.
Enable the form to connect to the data source when the form
is opened.
Bind the list to its corresponding data node. For information
about how to bind objects to a data source, see Binding fields to a data source.
To specify list item values for a drop-down list or list boxEach item in
a list is associated with a data value that represents the list
item. By default, the values match the text for the list item. You
can change these values, for example, to match existing values in
a data source.
When you choose to specify item values for the first time, the
values will change to integer values starting with “1” for the first
item. If you deselect the Specify Item Values option, the values
will revert to match the list item text.
You can dynamically populate a list box with
values from a data source. Select the drop-down list or list box object.
In the Object palette, click the Binding tab.
Select Specify Item Values.
Double-click the first value that you want to change.
Type the new value.
Press Enter to change the next value or double-click any
other value to change it.
|
|
|


 .
.
