|

Designer includes some predefined custom objects that you
can use to quickly create forms. For example, in this tutorial,
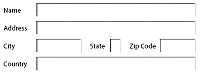
we will use the Address Block custom library object to insert several
fields at once.
In the Object Library palette, click the Custom category
and then drag the Address Block field object  onto
the form under the Purchase Order title. onto
the form under the Purchase Order title.
Rename the Name text field to Ordered By.
In the Object Library palette, click the Standard category
and then drag the Text Field object  onto
the form under the Country field. onto
the form under the Country field.
Name the Text Field object Phone Number.
Add another Text Field object for Fax Number.
Add another Text Field object onto the form under the fax
number.
Name the Text Field object Contact Name.
To be able to insert a second address block beside this one,
drag to select all the fields created in steps 1 to 7 and reduce
the width of them by about half an inch using the sizing handle
on the right side.
Copy and paste the selected fields next to the Ordered By
address block.
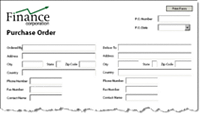
Rename the second Ordered By field to Deliver To.
Your form should look like this now.
You can preview your form with the Preview PDF tab again.
 To improve the appearance of the form, you can
change the look of the sunken box fields. To do this, select the
object, and then in the Object palette, click the Field tab and
select Underlined from the Appearance list. Click to continue: Adding the purchase order details
|
|
|