|

Create the form design by using the New Form wizard in
Workbench. After you create the form design, save it to your LiveCycle
application. The wizard configures the form for use with Workspace
by completing the following tasks:
Sets the location to store the form in your LiveCycle
application.
Imports a data schema that you can use to bind data to.
Adds form objects to the form design to enable it for use
with Workspace.
Specifies to submit data using XML Data Package (XDP) or
a PDF document.
Starts Designer to complete the creation of the form design.
Create the form designEnsure that you are logged in
to Workbench.
Select File >New > Form. The
New Form wizard appears.
In the New Form pane, complete these steps:
In the Name box, type PreLoanForm to
replace the default text.
In the Description box, type Preapproval loan form.
In the pane below the Location box, select FirstApp > FirstApp/1.0,
and click Next.
In the Specify Form Data Model pane, complete these steps:
Select the Import a data model option.
Beside the Import Data Model box, click Browse.
In the Open dialog box, navigate to the location on your
computer where you extracted the tutorial assets, select firstAppLoanSchema.xsd,
and then click Open.
In the bottommost pane, below the Enter Or Select The Parent
Folder box, select FirstApp > FirstApp/1.0, and
then click Next.
In the Form Usage pane, accept the following default settings:
The From LiveCycle Workspace option is selected.
For the Submit Adobe Acrobat/Reader Form As option,
ensure xdp is selected in the list.
Click Next. The Opening Designer dialog box appears,
which starts Designer.
In the New Form Assistant wizard, complete these steps:
In the Getting Started pane, select the Use a blank form option,
and click Next.
In the Document Setup pane, use the defaults (Page Size:
Default, Orientation: Portrait, and Number Of Pages:1) and click Next.
In the Summary pane, ensure that xdp is selected in
the Form Type list, and then click Finish.
Designer
opens the form design that includes the Submit button. The following
illustration identifies areas in the Designer user interface that
are used in this tutorial:
View full size graphic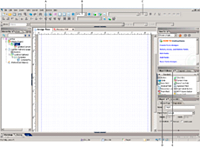 - A.
- Design View
- B.
- Change size of Design View
- C.
- Modify font size
- D.
- Object palette
- E.
- Object Library palette
Save the form design In Designer, select File > Save. In Designer, select File > Save.
Save
your changes periodically and check in your assets. Ensure that
you check out the form design when you want to make additional changes.
You
have finished using the Form wizard to create a form design enabled
for Workspace.
|
|
|

