|

Create tasks to involve users in processes.
Tasks are assigned to users and include a user interface (a form
or a Guide) that can be populated with data. When users are assigned
a task, they are provided with the form or Guide to complete and submit.
The following items can be added to process diagrams to generate
tasks and involve users:
- Workspace start point:
- Enables users to open forms or Guides in the Start Process
pages of Workspace.
- Assign Task operation:
- Creates a task that is assigned to a single user or user group.
- Assign Multiple Tasks operation:
- Creates tasks for multiple users so that they can simultaneously
review information. The results of the reviews are stored in a Task
Result collection.
After you add these items, specify values
for presentation properties, such as the form and action profile
to use. For Assign Task and Assign Multiple Tasks operations, also
specify who is assigned the tasks that are generated. Workspace
start point tasks are automatically assigned to the user who opened
the form or Guide from the Start Process page.
When users
submit forms and Guides to complete their tasks, the corresponding Workspace
start point, Assign Task operation, or Assign Multiple Tasks operation is
also complete. Data that populated the form or Guide is submitted
to the LiveCycle Server. Data about the task is also submitted,
such as who completed the task and which action was selected to
complete the task.
For information about adding and configuring
Workspace start points, see Starting processes using start points.
Add an Assign Task or Assign Multiple Tasks operation: Drag the Assign Task operation  or
Assign Multiple Task operation  to
the process diagram. After you drag the operation to the process
diagram, you can complete the following tasks:
Assigning tasks to usersFor each Assign Task operation
and Assign Multiple Tasks operation that you add to the process
diagram, identify who is assigned the task:
For Assign Task operations, specify a single user or
a group.
For Assign Multiple Tasks operations, specify multiple users.
You can use the following methods to identify a user:
- Specific user:
- Search for the LiveCycle user who always fulfills the role
for this step in the process. If the user who fulfills the role
changes, change the process accordingly. This method is useful for
testing processes in the development environment. In the production
environment, assign tasks based on roles or use XPath expressions.
- User list:
- (Assign Multiple Tasks operations only) Select a user list
that has been created.
- Group:
- Assign the generated task to user groups so that tasks are
distributed among the users in the group. Task assignment can occur
in one of two ways:
Tasks are assigned to a group’s
task queue, and users in the group manually claim tasks from the
queue.
Tasks are automatically assigned randomly to users in the
group.
- Assign to process initiator:
- You can specify that tasks are assigned to the user who initiated
the process without specifying the actual user profile.
- Variable:
- (Assign Multiple Tasks operations only) Select a variable
that contains a User or Group value, or select a string value that
stores an identifier for a user or group.
- XPath expression:
- Use an XPath expression that evaluates to a value that represents
a user or group. XPath expressions are useful when the identification
of the participant is stored as process data. For example, a previous
task collects the identification in a form.
Reassigning tasks for out-of-office usersTasks can be automatically
reassigned if the task is assigned to a user who is out of the office.
Reassigning tasks prevents delays in the progression of the process.
Tasks
are reassigned according to the Out Of Office settings that the
user configured in Workspace. For example, the mortgage loan application
that a bank uses requires loan approvals to occur in two days. A
bank employee is on vacation and has configured the Out Of Office
settings so that new tasks are reassigned to a colleague. When a
task in the process is assigned to the employee who is on vacation,
the task is automatically reassigned to the colleague.
Important: You may not want to reassign tasks if they
display confidential information to the user.
Assign tasks for Assign Task operations:On the process
diagram, select the Assign Task operation.
In the Process Properties view, expand the Initial User Selection
property group.
Specify the user:
To select a user, select
Assign To Specific User and then click Browse to search for the
user. (See Select a specific user).
To select the process initiator, select Assign To Process
Initiator.
To specify a user from a group, select Assign To Group. Specify
how tasks are assigned to users in the group, and then click Browse
to search for the group. (See Select a specific group.)
To use an XPath expression, select XPath Expression and then
click the ellipsis button  to
open XPath Builder. (See Use an XPath expression or variable to specify users.) to
open XPath Builder. (See Use an XPath expression or variable to specify users.)
To forward tasks according to users’ Workspace out-of-office
settings, select Allow Out Of Office Designation.
Note: Tasks are forwarded only if the user’s out-of-office
settings indicate to do so.
Assign tasks for Assign Multiple Tasks operations:On
the process diagram, select the Assign Multiple Tasks operation.
In the Process Properties view, expand the Participants property
group.
To add an item to the list, click the plus button  . Select
the type of item to add to the list, and then specify the specific
item: . Select
the type of item to add to the list, and then specify the specific
item:
Repeat the previous step to add additional users or groups.
For each item in the Participants list, specify whether to
forward tasks according to users’ Workspace out-of-office settings:
For each group in the list, specify whether a task is assigned
to each member of the group:
Select a specific userSearch for the user to assign
tasks that Assign Task or Assign Multiple Tasks operations generate.
The following procedure describes how to use the Select User dialog
box that appears when you are assigning tasks to specific users.
For information about how to open the Select User dialog box, see Assigning tasks to users.
Search for a user:In the Select User dialog box, specify
how to search for the user:
To search by name, select
User Name.
To search by the user’s email address, select Email.
In the box, type all or part of the user name or email address
and click Find.
 Type no characters in the
box and click Find to retrieve a list of all users. In the Results pane, select a user, and then click OK.
Select a specific groupSearch for the user group to assign tasks
that Assign Task or Assign Multiple Tasks operations generate. The
following procedure describes how to use the Select Group dialog
box that opens when you are assigning tasks to specific groups.
For information about how to open the Select Group dialog box, see Assigning tasks to users.)
Groups are defined by using User Management in Administration
Console or the LDAP server defines them.
Search for a group:In the Select Group dialog box, specify
how to search for the group:
To search by name, select
Group Name.
To search by the group’s email address, select Email.
In the box, type all or part of the group name or email address
and click Find.
Type no characters in the
box and click Find to retrieve a list of all groups. In the Results pane, select a group, and then click OK.
Select a user listBrowse for a user list to assign tasks that Assign Multiple
Tasks operations generate. The following procedure describes how
to use the Select User List dialog box that opens when you are assigning
tasks to a user list. For information about how to open the Select
User List dialog box, see Assigning tasks to users.
Browse for a user listIn the Select User List dialog
box, click the ellipsis button to open a user list selection dialog
box.
In the application tree, locate the user list to use to assign
tasks.
Click the user list and click OK.
For information
about creating a user list, see Creating and changing user lists.
Use an XPath expression or variable to specify usersYou can use XPath expressions
to identify users and groups that are assigned the tasks that Assign
Task and Assign Multiple Tasks operations generate. (See Assigning tasks to users.) For Assign Multiple Tasks operations, you
can also use variables. XPath expressions or variables are useful
when the identification of the next participant is captured during
the process.
The value obtained from the XPath expression or variable must
be the identification of a user or group. If the identity of the
user or group is not valid, an error occurs. The following information
can be used to identify a user:
Global unique identifier (GUID) of the user account,
such as 9A7AD945-CA53-11D1-BBD0-0080C76670C0
Login name of the user, such as atanaka
Canonical name of the user, such as atanaka.sampleorganization.com
Email address, such as atanaka@sampleorganization.com
Common name, such as Akira Tanaka
The value that represents the user. See User for
more information.
Note: Use the common name or email addresses only
if you are certain that they are unique.
The following information can be used to identify a group:
The GUID of the group, such as C76670C0-CA53-11D1-9A7AD945BBD0-0080
The canonical name of the group, such as tanakareports.sampleorganization.com
The email address, such as tanakareports@sampleorganization.com
The common name, such as TanakaReports
The value that represents the group. See Group for
more information.
GUIDs are unique across all domains. Canonical names are guaranteed
to be unique to a single domain only.
You can obtain User and Group values by using
the User Manager Lookup service. (See User Lookup.)Creating and changing user listsCreate a user list to use for configuring task assignment
for Assign Multiple Tasks operations. User lists are saved as application
assets. You can edit or remove user lists any time after you create
them. If you delete a user list, it is removed from the properties
of any operations that refer to the list.
The New User List wizard steps you through the process of creating
a user list. The wizard lets you specify the name and location of
the user list, and the members of the list. After the user list
is created, you can change which users are in the list.
Start the New User List Wizard: Click File > New
> User List. You can also right-click an
application version and click New > User List. Change a user list: In the Applications view, right-click
the user list and click Open. Ensure that
you have the user list checked out. User list general propertiesThe following user list properties are configured by using
the New User List wizard:
- Name:
- The name of the user list.
- Description:
- (Optional) A description of the user list that informs developers what
the user list is used for.
- Location:
- The location to store the user list. Use one of the following
methods to specify the location:
Click New Folder
to create a folder to store the user list.
User list population propertiesYou can configure the following user list properties by
using the New User List wizard or when the user list is opened in
Workbench:
- User List Population Options:
- Select an option to indicate how to specify the members of
the user list:
Select the users and groups to include
in the user list to add the members manually. You can search for
users and groups and add them to the list.
Select use a process to populate the user list to run a process
that selects the members.
The option that you select
determines which properties appear.
Select the users and groups to include in the user list:Select Users to add a user, or select Groups to add a group.
In the Name box, type part or all of the user or group name
to search for, and then click Search.
The
search returns all users or groups when no name is entered. In the list, select the user or group to add.
If you are adding a user, to forward the task based on the
user’s Workspace out of office settings, select Allow Out Of Office
Designation.
If you are adding a group, specify how tasks are assigned
to the group:
To create one task and add it to the
group’s To Do list in Workspace, select Assign To Group Queue.
To create a task for each member of the group, select Assign
To Every User In The Group.
Click Add to add the user or group to the user list.
Repeat this procedure for every user or group that you want
to add.
Use a process to populate the user list: Specify the
location of the process by using one of the following methods:
The
process that you select must return a list value that contains the
following data types (the list members must be the same data type):
If
a process for populating user lists is not yet created, click New
Process. Workbench creates a minimal process that you can use to
configure the user list properties. You can develop the process
later.
Configuring the presentation of task dataFor each Assign Task and Assign Multiple Task operation
that you add to the process diagram, identify the information that
is presented to the user. You can present an asset or a document
that is stored in a document variable.
Asset and dataWhen the Assign Task or Assign Multiple Task
operation executes, the asset and data are sent to the assigned
user. Specify which action profile of the asset to use. The prepare
data, render, and submit processes of the action profile can require the
following configuration:
DocumentAny
document can be presented to the user if it is stored in the process
data model as a document value. The user must have the client software
required to open the document. Some applications require that the
document opens in a new window.
Presenting
PDF documents is useful when you need to preserve a digital signature
that is on the document. If you use a document variable,
you cannot specify data to merge with the document.
PDF assets with no submit buttonsConfigure tasks so that
Workspace provides submit buttons when all of the following circumstances
are true:
The task asset is a flat PDF document or
a PDF form that does not include a submit button.
Users open tasks using Adobe Reader version 9.1 or later,
or Acrobat Professional and Acrobat Standard.
Under
these circumstances, configure the Submit Via Reader property of
Assign Task and Assign Multiple Tasks operations.
Use an asset and data:Select the Assign Task operation
or Assign Multiple Tasks operation on the process diagram.
In the Process Properties view, expand the Presentation &
Data Settings property group.
Select Use An Application Asset, click the ellipsis button,
and select the asset.
In the Action Profile menu, select the action profile to
use for the asset.
If the processes of the action profile
that you select require input values, corresponding properties appear
at the bottom of the Application Asset area.
(Optional) In the Variable menu of the Initial Task Data
area, specify the process variable that contains data to populate
the asset.
If you require Workspace to provide the submit button for
the asset, select Submit Via Reader.
If you selected Submit Via Reader, in the list, select the
type of data that you want to be submitted. The properties of the
asset determine the available types. (See About captured data.)
If the action profile that you selected in step 4 includes
a prepare data process, specify when the process runs:
The User Opens The Task: When the user opens the task
from their To Do list
The User Opens A Draft Task: When the user opens a
draft task that they previously saved
The User Opens A Completed Task: When the user opens
a task from their task history
If the processes of the action profile require input values,
configure the remaining properties.
Use a document variable:Select the Assign Task operation
or Assign Multiple Tasks operation on the process diagram.
In the Process Properties view, expand the Presentation and
Data Settings property group.
Select Use A Document Variable and then select the variable
from the list.
If the document is a PDF document that Adobe Reader users
will submit, select Submit Via Reader.
If you selected Submit Via Reader, in the list, select the
type of data that you want to be submitted.
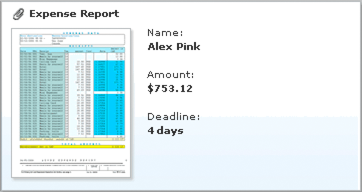
Providing task instructionsProvide
instructions to include with tasks so that users know what to do.
The text you provide appears on the process cards that appear
in Workspace. Effective instructions can be created by expressing
task instructions using a template value. You can also use HTML
code to format the text. For example, the following text is a template
value for the task instructions:
Name:<br><b>{$/process_data/@name$}</b></p>
Amount: <br><b>{$/process_data/@total$}</b></p>
Deadline:<br><b>{$/process_data/@deadlineDays$}</b></p>
The following task card in Workspace shows the resulting task
instructions.
For more examples of effective layouts for task instructions,
see Best practices for Workspace.
You can provide task instructions as a literal or template value,
or you can specify a variable or XPath expression.
Provide task instructions:Select the Assign Task or Assign
Multiple Tasks operation on the process diagram.
In the Process Properties view, expand the Task Instructions
property group.
In the Task Instructions box, specify the text to use for
the instructions.
You can also specify a variable
that contains the text, or an XPath expression that evaluates to
the text.
Providing actions for submitting tasksYou can specify actions
that users can select when they submit tasks. The actions you specify
appear instead of the default Complete action. For example, the actions
Approve and Deny can appear as buttons in Workspace.
The type of asset that is being used determines how actions appear
in Workspace:
If a Guide or PDF form is used, each action appears as
a button. Clicking a button selects the option and completes the
task.
If an HTML form is used, each action appears in a list next
to the submit button on the form itself rather than in Workspace.
The user can select an item in the list before clicking the submit
button.
Note: The form may require the Process Fields object
to display the action options. (See “Preparing form designs for
LiveCycle Process Management” in Designer Help.)
The name of the action that the user selects is included in the
submitted task data. The selected action can be accessed by using
XPath expressions later in the process if necessary. However, XPath
expressions are not necessary for selecting the route to follow
after the Assign Task or Assign Multiple Tasks operations.
Add a user actionSelect the Assign Task or Assign Multiple Tasks
operation on the process diagram.
In the Process Properties view, expand the User Actions property
group.
Click the Add A User Action button  . .
In the Action Name box, type the name of the action as you
want it to appear to the user.
Note: To
express the value of the User Action Name property as a variable,
the variable must be a list of string values.
Adding destinations for Assign Task operation actionsWhen you add user actions to Assign Task operations, you
can associate each action with a subsequent operation. When the
action is selected at run time, the route to the associated action
is followed.
Note: Any conditions on the route are ignored.
If no operation is associated with the selected user action,
the Route Evaluation properties of the operation and route conditions
determine the next operation to execute.
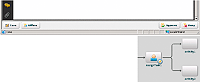
For example, the following illustration shows the Approve and
Deny actions. When the user clicks Approve, the route to activity1
is followed. When the user clicks Deny, the route to activity2 is
followed.
Before you add destinations, draw a route to the desired destination.
Specify a destination for an Assign Task operation:Select
the Assign Task operation on the process diagram.
In the Process Properties view, expand the User Actions property
group.
Select the action and click the Modify A User Action button  . .
To add a user action, click the Add A User Action
button . From the Destination list, select next operation to execute
when the user action is clicked, and then click OK.
Note: To express the value of the User Action Name property
as a variable, the variable must be a list of string values.
If you use a variable, you cannot associate user actions with routes.
Adding completion policies to Assign Multiple Tasks operationsCreate completion policies to complete Assign Multiple
Tasks operations before all reviewers have submitted their task.
Typically, the number of times a certain user action is clicked
determines the outcome of the review. Often, decisions can be made
before all reviewers submit feedback. For example, a majority vote
only requires higher than 50% of reviewers’ approval.
The completion policy is Complete this step when more than 50 % pick the Approve action.
Each time a user clicks an action to submit a task, completion
policies are evaluated.
The Assign Multiple Tasks operation tracks the number of times
each user action is selected at run time. Policies use this information
to determine when the operation completes, thus terminating the
review. Policies contain the following information:
The name of the action to which the policy applies
A threshold, which is either a percentage or number of users
that select the action
An operator for the threshold, which can be either at least, exactly,
or more than.
For example, the following policy completes the operation when
more than 50% of reviewers select the Approve action:
Complete this step when more than 50 % pick the Approve action
The action is Approve, the threshold is "50%" and the operator
is "more than".
Specify the next operationPolicies can optionally specify the
next operation to execute when the Assign Multiple Policies operation
is complete. These policies are in the following format:
Go to operation_name when operatorthreshold pick the action_name action
The
following policy completes the operation and executes the execute1 operation
when more than 50% of the reviewers select the Approve action:
Go to execute1 when more than 50 % pick the Approve action
Use route evaluation propertiesWhen policies do not specify
the next operation to execute, the route evaluation properties of
the operation and route conditions determine the next operation. These
policies are in the following format:
Complete this step when operatorthreshold pick the action_name action
The
following policy completes the operation when 50% of the users select
the Approve action but does not determine the next operation to
execute:
Complete this step when more than 50 % pick the Approve action
Use the "exactly" operator carefullyUsing the "exactly" operator
in a completion policy is risky when the threshold is based on a
percentage. Depending on the number of reviewers, an exact percentage
can be impossible to achieve. For example, a review that includes nine
people cannot result in exactly half of the tasks having the same
action clicked.
Use the "at least" operator to include an
exact percentage in the completion policy. The following example
policy causes the operation to complete when exactly 60% or more
of all reviewers click the Reject action:
Complete this step when at least 50 % pick the Reject action
Ensure early completionCreate multiple completion policies to
ensure that reviews are completed as soon as possible. When you
create multiple completion policies, the Assign Multiple Tasks operation
completes when either of the policies is true.
For example,
a reviewed document is accepted when at least 50% of reviewers click
the Approve action:
Go to publishDocument when at least 50 % pick the Accept action
The
result of this rule is that the document is rejected when more than
50% of reviewers click the Reject action. However, when more than
50% of the reviewers click Reject, the preceding completion policy
cannot be attained. The review completes only after all reviewers
submit their feedback.
To ensure that the review is complete
as soon as possible, a second policy is created:
Go to rejectDocument when more than 50 % pick the Reject action
The
number of completion policies that you require depends on your review
and the policies of your organization.
Before
you create completion policies, add all user actions and draw routes
to all of the next possible operations. Creating completion policiesSelect the Assign Muliple Task operation on the
process diagram.
In the Process Properties view, expand the User Actions property
group.
Select Use Completion Policies.
Click the Add A Completion Policy button .
Note: In
order to add a completion policy you must have first have a user
action set up. See Add a user action for more information.
In the dialog box, specify how the next operation to execute
is determined:
To specify the operation in the policy,
select Go To A Specific Next Step.
To use the route evaluation properties, select Use Routing
Evaluation Order And Route Conditions To Determine Next Step.
Click the text to change the values:
If Go
To A Specific Next Step is selected, click <some destination>
and select the next operation.
To change the operator, click More Than and select the operator.
To specify the threshold, click <some value> and type
a number. To change the threshold from a percentage to a count of
users, click % and select User(s).
To specify the action that this policy is associated with,
click <some action name> and select the user action.
Click OK.
Saving task dataYou can save the data that is sent to the LiveCycle Server
when the user submits the form or Guide to complete their task.
Saving the data is necessary if you want to use the data later in
the process.
Note: If you save task data in a variable that already
stores data, the existing data is replaced.
For Assign Task operations, task data is returned as a Task Result
value. These values include information about the task, such as
which user action was selected, the user who completed the task,
task attachments, and user comments (if the Approval Container features
are used in Workspace). The field data from the form or Guide is
also included. You can optionally store the field data separately
in a document or XML variable, so that it is easy to pass to subsequent
Assign Task or Assign Multiple Tasks operations.
Because Assign Task operations create a single task, save the
submitted task data in a Task Result variable. Assign Multiple Tasks
operations create several tasks. Therefore, the Task Result value
from each task is saved in a special collection called Task Result Collection.
Each Task Result value is appended to the Task Result Collection
value. You can also append the output of an Assign Task operation
to a Task Result Collection value.
Task Result Collection and the Workspace approval containerThe
Workspace approval container displays information that is stored
in the Task Result Collection that is used to store task results.
Any comments and user action information that is stored in the Task
Result Collection is displayed in the approval container.
For
example, a process includes an Assign Multiple Tasks operation,
followed by an Assign Task operation:
The Assign Multiple Tasks
operation creates tasks for several users so that they can review
a document. As users complete their tasks, the results are stored
in the Task Results Collection. When stored, they are immediately
available to the Workspace approval container. Users can open their
task in Workspace to see which actions were clicked for completed
tasks.
The Assign Task operation executes when the Assign
Multiple Tasks operation is complete. When the user opens their
task, they too can see which actions were clicked for the tasks
of the Assign Multiple Tasks operation.
Save task data for Assign Task operations:Select the
Assign Task operation on the process diagram.
In the Process Properties view, expand the Output property
group.
In the Task Result box, specify the variable or location
in the process data model to store the Task Result value.
Note: If you save task data in a Task Result variable
that already stores data, the existing data is replaced.
To store field data separately, in the Output Data box, specify
the document or XML variable to store the field data.
Note: If you save task data in a variable that already
stores data, the existing data is replaced.
Specify whether to store the task data in a Task Result Collection
variable:
In the Variable list, select the Task Result
Collection variable.
To save field data in the collection, select Include Captured
Data.
To save attachments in the collection, select Include Attachments.
Note: Task data is appended to the Task Result Collection.
No existing data is overwritten.
Save task data for Assign Multiple Tasks operations:Select the Assign Multiple Tasks operation on the process
diagram.
In the Process Properties view, expand the Output property
group.
In the Variable list, select the Task Result Collection variable.
To save field data in the collection, select Include Captured
Data.
To save attachments in the collection, select Include Attachments.
|
|
|