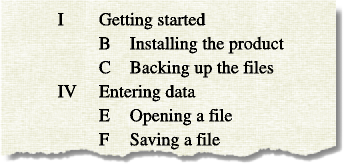
Counters in autonumber formats
A counter consists of angle brackets (< >) that surround a display style and an increment value. The Custom Autonumbering feature supports the Unicode text encoding standard.
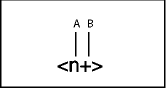
A. Display style B. Increment value
To indicate the display style, use a counter with one of the following letters.
|
For this numbering style |
Use |
|---|---|
|
Numeric (1, 2, 3, …) |
n |
|
Lowercase Roman (i, ii, iii, iv, …) |
r |
|
Uppercase Roman (I, II, III, IV, …) |
R |
|
Lowercase alphabetic (a, b, c, …, aa) |
a |
|
Uppercase alphabetic (A, B, C, …, AA) |
A |
To indicate how an autonumber is incremented, use a counter with an increment value, as shown in the following examples.
|
To |
Use |
|---|---|
|
Keep the value the same |
<n> |
|
Set the value to 1 or to any other number you enter after the equal sign |
<n=1> |
|
Increase the value of the counter by 1 |
<n+> |
|
Keep the value the same but not display it |
< > |
|
Reset to zero (or any other number) but not display it |
< =0> |
By default, each counter is initially set to zero. The counter can maintain its current value, be incremented by 1, or be reset to a different value. For example, use <n=1> in the format that resets numbering to 1 at the beginning of a new set of numbered steps.
To keep the value the same but not display it, place a blank space between the angle brackets. If you leave out the blank space, the angle brackets appear as part of the autonumber format.