Change paragraph alignment
The alignment property of a paragraph determines how the paragraph is positioned between the left and right indents, not between the edges of the text column.
Do one of the following:
To use the ruler, drag the indent symbol to a new location on the ruler.
Figure 1. A. First indent B. Left indent C.Right indent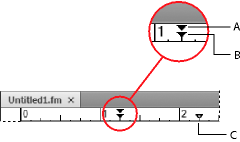
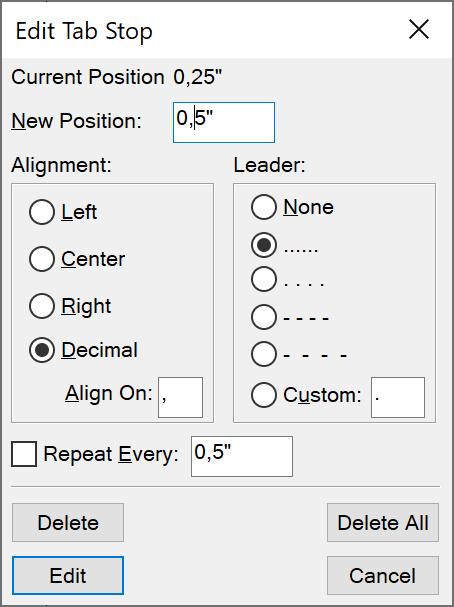
To use an indent value, display the Basic properties of the Paragraph Designer. Enter the indents you want in the First, Left, and Right boxes, and then click Apply.
Choose an alignment from the Alignment drop-down list on the formatting bar or in the Basic properties of the Paragraph Designer.
Note: If you use Shift+Enter or Shift+Return to insert a forced return within
a fully justified paragraph, the line that ends with the forced
return is not justified.
Tip: To align an indent with a ruler marking, turn
on the snap grid (use ).
When you drag an indent symbol, it snaps to locations corresponding
to the snap grid.