Reorder, rotate, or delete custom master pages
Reorder custom master pages
When you reorder custom master pages, the Right and Left master pages always remain at the beginning.
1)Open a master page, and then choose Format > Page Layout > Reorder Custom Master Pages.
2)Select a master page in the Custom Master Pages list, and click Move Up or Move Down to move the page accordingly.
3)Click Set. If you were previously viewing a custom master page, note that a different master page may now be visible.
Rotate a master page
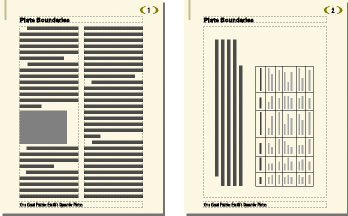
You can create a custom master page that changes the orientation of a body page. For example, you can create a rotated orientation for a body page with a wide table.
Right page uses a rotated master page.

1)On a new master page, set up any text frames and background text and graphics that you want to have the same orientation (unrotated) as headers and footers on the other master pages.
2)Choose one of the Format > Customize Layout > Rotate Page commands. When FrameMaker rotates the page, part of the page will probably be out of view. You can adjust the window size to see as much of the page as possible.
3)Create the text frames, background text, and background graphics that you want to display rotated.
tip: You can type in rotated text frames, or you can unrotate the page to make typing faster. To unrotate a page, choose Format > Customize Layout > Unrotate Page. When you’re finished, you can rotate the page again.
Creating and modifying background text frames
Rename or delete a custom master page
1)Display the master page, and choose Special > Delete Page.
note: You cannot rename the master pages named Left and Right, and you cannot delete the left or right master page or any master page currently assigned to a body page.