Indentation, alignment, and spacing
Change paragraph alignment
The alignment property of a paragraph determines how the paragraph is positioned between the left and right indents, not between the edges of the text column.
1)Do one of the following:
•To use the ruler, drag the indent symbol to a new location on the ruler.
A. First indent B. Left indent C.Right indent
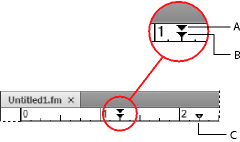
tip: To align an indent with a ruler marking, turn on the snap grid (use Graphics > Snap). When you drag an indent symbol, it snaps to locations corresponding to the snap grid.
•To use an indent value, display the Basic properties of the Paragraph Designer. Enter the indents you want in the First, Left, and Right boxes, and then click Apply To Selection.
•Choose an alignment from the Alignment pop-up menu on the formatting bar or in the Basic properties of the Paragraph Designer.
note: If you use Shift+Enter or Shift+Return to insert a forced return within a fully justified paragraph, the line that ends with the forced return is not justified.
Change tab stops
If you press Tab and the insertion point doesn’t move, a tab stop hasn’t been defined.
You can choose from four types of tab stops—left, center, right, and decimal.
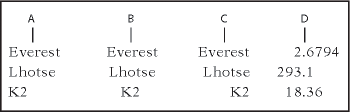
A. Left tab stop B. Center tab stop C. Right tab stop D. Decimal tab stop
You can also specify a pattern of characters—a leader—to fill the space between a tab and the character following it. Typically, a leader is a series of periods. Tab leaders are useful in tables of contents that have a wide gap between columns.
Change tabs in formatting bar
1)Display the Paragraph Format toolbar. Only the tab stops common to all the selected paragraphs appear on the top ruler.
2)Do one of the following:
•To add a tab stop, click a tab stop symbol from Paragraph Format toolbar and click the desired position below the top ruler.
•To move a tab stop, drag it to a new position.
tip: To align tab stops with ruler markings, turn on the snap grid (Graphics > Snap). When you drag a tab symbol, it snaps to locations corresponding to the snap grid.
•To add multiple tab stops at regular intervals, on the top ruler, double-click the existing tab stop that you want to duplicate. Enter the interval between tabs in the Repeat Every box and click Edit.
•To change a tab stop, double-click it, enter a new tab position in the New Position box, and choose a different alignment. The position is the distance from the left edge of the column to the tab stop. Then click Edit. You can also drag a new tab stop on top of an existing one on the ruler to replace it.
•To delete a tab stop, drag it off the bottom of the top ruler.
•To delete all tab stops, double-click a tab stop and click Delete All.
Change tabs in Paragraph Designer
1)Display the Basic properties of the Paragraph Designer.
2)In the Tab Stops area, create, edit, or delete, choosing the appropriate settings.
3)Click Apply To Selection.
Define a leader or decimal tab character
1)Double-click the tab stop on the ruler.
2)Do one of the following:
•In the Leader area of the dialog box, click one of the predefined tab leaders or enter your own custom leader, and then click Edit.
•To specify a decimal character—for example, a comma when you’re working with European decimals—enter the decimal character in the Align On box in the Alignment area and click Edit.
Change paragraph and character spacing
Vertical spacing is the space between paragraphs and lines. Horizontal spacing is the space between words and characters. Spacing properties go by different names in different contexts. The space between characters is often called pair kerning; adjusting the letter spacing in a line is spread or tracking; the line spacing of a paragraph— measured from the baseline of one line to the baseline of the next—includes its leading.
Adjust vertical spacing
When adjusting vertical spacing, keep in mind the following:
•If a paragraph falls at the top of a column, FrameMaker ignores the Space Above setting. If the paragraph falls at the bottom of a column, FrameMaker ignores the Space Below setting.
•When an anchored frame is positioned below the current line and its anchor symbol appears in the last line of a paragraph, the space below the paragraph usually appears between the frame and the next paragraph. If the frame is anchored in a straddle paragraph, the space below is discarded. If the frame is a straddle frame but is not anchored in a straddle paragraph, the space below appears between the anchor symbol and the frame.
•In a multicolumn layout, you can also adjust vertical spacing in columns by vertically justifying, or feathering, the text in them.
Several properties affect the vertical spacing of a paragraph: the space above the paragraph, the space below the paragraph, and the line spacing.
1)Display the Basic properties of the Paragraph Designer and do one of the following:
•Specify values for Space Above and Space Below. The space between paragraphs is determined by the Space Below setting of the first paragraph or the Space Above setting of the second paragraph, whichever is larger.
•Choose a type of line spacing from the Line Spacing pop-up menu, or enter a value in the box.
2)To allow extra space between lines to accommodate superscripts, subscripts, rubi text, and larger font sizes that appear in the paragraph, turn off Fixed.
3)Click Apply To Selection.
Adjust horizontal spacing
As FrameMaker fills a line of text, it adjusts the space between characters according to kerning and tracking properties. The spacing between words is based on the following values, which are stored as part of the paragraph format:
•The minimum spacing is the smallest space allowed between words.
•The maximum spacing is the largest space allowed between words before FrameMaker tries to hyphenate words or add space between letters in justified paragraphs.
•The optimum spacing is what FrameMaker tries to achieve.
These values are expressed as a percentage of the standard space character for the default font of a paragraph. Values below 100% create tighter word spacing with a more justified look; values above 100% create looser spacing, with a more ragged right edge.
1)To adjust the space between words, click a paragraph or select several paragraphs whose spacing you want to change.
2)Display the Advanced properties of the Paragraph Designer and specify the minimum, optimum, and maximum space to allow between words.
3)Click Apply To Selection.
note: Lines of text in a justified paragraph can have more than the maximum space between words if FrameMaker can’t fit a word on a line and can’t hyphenate it. To avoid this, add extra space between characters in justified text by choosing Allow Automatic Letter Spacing in the Word Spacing area.
4)To apply pair kerning or spread, in the Character Designer, choose Pair Kern option or fill in the Spread field.
Adjust spacing in Japanese documents
If your system supports the typing of Japanese text in documents and dialog boxes, you can adjust the following spacing properties:
•Special group of properties in the Paragraph Designer that controls some aspects of Japanese character spacing.
•Size, spacing, and alignment of rubi text throughout a document.
•Spacing of variable-width Japanese characters through selection of the Tsume font property.
Adjust the space around characters and punctuation
1)In the Paragraph Designer, display the Asian properties.
2)Do the following:
•To adjust the space between Japanese characters and Western ones, use the upper group of boxes; to adjust the space between Japanese characters, use the lower group of boxes. Enter minimum, maximum, and optimum percentages.
•To determine the space between characters and special punctuation characters (yakumono), choose from the Punctuation pop-up menu. Squeeze As Necessary means that space around punctuation is reduced only when special punctuation handling (kinsoku shori) occurs. Never Squeeze means that no space adjustment is made around punctuation. Always Squeeze means that space is always reduced around punctuation.
•To achieve a monospaced look in Japanese text, choose Never Squeeze from the Punctuation pop-up menu and turn off Tsume.
Adjust rubi text size, placement, and spacing
Rubi text is made up of small characters (usually kana) appearing above other text, called oyamoji. Your settings affect rubi text throughout a document.
1)In the Format > Document > Rubi Properties dialog box, choose a value from the Size pop-up menu or enter a value in the box. The value you enter can be a percentage of the point size of the underlying oyamoji, a point size, or any other unit of measurement, including Q units.
2)Do the following:
•To let rubi text overhang non-oyamoji text, click Let Rubi Overhang Surrounding Hiragana.
•To remove preceding or trailing space when rubi text appears at the start or end of a line, click Align All Characters At Line Boundaries.
3)Click an option in the Rubi Alignment For Japanese Oyamoji or the Rubi Alignment For Other Oyamoji area. The illustrations in the dialog box show how rubi text is spaced and aligned when it’s above Japanese or non-Japanese characters and when its length is less than or greater than the underlying text.
4)Click Set.