Configure PDF settings
You can customize PDF output settings such as bookmarks, page size, and named destinations in the PDF Setup dialog.
The PDF Setup dialog is opened when you choose File > Save As PDF.
However, to customize the PDF output without creating a PDF for the current document, choose Format > Document > PDF Setup.
In this dialog:
•In the Settings tab, Update general settings.
•In the Bookmarks tab, Customize PDF bookmarks.
•In the Tags tab, Tagged PDF output.
•In the Links tag, Add links from other documents.
Update general settings
In the Settings tab of the PDF Setup dialog, you customize settings such as page size and the options to open the generated PDF.
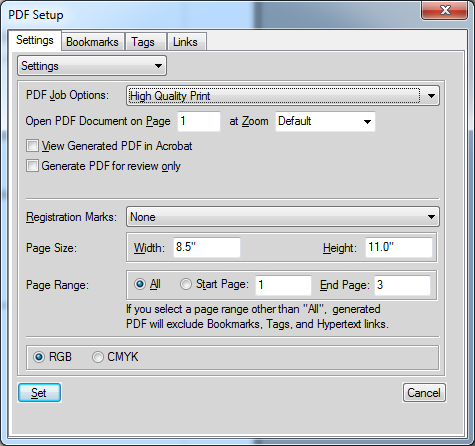
PDF Job Options
Choose from the available list depending on the required output. For example, for print output, choose High Quality Print. You can choose to keep the PDF file size minimum by selecting Smallest File Size.
note: If you are creating PDF output for a book, select the first file in the book.
Open PDF Document on Page
Choose to open the output PDF at a specific page location and with a defined zoom factor.
View Generated PDF in Acrobat
By default, the output PDF is opened in Adobe Reader. You can choose to open the PDF in Acrobat.
Registration Marks
To print a document with crop marks and registration marks, choose an option from the Registration Marks pop-up menu. In some instances, you may want to scale down the printed page image so that crop marks and registration marks fit on the page. You can choose between Western and Tombo (Japanese) crop marks.
Page Size
Specify the output page’s width and height.
Page Range
Specify to create PDF output for all the pages or a range of pages in the source.
note: If you select a PDF range, bookmarks, tags and hypertext links are excluded from the output.
RGB or CMYK
Select Convert CMYK Colors To RGB to convert CMYK colors to RGB when FrameMaker prints and creates PDF files.
By default, FrameMaker converts CMYK colors to RGB when it prints and creates PDF files. To convert CMYK colors to sRGB, CalRGB, or another type of RGB, set this option. Also set the values in the Acrobat Distiller PDF joboptions file. If you deselect this option, FrameMaker preserves CMYK colors.
note: The setting in the PDF joboptions file takes precedence over the option in the PDF Setup dialog box. So, if your documents still print RGB, correct the settings in the PDF joboptions file.
The CMYK route has a few advantages over the RGB route in that it also provides support for spot colors. The RGB route does not support bigger page sizes but this is not a limitation in the CMYK route.
Customize PDF bookmarks
You can customize the way PDF Bookmarks are generated in the PDF output of a FrameMaker document or book.
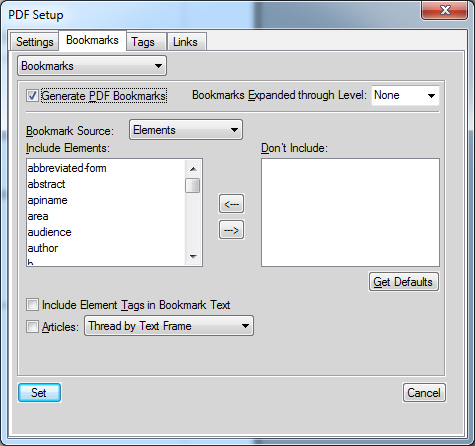
Generate PDF Bookmarks
Choose to generate bookmarks in the output PDF.
Bookmarks Expanded through Level
Specify the level to which the bookmarks are expanded when the PDF is opened.
Choose Default to open the PDF with the bookmarks expanded using the default setting of the PDF reader.
Choose None to open the PDF with all bookmarks collapsed.
Choose All to open the PDF with all bookmarks expanded.
You can also enter a number to open the PDF with bookmarks expanded to the specific level.
Bookmark source
Choose paragraphs for FrameMaker documents and Elements for Structured FrameMaker documents.
Bookmark Level
Use the double-arrow buttons below the Include Paragraphs list to increase or decrease the indentation of the bookmarks.
Include Paragraph or Elements in Bookmark Text
Move paragraphs or elements between the Include and Don’t Include list to specify the paragraphs or elements to include in the bookmarks.
To move all paragraphs or elements from one list to the other, press the Shift key and click the arrow.
Articles
Set up article threading:
Thread by Text Frame: To have the reading order of each article follow the same order that the insertion point moves, select Articles and choose Thread by Column from the pop-up menu. This setting is usually the most appropriate in multicolumn formats.
Thread by Column: For a reading order of text frame to text frame, select Articles and choose Thread by Text Frame from the pop-up menu. This setting is usually the most appropriate in single-column formats.
Tagged PDF output
The tagged PDF feature creates PDF files from FrameMaker with logical document structure and extensive metadata for repurposing content. Logical structure refers to the organization of the document, such as the title page, chapters, sections, and subsections.
Tagged PDF provides the following capabilities:
•Ensures that information is in the correct reading order on a page
•Includes paragraph attributes used to correctly re-flow the document contents into different-sized devices, such as eBook reading devices
•Ensures the reliable translation of text into Unicode. This approach recognizes ligatures and hyphens, so that a Windows screen reader can correctly read all characters and words
•Recognizes alternative text descriptions for graphics in anchored frames
•Enables the document to be exported more reliably to Rich Text Format (RTF) and XML from Acrobat 7.0 for reuse in other documents�
Tagged Adobe PDF files include author content, such as pages, articles, paragraphs, tables, and graphics in anchored frames.
Tagged PDF files do not include the following information found in standard PDF files:
•Comments, such as online notes, graphic markups, and text markups
•Pagination artifacts, including all content that comes from master pages (such as page numbers and running headers), and any graphic objects outside anchored frames
•Layout and typographic artifacts, such as colored bars between columns of text, horizontal lines separating footnotes from text, and table borders
•Printing artifacts, such as crop marks, registration marks, and page information printed outside the crop marks
Create a tagged PDF
In the PDF Setup dialog, go to the Tags tab:
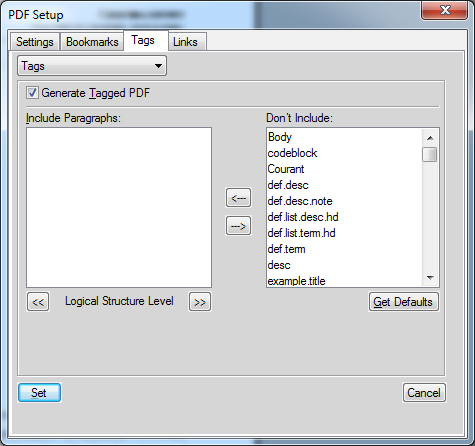
Generate Tagged PDF
Check this option to generate a tagged PDF.
Include Paragraphs
To indicate the paragraphs to include in the PDF structure, move paragraph tags between scroll lists. The paragraphs in the Include Paragraphs scroll list are used to define the structural relationship between FrameMaker paragraph tags in the PDF file. To move a tag between scroll lists, select the tag and click an arrow or double-click the tag.
Logical Structure Level
To change structure levels for the included paragraphs, select a paragraph tag and click a Logical Structure Level arrow. To change the level of all items by one level, Shift-click a Logical Structure Level arrow. If the indent for a tag exceeds six levels, n> precedes the paragraph tag, where n is the indentation level of the paragraph tag.
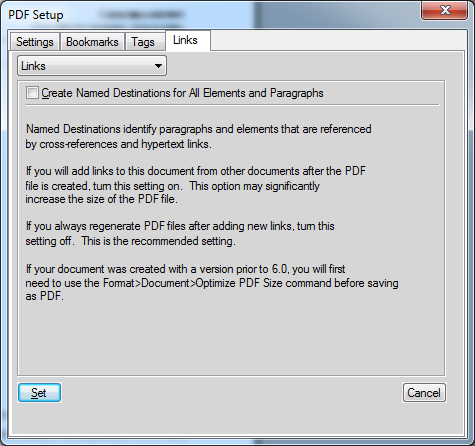
Add links from other documents
You can add a named destination in a PDF in FrameMaker to ensure that external resources can link directly to specific elements or paragraphs within the PDF.
Say, you create PDF from a FrameMaker document and you link from one to the other document. By default, if you to add a link from another document to the target, you will need to re-create both the PDFs from FrameMaker. However, if you create the target PDF to include named destinations, you do not need to re-create the target PDF every time you create a new link to the target.
Import PDF Settings
If you have customized the PDF settings for a document, you can import these settings into one or more documents.
1)Open the source document with the preferred PDF output settings.
2)Open the document or book into which you want to import the preferred settings.
If you are importing the settings into:
•A single document, ensure the document is currently active.
•All documents in a book, ensure the book is selected in the Resource Manager.
•Some of the documents in a book, ensure the documents are selected in the Resource Manager.
3)Choose File > Import > Formats.
The Import Formats dialog is displayed.
4)In the Import Formats dialog, click Deselect All and check Document Properties.
5)To import the formats into the selected documents or book, click Import.