Configure and manage Adobe Connect meetings

You configure and manage meeting settings using the Settings
dialog box (Add-in menu > Change Settings).
Change server information
This option is not available if your administrator specified
one server for the add-in.
-
In the Add-in menu, select Change Settings.
-
Click Edit next to the server name.
-
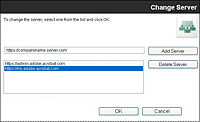
In the Change Server dialog box, do any of the following
tasks:
-
To use an existing server, select the server
and click OK. This server appears in the Server text box in the
Settings dialog box.
-
(If available) To add a new server, type the FQDN (
fully
qualified domain name
) in the text box and click Add Server.
The
FQDN
, sometimes called an absolute domain name,
is the full domain name of the server hosting the Adobe Connect
server application. This server appears in the list of available
servers.
-
To delete a server, select it and click Delete Server.
Set the default meeting room
Before you change the default meeting room, make sure that
you have defined the Adobe Connect server in the Settings dialog
box. The server retrieves a list of rooms associated with your user
account.
-
In the Add-in menu, select Change Settings.
-
Click Edit next to the default room name.
-
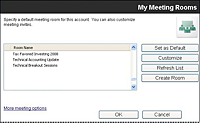
In the My Meeting Rooms dialog box, select a room from the
list and click Set As Default.
Note:
Brackets (>>) mark
the current default meeting room in Lotus Notes 8.5 or later.
Note:
You
can also specify a new meeting as the default when you create it.
-
To specify additional meeting information, click More Meeting
Options. This option opens the Meeting List in Adobe Connect, where
you can select your meeting and change meeting information. For
more information, see Adobe Connect Help.
Customize the meeting room details
All Adobe Connect rooms use a predefined template with
settings for the room URL, audio conferencing details (if applicable),
and more. You can use the predefined settings, or customize these
settings for any room. For example, you can add account details
for an audio conferencing provider so that all necessary integration
details are available when you schedule meetings. Multiple rooms can
have different customized settings for the invitation.
-
In the My Meeting Rooms dialog box, select a room and
click Customize.
-
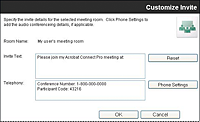
Do any of the following:
-
To add invitation
details, type the text and add the URL of the Adobe Connect meeting
room.
-
To add audio conferencing (telephony) details, click Phone
Settings. This option automatically appends any telephony information
retrieved from the Adobe Connect server into the text box, after
the current entry.
Update the list of meeting rooms
You can synchronize the meeting rooms associated with a
user account on a particular server. Meeting rooms are maintained
on the Adobe Connect server, and on your computer for offline work.
You can synchronize your local list of meeting rooms with the rooms
on the server.
 In the My Meeting Rooms dialog box, click Refresh List.
If the currently assigned default meeting room exists on the
server, it remains as the default. Otherwise, the topmost room in
the list is automatically selected as the default. You can select
a new default room from the list, or create a meeting room and set
it as the default.
|
|