|

Event
types are thrown to provide notifications about the occurrence of
the event. Service operations can throw exception events that indicate
that an error has occurred during execution of the operation. You
cannot explicitly throw a service exception or exception event types.
Many services provide asynchronous events that you throw in short-lived
and long-lived processes. When you throw an event in a process,
you configure the event data and the event message data that is
provided in the event notification.
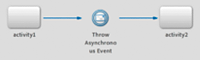
An event throw appears as an icon on the process diagram. Routes
can begin and terminate at an event throw similar to the way they
do for operations.
At run time, when the throw of an event type is routed to and
executed, the notification about the event is sent to all of the
receivers and catchers of that event type. After the event is thrown,
the process continues according to the routes that originate from
the event throw.
To configure event throws, you can specify the event data that
is provided to event receivers. For asynchronous event types, you
can also specify the event message data. For timer event types,
you can specify the timer data.
Add and configure asynchronous event throws* New for 9.5 *
You can add an
event throws to short-lived processes.
Note: You cannot throw exception event types.
Drag the Event Picker  from
the Activity Toolbar to an unused part of the process diagram. from
the Activity Toolbar to an unused part of the process diagram.
(Optional) In the Name box, type a new name to replace the
default name.
(Optional) To search for a specific event, replace the default
string in the Find box with a value.
Select an asynchronous event type and click OK.
In the Event Behavior Configuration dialog box, ensure that
the Event Throw is selected.
Add event data to send. (See Adding event data to send.)
(Optional) Send additional XML data from an XML variable
by completing the following steps:
In the Event Behavior
Configuration dialog box, click the ellipsis beside the Event Message
Data box.
In the Asynchronous Event Throw Configuration dialog box,
select the XML variable that stores the data and click OK.
Click OK.
Add and configure timer event throwsYou can configure timer event throws to provide timer data.
You can provide a specific date or duration.
Drag the Event Picker from
the Activity Toolbar to an unused part of the process diagram.
(Optional) In the Define Event dialog box, in the Name box,
type a new name to replace the default name.
(Optional) To search for a specific event, replace the default
string in the Find box with a value.
Select an event type from the Timer event category and click
OK.
Note: The Timer category appears only after you create and
deploy at least one custom timer event. LiveCycle does not provide
default system timer events. Custom timer events that are not deployed
are listed in the current application category. (See Creating custom
event types.)
In the Event Behavior Configuration dialog box, ensure that
the Event Throw is selected.
Add event data to send. (See Adding event data to send.)
Provide the date and time data by completing one of the following
steps:
To set the duration of the timer, select Set
Timer Event Duration enter the duration in the following fields.
Date: Use the time specified in the XPath expression
to a DateTime value.
Hours, Minutes, Second: Use the defined time from
the Hours, Minutes, and Seconds fields.
To set a specific date when the timer expires, select one
of the following values from the list:
LITERAL:
Click the ellipsis  button
beside the Date box, and in the Calendar Date Selector dialog box,
choose a date. Also, enter the Hour, Minute, and Seconds values
and click OK. button
beside the Date box, and in the Calendar Date Selector dialog box,
choose a date. Also, enter the Hour, Minute, and Seconds values
and click OK.
XPATH: Click the ellipsis button
beside, in the Timer Event Throw Configuration dialog box, build
an XPath expression to represent the date as a DateTime value.
|
|
|