Using
a shader as a filter is like using any of the other filters in ActionScript.
When you use a shader as a filter, the filtered image (a display
object or BitmapData object) is passed to the shader. The shader
uses the input image to create the filter output, which is usually
a modified version of the original image. If the filtered object
is a display object the shader’s output is displayed on the screen
in place of the filtered display object. If the filtered object
is a BitmapData object, the shader’s output becomes the content
of the BitmapData object whose
applyFilter()
method
is called.
To use a shader as a filter, you first create the Shader object
as described in
Loading or embedding a shader
. Next you create a ShaderFilter object
linked to the Shader object. The ShaderFilter object is the filter
that is applied to the filtered object. You apply it to an object
in the same way that you apply any filter. You pass it to the
filters
property
of a display object or you call the
applyFilter()
method
on a BitmapData object. For example, the following code creates
a ShaderFilter object and applies the filter to a display object
named
homeButton
.
var myFilter:ShaderFilter = new ShaderFilter(myShader);
homeButton.filters = [myFilter];
When you use a shader as a filter, the shader must be defined
with at least one input. As the example shows, you do not set the
input value in your code. Instead, the filtered display object or
BitmapData object is set as the input image. If you use a shader
that expects more than one input, you provide a value for any input beyond
the first one.
In some cases, a filter changes the dimensions of the original
image. For example, a typical drop shadow effect adds extra pixels
containing the shadow that’s added to the image. When you use a
shader that changes the image dimensions, set the
leftExtension
,
rightExtension
,
topExtension
,
and
bottomExtension
properties to indicate by how
much you want the image size to change.
The following example demonstrates using a shader as a filter.
The filter in this example inverts the red, green, and blue channel
values of an image. The result is the “negative” version of the
image.
Note:
The shader that this example uses is the invertRGB.pbk Pixel
Bender kernel that is included with the Pixel Bender Toolkit. You
can load the source code for the kernel from the Pixel Bender Toolkit
installation directory. Compile the source code and save the bytecode
file in the same directory as the source code.
The important ActionScript code is in these two methods:
-
init()
: The
init()
method
is called when the application loads. In this method the code loads
the shader bytecode file.
-
onLoadComplete()
: In the
onLoadComplete()
method
the code creates the Shader object named
shader
.
It then creates and draws the contents of an object named
target
.
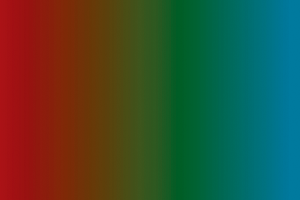
The
target
object is a rectangle filled with a
linear gradient color that is red on the left, yellow-green in the
middle, and light blue on the right. The unfiltered object looks
like this:
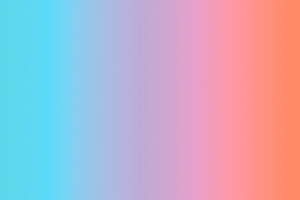
With
the filter applied the colors are inverted, making the rectangle
look like this:
The shader that this example uses is the “invertRGB.pbk” sample
Pixel Bender kernel that is included with the Pixel Bender Toolkit.
The source code is available in the file “invertRGB.pbk” in the
Pixel Bender Toolkit installation directory. Compile the source
code and save the bytecode file with the name “invertRGB.pbj” in
the same directory as your ActionScript source code.
The following is the ActionScript code for this example. Use
this class as the main application class for an ActionScript-only
project in Flash Builder, or as the document class for the FLA file
in Flash Professional:
package
{
    import flash.display.GradientType;
    import flash.display.Graphics;
    import flash.display.Shader;
    import flash.display.Shape;
    import flash.display.Sprite;
    import flash.filters.ShaderFilter;
    import flash.events.Event;
    import flash.geom.Matrix;
    import flash.net.URLLoader;
    import flash.net.URLLoaderDataFormat;
    import flash.net.URLRequest;

    public class InvertRGB extends Sprite
    {
        private var shader:Shader;
        private var loader:URLLoader;

        public function InvertRGB()
        {
            init();
        }

        private function init():void
        {
            loader = new URLLoader();
            loader.dataFormat = URLLoaderDataFormat.BINARY;
            loader.addEventListener(Event.COMPLETE, onLoadComplete);
            loader.load(new URLRequest("invertRGB.pbj"));
        }


        private function onLoadComplete(event:Event):void
        {
            shader = new Shader(loader.data);

            var target:Shape = new Shape();
            addChild(target);

            var g:Graphics = target.graphics;
            var c:Array = [0x990000, 0x445500, 0x007799];
            var a:Array = [255, 255, 255];
            var r:Array = [0, 127, 255];
            var m:Matrix = new Matrix();
            m.createGradientBox(w, h);
            g.beginGradientFill(GradientType.LINEAR, c, a, r, m);
            g.drawRect(10, 10, w, h);
            g.endFill();

            var invertFilter:ShaderFilter = new ShaderFilter(shader);
            target.filters = [invertFilter];
        }
    }
}
For more information on applying filters, see
Creating and applying filters
.